Friday, June 21, 2013

Farro, Kale & Smoked Mozzarella Salad

Last Year's Post: Easy and Elegant Summer Salad with Cheese, Fruit and Nuts

I was having a bad day a few weeks ago and stopped at the deli counter of my local grocer to pick up dinner (yes, even food bloggers do it).  They had a new farro salad that looked interesting so I tried it and really liked it - so much that I emailed them (ever so politely) and asked for the recipe.  They replied (ever so politely) that unfortunately they could not supply the recipe "because it was not scaled for consumer use".  Right.  Guess what - send me the big version and together with my calculator we can figure out the consumer version.  Actually, I didn't send them that reply (although I wanted to) because I knew it was pointless.  Grrrr.  Now aggravated, I decided to come up with my own version.  That would show them!  I printed out 4 or 5 different farro salad ideas before creating this one.  I like the mix of ingredients but of course you can always substitute your favorites.

The three most important ingredients are farro, kale and smoked mozzarella (you probably figured that out from the title, right?). Farro and kale may be new to you. Farro (fahr-oh) has become very popular lately in the United States, but it's an ancient grain believed to have once been consumed by the Roman legions and eaten in Italy ever since. Farro is not wheat, but a plant and grain all its own. A grain of farro looks and tastes somewhat like a lighter brown rice with a chewy (not soft) texture. It has a complex, nutty taste with undertones of oats and barley. Due to its chewy texture, farro is quite filling.  You can find farro in some upscale grocery stores or in natural food stores.  If you don't feel like trying farro, you could always substitute brown rice or barley.

cooked farro
Kale is a leafy green with more vitamins and antioxidants than even spinach, which explains why it's become so popular.  When raw, it's a tough and bitter green but when blanched for a brief period it becomes softer and the bitterness disappears. You strip the leaves off the tough stems, chop them up, boil the leaves for about a minute, then drain. The bright green color is attractive in salads and the health benefits are great.  If you don't want to try kale, substitute raw baby spinach instead.


In addition to farro and kale, the salad contains cherry tomatoes, cucumber, green onions, herbs and smoked mozzarella.
I found these cute little multi-colored cherry tomatoes at Trader Joe's


It's a healthy summer alternative to heavier foods and an opportunity to try new ingredients.  Of course you could serve it as a side salad to grilled meats and it also makes a great salad for a potluck picnic because it doesn't wilt, but we like to eat it on its own - there's plenty of fiber and protein to keep you satisfied.  It also makes a great lunch for work the next day.

printable recipe
Farro, Kale & Smoked Mozzarella Salad
Serves 6 to 8

Note:  to seed a cucumber, cut it in half lengthwise and use a small spoon to scoop out the seeds down its length.

For the dressing:
2 tablespoons red wine vinegar
¼ cup olive oil
1 tablespoon minced shallots
Salt and pepper

For the salad:
12 oz farro, rinsed
½ head kale, leaves stripped off steams and chopped into bite-sized pieces
6 oz smoked mozzarella, cubed
1 pint cherry tomatoes, halved
6 green onions, finely chopped
½ cucumber (or 1/3 English cucumber), unpeeled, seeded and chopped
½ cup chopped chives
¼ cup chopped fresh basil

 Place the red wine vinegar in a small bowl.  Gradually whisk in oil.  Add the shallots and salt and pepper, then set aside.

Place the farro in a large pot and cover with water by about 3 inches.  Set over high heat and bring to a boil.  Reduce the heat, cover, and simmer until the farro is tender, 15-18 minutes.  Drain, rinse, and drain again.  Set aside to cool.

Bring a large pot of water to a boil.  Add the kale pieces and boil 60-90 seconds until bright green.  Drain and immediately place the kale pieces in an ice water bath to stop the cooking process.  Drain thoroughly and pat dry.

Put the farro in a large bowl; add the kale, mozzarella, green onions, and cucumber and toss.  Add the dressing and toss again.  Just before serving, add the chives and fresh basil.  Taste and adjust salt and pepper as needed.

Serve room temperature or cold.


Friday, June 14, 2013

Lemony Chicken Saltimbocca

Last Year's Post: Hoisin Burgers with Wasabi Slaw

I enjoy cooking and trying new ingredients and techniques so much that I actually feel sort of cheated if we're having a dinner that we just pulled out of the freezer to reheat.  I mean, what fun is that?  Of course, it's fabulous if you've had a really bad day but hopefully you don't have too many of those.  On the other hand, it's not a good idea to plan a week of meals that all take hours to prepare.  You have to have a break sometime.  This recipe is the best of all worlds - beautiful presentation, delicious flavor, an interesting technique yet fast to make, and low in calories.  It's definitely company-worthy, but easy enough to make any day of the week.  Really, what's not to like?  Moist and juicy chicken, woodsy sage and salty prosciutto covered in a velvety lemon sauce.  Yum.  Saltimbocca (meaning to jump in the mouth) is an Italian dish traditionally made with veal, sage and prosciutto but I love this version, adapted from Cooking Light magazine, even more.

It looks fancy but it's actually very easy.  Start with chicken cutlets, which are just thinner versions of chicken breasts.  You can sometimes find them in the store but it's just as easy to make your own by slicing a boneless skinless chicken breast in half horizontally.


OK,  I didn't do the greatest job of cutting it into two equal-sized cutlets but I'm sure you can do better.  Then you artistically place three fresh sage leaves on each cutlet and wrap with a thin slice or two of prosciutto, partially covering the leaves but letting some stick out. (That was the technique part in case you were wondering.)


Before sauteing  the chicken, heat a pot of water and start cooking some angel hair pasta.  The chicken cutlets cook for just a few minutes because they're thin.


Make a quick pan sauce from lemon juice, chicken broth, and a little cornstarch to thicken, then toss the  pasta with a little garlic and olive oil and you're good to go.  The entire meal takes maybe 30 minutes to make and has only about 400 calories but it tastes like a million bucks.


printable recipe
Lemony Chicken Saltimbocca
Serves 4

For the chicken:
2 (8 oz) boneless skinless chicken breasts, cut in half horizontally to make 4 (4 oz) chicken cutlets
1/8 teaspoon salt
12 fresh sage leaves
2 oz very thinly sliced prosciutto, cut into 8 thin strips
4 teaspoons olive oil, divided
2/3 cup low-sodium chicken broth
½ cup fresh lemon juice
1 teaspoon cornstarch
lemon wedges for garnish, optional

For the pasta:
6 oz angel hair pasta
2 teaspoons olive oil
1 small garlic clove, minced


Bring a large pot of water to a boil and cook pasta according to directions.

Meanwhile, sprinkle the chicken evenly with salt.  Place 3 sage leaves on each cutlet; wrap 2 prosciutto slices around each cutlet, securing sage leaves in place.  Heat a large skillet over medium heat and add 1 tablespoon oil to pan, swirling to coat.  Add chicken to pan; cook for 2-3 minutes on each side or until done.  Remove chicken from pan and keep warm.

Combine broth, lemon juice and cornstarch in a small bowl while the chicken is cooking; stir with a whisk until smooth.  When chicken is removed from pan, add cornstarch mixture and the remaining 1 teaspoon olive oil to pan; bring to a boil stirring constantly.  Cook for 1 minute or until slightly thickened, stirring constantly with a whisk. 

Drain the pasta and toss with 2 teaspoons olive oil and garlic.  Serve the chicken with the sauce spooned over and pasta along side.  Garnish with lemon wedges, optional.


Friday, June 7, 2013

Lemon Polenta Cake

Last Year's Post: Grilled Shrimp Greek Salad

I specifically wanted to post this particular recipe this week because Father's Day and July 4th are both coming up soon, which often involve big family gatherings.  Four generations of The Lawyer's family get together for July 4th every year, and I thought this cake would make a great addition to the picnic because you can cut it into a lot of small pieces and it doesn't have frosting that would melt in the sun.   Then I remembered that several people in the family have serious issues with gluten.  By sheer luck, this cake is gluten free which made it all the more attractive and will make me appear more considerate than I actually am.  If you have a large gathering in your future and some of the people are trying to avoid gluten, this is a perfect choice.

The cake is Italian in origin, where cornmeal cakes are common.  The lemon glaze soaks into the cake, making it very moist at the same time the cornmeal gives it a slightly crunchy texture that's very appealing.  The lemon zest in the cake combines with the lemon glaze to give the cake an intense lemon flavor.  I made it in a square tart pan although any 9" round or square tart or springform pan with a removable bottom will work.  The cake is relatively flat but it does rise a little as it bakes so just be sure your pan isn't full to the brim before baking.  I was experimenting with my new pan and lucked out - it was darn close to spilling over and making a mess but it ended up just slightly drooping over one or two sides so it was easy to cut those off.  For a while when it was baking I was afraid to look.

One of the benefits of this cake is that it actually improves if you let it sit overnight in the refrigerator - I think the glaze soaks in more uniformly and the cake gets a little firmer, which makes it easier to cut. 


The recipe calls for fine polenta.  I couldn't find fine polenta at the store but I already had regular polenta and cornmeal at home so I experimented. Both are corn products; the difference is mainly in how fine they're cut.  When I compared the two side by side, the polenta was more coarse than the cornmeal.  I first made the recipe using polenta, and felt it was a little too crunchy.  The Lawyer brought the rest of the cake to work, and his co-workers were split 50/50 on whether the texture was just right or too coarse but everyone loved the lemon flavor.  The second time I made the cake with cornmeal and it was more to my liking.  I would expect fine polenta to be similar to cornmeal in terms of coarseness so I would recommend using cornmeal, which is more readily available and you probably even have in your pantry.  (I'm still calling it "polenta cake" because it sounds more elegant than "cornmeal cake".)

Two ingredients that you probably don't have in your pantry are superfine sugar and almond meal/flour.  I really don't know why the recipe calls for superfine sugar and probably wouldn't bother buying it just for this - I just happened to have some on hand but can't imagine it would make much difference.  Almond meal/flour, on the other hand, is important for texture, taste and the gluten-free aspect.  I would check out the local natural food store or coop to get the cheapest price and to see if you can buy the exact amount you need in the bulk aisle since you probably won't need it again for a while.

printable recipe
Lemon Polenta Cake
Makes one 9” cake, cuts into approximately 24 small pieces

14 tablespoons unsalted butter at room temperature, plus more for greasing pan
1 cup superfine sugar
2 cups almond meal/flour
¾ cup fine polenta or cornmeal
1 ½ teaspoons baking powder (gluten free)
3 eggs
Juice and zest of 2 lemons
1 heaping cup of confectioner’s sugar

Special equipment: square or round 9” tart or springform pan with removable bottom, parchment paper

Line the base of the pan with parchment paper and grease its sides lightly with butter.  Preheat the oven to 350d.

Using a mixer, beat the butter and sugar together until pale and whipped.  In a separate bowl, mix together the almond meal, polenta and baking powder, then add a third of the dry mixture to the butter-sugar mixture and beat together.  Add one egg and beat.  Repeat, alternating the dry mix and eggs.  Finally, beat in the lemon zest, reserving the juice for the syrup.  Spoon the mix into the prepared pan and smooth the top.  Bake for approximately 30 minutes until lightly browned and the edges have begun to shrink away from the sides of the pan.  Remove from the oven to a wire cooling rack placed over a cutting board or pan (to catch drips), leaving the cake in its pan. 

Make the syrup by heating the lemon juice and confectioner’s syrup in a small saucepan until the sugar is completely dissolved.  Prick the top of the cake all over with a toothpick, spoon the syrup all over the cake, and let cool.  Once cooled, the cake can be removed from the pan.  Refrigerate for several hours or overnight before cutting.


Make ahead:  the cake can be baked up to 3 days ahead and stored in an airtight container in the refrigerator.  It can also be frozen wrapped in plastic wrap and foil, for up to 1 month.  Thaw 3-4 hours at room temperature.

Friday, May 31, 2013

Grilled Shrimp with Cucumber Horseradish Dipping Sauce

Last Year's Post: Pesto Pasta with Edamame, Spinach and Almonds

This is a twist on the classic shrimp cocktail, using grilled shrimp instead of poached and substituting a cucumber horseradish sauce for the usual cocktail sauce.  Grilled shrimp are a great summer food (think 4th of July or Father's Day) that you can choose to make spicy or not by adding a seasoning blend prior to grilling or just keeping it simple with olive oil, salt and pepper.  You can make the cucumber sauce milder or hotter by varying the amount of horseradish to balance and complement the spice level you choose for the shrimp.  We grilled the shrimp with just oil, salt and pepper so I added a considerable amount of horseradish to the sauce, but I think it would be just as good to add a spicy seasoning blend to the shrimp and let the cool cucumber sauce be the counterpoint without any horseradish at all.  You can puree the sauce or leave it slightly chunky as I did here.  It would also be fun to serve the shrimp with both the cucumber sauce and regular cocktail sauce and let people choose their favorite.  Best of all, grilled shrimp are really low in calories.

Served in a mound like this, people just devour shrimp.  As part of my career I've attended quite a few hosted trade show parties and the shrimp are always the first to disappear.  I've found the U16-20 sized shrimp are perfect - they're big enough to be impressive but not so big that they require two bites, which might tempt people to double dip.  If you've ever wondered, "U counts" refer to the number of shrimp in a pound, which translates to their size.  "U16-20" means there will be 16 to 20 shrimp per pound.  I've seen shrimp as large as U5-7 and as small as U30-50.  Larger shrimp are always more expensive.  Here's a tip - for this recipe I compared the price of U16-20 shrimp in a bag in the freezer department to the same size in the glass-front seafood case and found the frozen shrimp to cost a dollar or two less.  Since shrimp thaw in a few minutes under running water, they're a better value frozen.  If you don't need a full bag you can always save the rest for another meal. 

You can also save a little more if you buy shrimp in the shells and peel and devein them yourself.  Pulling little veins out of shrimp is not my favorite activity so I buy them peeled and deveined.  Some people think shrimp have more flavor if they're grilled in the shell and then peeled, but I've tried them both ways and don't think there's much difference in the taste.  Plus, I like the way they look and taste when they come in direct contact with the grate and they're much easier to season or marinate in advance when peeled.  When grilling shrimp, use two skewers instead of one for each row of shrimp.  (I wish I had thought of photographing this step, but it's such second nature to me that I forgot.)  It helps you flip the shrimp over without them spinning around. 

One last thought - horseradish comes in two different styles, creamy and what might be labeled just simply "horseradish" or "extra hot".  The creamy version has already been blended with a mayonnaise-type base so it's good for sandwiches but not right for this type of recipe where you're going to add it to a sauce.  Use regular horseradish instead, which is slightly darker in color and the texture looks like it was grated from horseradish root.  It's stronger than the creamy variety as you would expect, so add it a little at a time and taste as you go.  We found we used the entire 3 tablespoons and it wasn't all that hot, I guess because the heat was tempered by the other cooling ingredients.  Or as I mentioned, leave it out entirely and really crank up the spiciness of the shrimp.  Your choice.


printable recipe
Grilled Shrimp with Cucumber Horseradish Sauce
Serves 4-6

For the sauce:
1 cup shredded unpeeled English cucumber
1/3 cup mayonnaise
1/3 cup plain yogurt (not Greek)
3 tablespoons prepared horseradish (not creamy style)
2 tablespoons finely chopped fresh Italian parsley
1 tablespoon finely chopped fresh chives
For the shrimp:
1 lb large (U16-20) raw peeled and deveined shrimp, thawed if frozen
Olive oil, for brushing
Salt and pepper
Seasoning blend (optional)
Metal or wooden skewers

If using wooden skewers, soak in water for 30-60 minutes in advance.

To make the sauce, combine all sauce ingredients in a bowl to blend, adding the horseradish one tablespoon at a time and tasting to adjust the heat to your preference.  Season with salt and pepper.  If you prefer, puree in a food processor for a smoother sauce.  May be made ahead; cover and refrigerate.

Pat the thawed shrimp dry and skewer using double skewers per row of shrimp.  Do not crowd the shrimp on the skewers.  Brush each side of the shrimp lightly with olive oil and season both sides with salt and pepper. Optionally, season with your favorite seasoning blend.

Preheat a grill to high, then lower the heat to medium.  Grill the shrimp for 2 minutes per side, flipping once.  Remove from the skewers and serve with the dipping sauce.


Friday, May 24, 2013

French Rhubarb Tarts


Last Year's Post: Scandinavian Muesli

We just returned from two weeks in France, which was very inspirational from a food standpoint.  Although all the food was delicious, the breads, cheeses and pastries were absolutely the best.  Looking at all the pastries in the shops was fun even without eating them because they're all so beautiful. I was making a list of new blog ideas throughout the trip, excited to try them all out. I thought I would start by celebrating France and springtime together with rhubarb tarts from La Bastide Odeon Restaurant in Paris.

What I like about this recipe is how beautiful the tarts are, as well as their intense rhubarb flavor. I love rhubarb, but I've been disappointed with other rhubarb tart and pie recipes in the past because they seemed somewhat bland. These tarts have the double whammy of a pile of tender rhubarb pieces as well as intense rhubarb syrup.  The rhubarb is placed on top of a flaky puff pastry circle with a thin layer of sweetened ricotta cheese, so you have the contrasts of sweet-tart-flaky-creamy all in a dessert that tastes surprisingly light.

The tarts aren't difficult to make (they only have six ingredients) but they look so darn impressive. I read a review of the recipe where someone stated they used red food coloring to make the rhubarb and sauce the "right color". Say what?  Just make sure you buy nice red rhubarb in the first place.  No food coloring here!


You start by cooking the rhubarb the day prior to serving, which I always like because it's one more thing out of the way in advance.  The rest of the cooking can be done an hour in advance so you can do that before your guests arrive.  Then all you need to do is assembly work when ready to serve. A little sprig of mint and a dusting of confectioner's sugar is really all you need as a garnish, although La Bastide Odean serves the tart with almond ice cream.  To me that seems like gilding the lily, but to each his own.

The rhubarb actually goes through a double cooking process. First you simmer the rhubarb and some brown sugar together until the rhubarb pieces are tender, then you drain the rhubarb pieces over a bowl (to catch the syrup) and refrigerate overnight.


The next day you cut and bake the puff pastry circles, broil the rhubarb pieces with a little sugar, and reduce the syrup. I adapted the recipe slightly by using an easier technique for baking the puff pastry and by shrinking the size of the tarts from 6" to 5" because it seemed about right to me.  I rummaged around in drawers and cabinets, trying out various saucers and bowls until I found the right size bowl to use as a guide for cutting the puff pastry circles.


If you put a second baking sheet on top of the puff pastry when it bakes, it comes out nice and flat and golden. (I forgot to take a picture of them after they get baked a second time with the ricotta on top, sorry.)


The rhubarb gets broiled while the sauce reduces to a deep red and thick wonderfulness.


All this gets done in advance so it has time to cool.  When you're ready to serve, just pile the rhubarb on the tarts and drizzle with syrup.


Add your garnish (go very light on the confectioners sugar so you don't cover up that beautiful red rhubarb color) and serve to oohs and aahs.


printable recipe

French Rhubarb Tarts
Serves 4

1 lb rhubarb, sliced ½” thick (the reddest you can find)
1 ¼ cups plus 2 tablespoons packed golden brown sugar
1 sheet (half of a 17.3 ounce package) frozen puff pastry, thawed
1 cup whole-milk ricotta cheese
1/3 cup powdered sugar
1 egg, beaten
Mint sprigs and additional powdered sugar for garnish, optional


Make Ahead:  combine rhubarb and 1 ¼ cups brown sugar in a large saucepan.  Cook over low heat until syrup forms and rhubarb is tender but not falling apart, stirring occasionally, about 35 minutes.  Pour rhubarb mixture into a sieve set over a bowl.  Cover sieve and bowl and chill rhubarb and juices overnight.

Day of:  Preheat oven to 400d.  Roll out the puff pastry sheet on floured surface to a 12 inch square.  Using a 5” diameter plate or bowl as a guide, cut four pastry rounds.  Place rounds on ungreased baking sheet and cover with parchment paper and a second baking sheet.  Bake 15 minutes and remove, maintaining oven temperature.

Remove the top baking sheet and parchment paper from the pastry rounds.  Blend ricotta and powdered sugar in a bowl.  Brush each crust with egg glaze.  Leaving a ½” plain border, spread ¼ of the mixture on each crust.  Bake tartlets again until topping is set, about 10 minutes.  Remove and let cool.

Preheat broiler.  Pour rhubarb syrup into a small saucepan and boil about 8 minutes, until slightly thickened; cool (syrup will thicken further as it cools).  Spread the rhubarb pieces ¾” thick on a rimmed baking sheet covered with foil.  Sprinkle with remaining 2 tablespoons brown sugar and broil for about 4 minutes, until the top is browned in spots.  Cool.

Pastry, syrup and rhubarb may be made up to one hour in advance.  Let stand at room temperature. 

When ready to serve, spoon rhubarb over tartlets and drizzle with syrup.  Garnish with mint sprigs and a light dusting of powdered sugar if desired.  Serve immediately.

Friday, May 17, 2013

Sausage Sliders with Broccoli Rabe Pesto

Last Year's Post: Jewels of Spring

Broccoli rabe is very trendy with chefs right now, as are pretzel rolls.  I won't get started regarding what I think about the originality (or lack thereof) of some of the new young chefs, but it's a safe bet that any hot new restaurant you walk into will have at least three things - pork belly something-or-other, big bad microbrews, and house-made charcuterie in some form.  I think it's the pork belly and charcuterie (prepared meat products like sausage) that have in turn caused the popularity of broccoli rabe because they go so well together - the bitter greens balance and cut through the fattiness/spiciness of the pork or sausage.  And they all go together with those big hoppy microbrews.

Anyway, I've seen enough versions of that particular trend that I decided to create my own version using spicy Italian turkey sausage, provolone, broccoli rabe pesto and mini pretzel rolls. The broccoli rabe pesto is a fairly unique rendition of the vegetable created by The Publican,  one of the aforementioned hot new restaurants in Chicago.  And why sliders rather than full-sized sandwiches?  The rational answer would be that these are all really big flavors so putting them in smaller packages makes sense.  The real answer is because sliders are really hot right now also, so I decided to go all in with my trip to Trendyland.

Here's a quick intro to broccoli rabe:  also called rapini or broccoli raab, it consists of spiky leaves and small heads of florets that look somewhat like broccoli.   Wikipedia describes the flavor as "nutty, bitter and pungent". (In my opinion that might be a little overly dramatic. It's slightly bitter with a taste similar to kale or spinach.) In Italian cooking it's often sauteed with garlic and a few crushed red peppers to serve along pork ribs or sausage (do I detect a theme here?). 


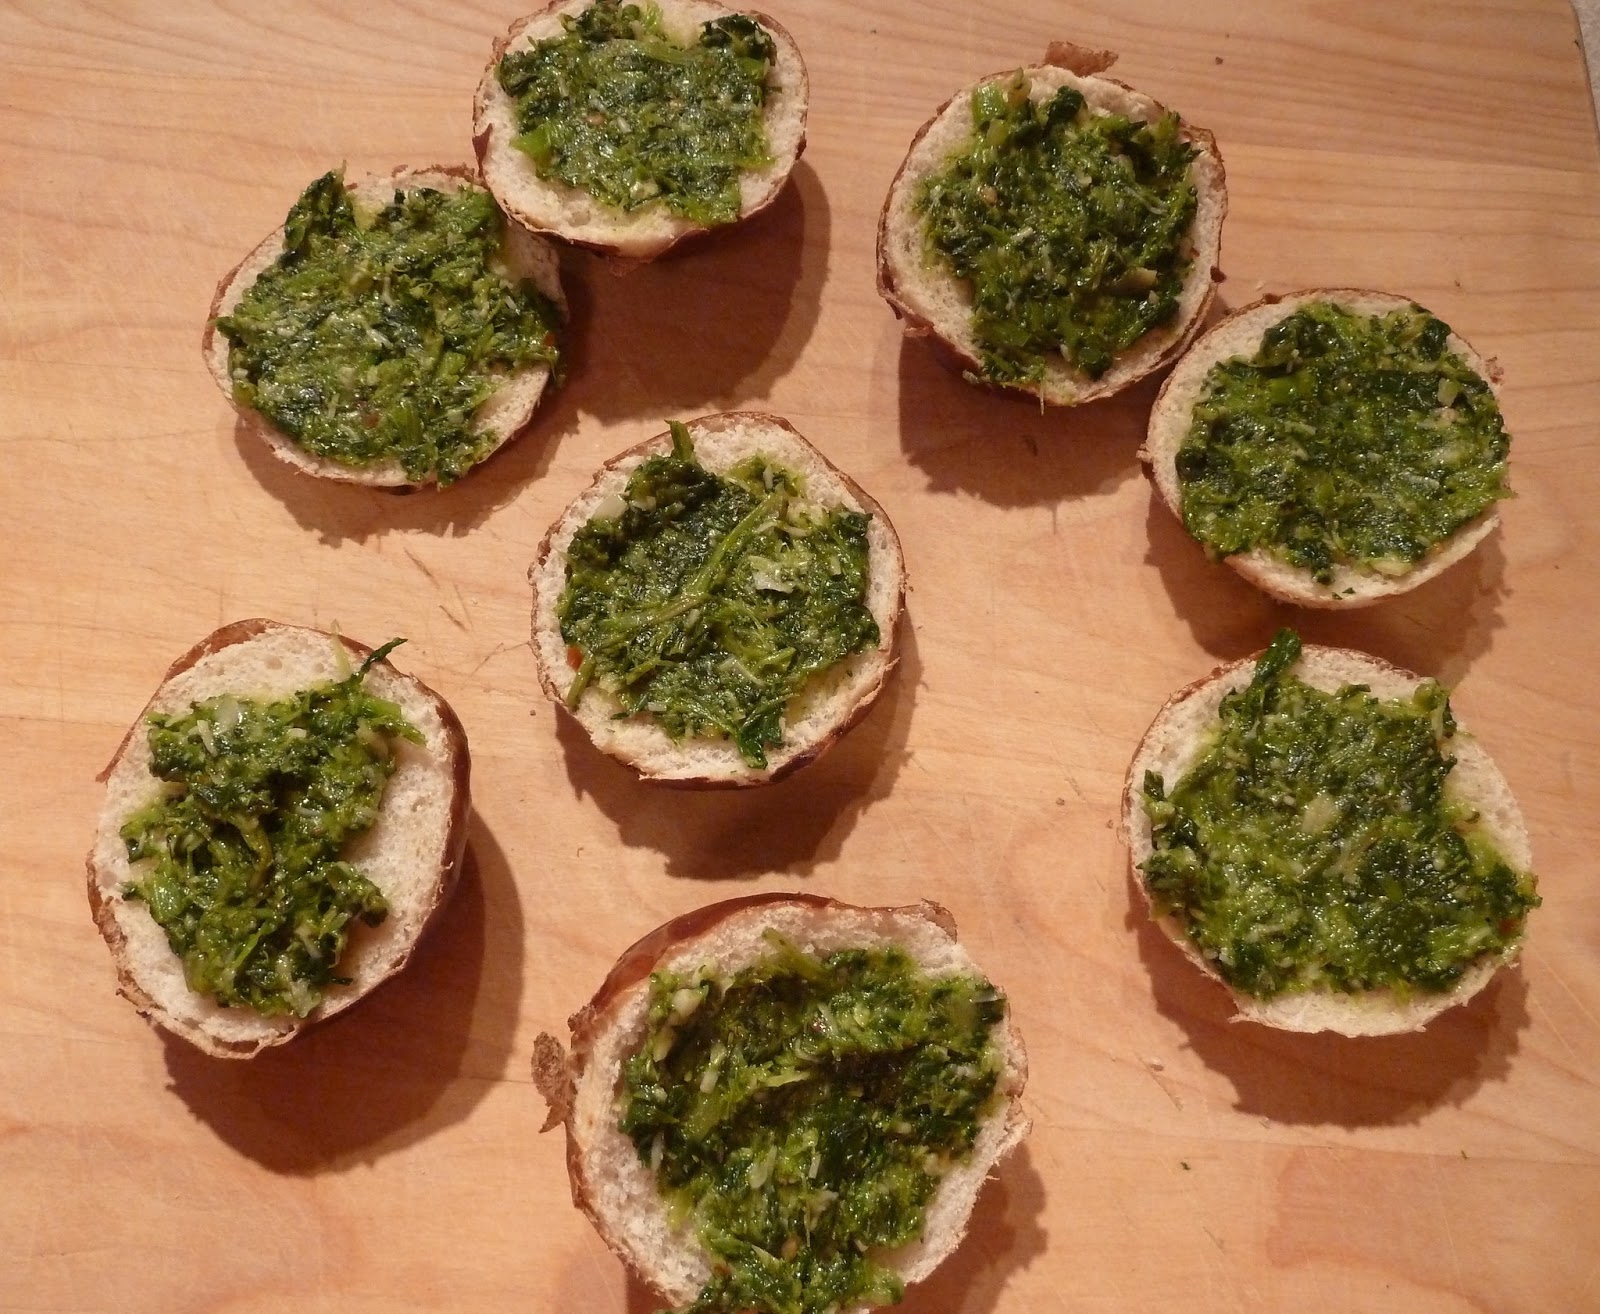
For the pesto, the broccoli raab is briefly cooked in hot water to set the bright green color, then shocked and drained, chopped, and cooked low and slow with a little olive oil, garlic and crushed red pepper flakes until  soft.  The final step is to coarsely puree to a pesto consistency.


About the red pepper flakes - the original recipe called for an entire teaspoon, but the pesto is paired with prosciutto in the original recipe which is a mild, sweet meat. I cut the red pepper in half since I was using spicy sausage.  We were happy with the results - I would call the sliders spicy but not overly so.  Depending on your spice tolerance you may want to start with an even smaller amount of red pepper because you can always add more later.  And about the spicy sausage - you could of course use mild Italian turkey sausage or your favorite variety of pork sausage instead.

The rest of the recipe is really easy - just shape and cook the sausage patties, melt some cheese on top, and assemble.


You can think of the sliders as appetizers, dinner, or party food but don't call them that because it would reveal that you are several iterations behind the trendy curve.  They are now called "Small Plates" when served 2 or 3 at a time and "Plates for Sharing" when served in larger quantities.  (Clearly I've been hanging out in a few too many trendy restaurants lately.)

The Lawyer and I really enjoyed the sliders and yes, they were particularly good with a beer. Apparently the chefs know what they're doing.


Here's how to complete your own personal trip to Trendyville:
1.Have one or both arms tattooed from shoulder to wrist.
2.Assuming you don't already have one, build a nice large rooftop patio on your house complete with speakers and a large flat screen showing old cartoons with the sound turned off.
3.Make a trip to the store to buy several types of hoppy local microbrews with whimsical names, preferably angry ones.
4.Make your sliders.
5.Invite your hippest friends over.  They will see you in a whole new light.  Guaranteed.

printable recipe

Sausage Sliders with Broccoli Rabe Pesto
Makes 10 sliders, approximately 2 ounces each

Note:  Depending on your preference for spiciness, you may want to start with the lower amount of red pepper flakes especially if you are using spicy sausage.

 1 lb broccoli rabe, about one bunch
6 garlic cloves, smashed
¼ cup olive oil
¼ - ½ teaspoon red pepper flakes (see note)
½ cup finely grated Pecorino Romano cheese
2 teaspoons honey
19.75 ounce package hot or sweet Italian turkey sausage links, casings removed
10 slices provolone cheese, cut to fit your slider buns
10 slider buns (white, wheat or pretzel)

For broccoli rabe pesto:  Cook broccoli rabe in a large pot of boiling water until bright green, about 30 seconds; drain and transfer to a bowl of ice water to stop the cooking process.  Drain again and pat with a clean towel to dry.  Cut into 1” pieces.

In the same large pot, combine the oil, garlic, red pepper flakes and broccoli rabe.  Cover and cook over low heat, stirring often, until the broccoli rabe is very soft, about 40-50 minutes.  Transfer to a food processor and pulse to a rough pesto consistency.  Let cool slightly, then mix in Pecorino and honey.  (Pesto can be made up to 3 days ahead, covered and chilled.)

For sliders:  Form the sausage into 10 small patties.  Cook either on a grill or in a frying pan with a small amount of olive oil until browned and fully cooked through, 3-4 minutes per side.  During the last seconds of cooking time put a piece of cheese on each patty to melt.  While the patties are cooking, spread some broccoli rabe pesto on both sides of the buns.  Assemble buns with sausage patties.