Showing posts with label ricotta. Show all posts

Friday, August 4, 2017

Zucchini Parmesan

Last Year's Post:  Savory Kale and Corn Galette
Two Years Ago:    Spanish Shrimp

It's summer, which means fresh tomatoes and zucchini are everywhere.  If you have a garden or made a recent trip to the farmer's market this is a perfect way to use some of them up.  I recently made a similar recipe for zucchini roll-ups stuffed with ricotta and topped with a tomato sauce that was very good but pretty fussy and time-consuming so the idea of simply layering the zucchini, cheese and sauce was appealing.

The original recipe didn't have ricotta cheese, which made it a nice light side dish.  Adding the ricotta makes it a satisfying vegetarian entree. It's your choice either way.

If you don't have a bunch of fresh tomatoes, you could always used good quality canned tomatoes.  To make it even easier,  you could buy a marinara sauce at the store.

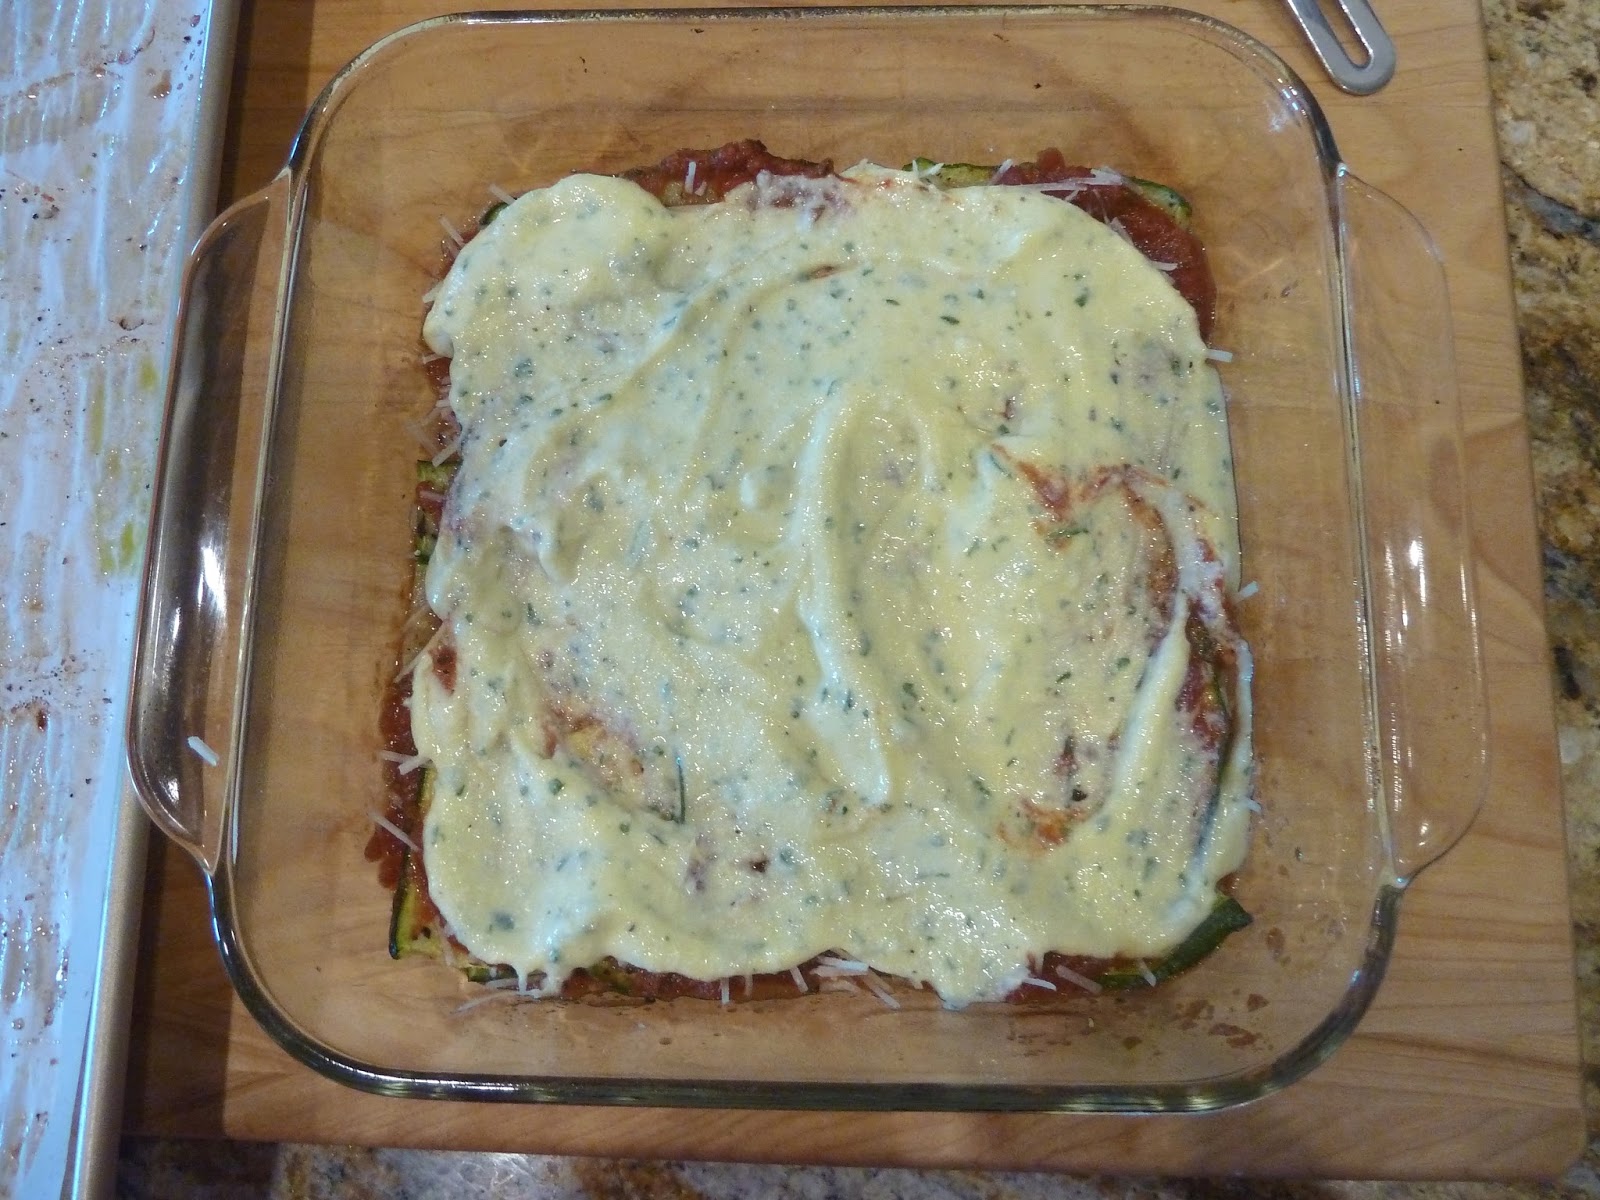
First you thinly slice the zucchini, then bake until tender. Layer the zucchini, sauce, and ricotta mixture (if using) with Parmesan and bake.  I wanted to use a pretty oval baking dish for the pictures, but couldn't quite figure out how to layer the rectangular zucchini slices in an oval dish.  Next time I think I'll just bake more zucchini and overlap them every which way, if that makes sense.




This is not only healthy, but truly delicious.

print
Zucchini Parmesan
Serves 6


For the tomato sauce:
2 to 2 ½ pounds fresh ripe tomatoes
1 tablespoon extra-virgin olive oil
1 small onion, chopped 
2-4 garlic cloves, to taste
Salt and pepper
1/8 teaspoon sugar
2 sprigs fresh basil
1 tablespoon chopped fresh basil

For the zucchini parmesan:
2 to 2 ½ pounds zucchini
Salt and pepper
3 tablespoons extra-virgin olive oil, divided
½ teaspoon red pepper flakes (or more to taste)
¾ cup freshly grated Parmesan
1 cup ricotta cheese
2 egg yolks
2 garlic cloves, grated
3-4 sprigs fresh basil


Preheat oven to 450 degrees. 

Line 2 sheet pans with parchment.  Trim ends off zucchini and cut in half crosswise, then cut into thin lengthwise slices about ¼ to 1/3” thick.  Season both sides with salt and pepper and toss with 2 tablespoons olive oil.  Arrange zucchini slices on baking sheets in a single layer and sprinkle with red pepper flakes.  Roast for 12-15 minutes until lightly browned and tender.  Remove and let cool.  Reduce oven to 375d.

While the zucchini cooks and cool, make the sauce:  if you have a food mill, quarter the tomatoes.  If not, peel, seed and chop them.  Heat 1 tablespoon olive oil in a large, heavy skillet over medium heat and add onion.  Cook, stirring often until tender, about 5 minutes.  Add garlic and cook, stirring, until fragrant, about 30 seconds.  Add tomatoes, salt, pepper, sugar and basil sprigs.  Increase heat to medium-high.  When tomatoes are bubbling briskly, stir and reduce heat to medium.  Cook, stirring often, until tomatoes have cooked down and are beginning to stick to the pan, 15-25 minutes.  Remove basil sprigs; taste and adjust seasonings.  If using a food mill, put sauce through medium blade.  If not, pulse sauce in a food processor until just coarsely pureed.  Stir in chopped basil.

To assemble and bake:  place the ricotta, egg yolks, grated garlic and basil in a small food processor and pulse to combine.  Set aside. Oil a 2-quart dish with olive oil or nonstick spray. Spread ¼ cup tomato sauce over the bottom of the dish.  Arrange a third of the zucchini slices in an even layer over the tomato sauce.  Spoon a third of the remaining sauce over the zucchini and sprinkle with ¼ cup Parmesan.  Repeat one additional layer, then spread the ricotta mixture evenly over the second layer.  Add one more layer of zucchini, sauce and Parmesan.  Drizzle on the remaining 1 tablespoon olive oil. 


Bake 30-35 minutes until bubbling and browned.  Allow to stand for 5-10 minutes before serving.  

Friday, October 11, 2013

Rustic Greens and Potato Pie


Last Year's Post: Lentil Soup with Spicy Italian Sausage
Two Years Ago:  Savory Breakfast Scones

We all know that dark leafy greens are really good for us, but getting them into your diet is sometimes the hard part.  We also know it's good to eat vegetarian once in a while.  This rustic pie is a delicious option to meet both of those goals.  It's very flavorful and has a rich, creamy texture from the potatoes and cheese.   It's warm, earthy and hearty, perfect for a fall dinner on a cool night.  Serve it with a bright salad of corn, cherry tomatoes and green onions to balance all those earthy flavors.

It would make a wonderful meal for any vegetarians you might happen to know.  Or, you could always add cooked sausage or bacon to the pie if you're serving people who really want meat - and they'll still get the nutritional value of the greens.

I always like to talk about ingredient substitutions.  In this recipe you can use any combination of greens that you want - I chose half kale (bold flavor) and half spinach (milder flavor) but chard, collard greens or mustard greens would also work.  Regarding the cheese, I think you could substitute pretty much any cheese you want for the Gruyere - blue cheese would be an especially interesting choice.  If you go for blue cheese, for some reason a little voice in my head tells me that chopped walnuts would be a good addition.  Blue cheese and walnuts go well together.


This type of rustic pie is also called a galette or a tart.  As I mentioned, it's hearty enough to be a dinner entree, or you could cut it in small pieces served cold for a tapas party.  I particularly like this type of rustic pie because you don't have to be overly perfect with the pie crust - if the edges crack when you roll it out, no big deal - it's just that much easier to fold over the filling. 

The key is to make sure the greens have released their liquid and the liquid has evaporated prior to taking them off the heat, otherwise the filling may give up a little liquid when you cut the pie.  One tip is to set the greens aside for a few minutes to cool.  Drain any liquid that may have accumulated in the bottom of the bowl or pan before adding to the potatoes.  By the way, this goes for any greens added to any pie or quiche - you'll often see recipes for chopped spinach that tell you to squeeze all the liquid out prior to adding it to the other ingredients.  Same principle.


After that it's really easy to add the filling to the pie crust, fold the edges up and over, brush with a little egg and bake.  Although I didn't try it myself, I don't see any reason why you couldn't prepare the pie in advance and refrigerate it covered with plastic wrap, then bake it after coming home from work.  It might take a few more minutes in the oven since it's cold.


If you've been having a hard time figuring out how to get those dark leafy greens into your diet, this might just be the way.


printable recipe
Rustic Greens and Potato Pie
Serves 4-6

Note:  A simple salad of cherry tomatoes, corn and green onions dressed with a little olive oil is an excellent accompaniment.

1 pie crust (homemade or store-bought)
¾ lb small boiling potatoes, such as Yukon Gold or Red Bliss
1 medium onion
2 pounds cooking greens, such as chard, spinach, kale, collards, or a mixture
2 tablespoons olive oil
2 garlic cloves, minced
2 ounces Gruyere cheese
1 ounce Parmigiano-Reggiano
1 cup ricotta
1/8 teaspoon fresh-grated nutmeg
Kosher salt and freshly ground black pepper
2 large eggs

Preheat the oven to 375 degrees.

Scrub the potatoes and cut them into 1 ½” pieces; place in a medium saucepan.  Add cold salted water to cover by 1”.  Bring the water to a boil over high heat; reduce heat to low and simmer the potatoes for 15 to 20 minutes, until tender when pierced with a knife.

Meanwhile, finely chop the onion (about 1 cup).  Thoroughly rinse and spin dry the greens, remove the tough stems, and chop the leaves (about 24 cups).  (The tougher the greens, the finer you should chop.)

Heat the olive oil in a large Dutch oven over medium heat until hot.  Reduce the heat to medium-low; add the onion and cook for 5 minutes until softened.  Add the garlic and cook for 1 minute.  Add half the greens and cook for 4-6 minutes, until wilted.  Remove the greens with tongs to a medium bowl.  Repeat with the remaining greens.  Return the first batch of greens to the skillet and cook everything for 2 minutes more, or until any liquid that collected in the skillet has evaporated.  Set aside.

When the potatoes are done, drain and mash using a potato masher.  Combine the potatoes and greens in a large bowl and set aside to cool slightly.

Roll the pastry out to make a 12” round.  Fit the pastry into a 9-inch pie plate; press against the sides of the plate allowing the excess to hang over the edges.  Put the pie plate in the refrigerator while preparing the remaining ingredients.

Grate the Gruyere (about ½ cup) and Parmigiano-Reggiano (about 1/2 cup); fold the cheeses into the potato mixture along with the ricotta, nutmeg, and salt and pepper to taste.

Lightly beat the eggs, reserving one tablespoon.  Stir the rest of the eggs into the potato mixture and spoon the filling into the pie plate.  Gently fold the overhanging pastry over the filling, pleating as necessary to make it fit.  It will make a border covering the edges of the filling but the center will be uncovered.  Brush the pastry with the remaining 1 tablespoon egg.

Bake the pie for about 40 minutes or until the filling is heated through and the pastry is golden.  Let stand 10 minutes before cutting.


Friday, May 24, 2013

French Rhubarb Tarts


Last Year's Post: Scandinavian Muesli

We just returned from two weeks in France, which was very inspirational from a food standpoint.  Although all the food was delicious, the breads, cheeses and pastries were absolutely the best.  Looking at all the pastries in the shops was fun even without eating them because they're all so beautiful. I was making a list of new blog ideas throughout the trip, excited to try them all out. I thought I would start by celebrating France and springtime together with rhubarb tarts from La Bastide Odeon Restaurant in Paris.

What I like about this recipe is how beautiful the tarts are, as well as their intense rhubarb flavor. I love rhubarb, but I've been disappointed with other rhubarb tart and pie recipes in the past because they seemed somewhat bland. These tarts have the double whammy of a pile of tender rhubarb pieces as well as intense rhubarb syrup.  The rhubarb is placed on top of a flaky puff pastry circle with a thin layer of sweetened ricotta cheese, so you have the contrasts of sweet-tart-flaky-creamy all in a dessert that tastes surprisingly light.

The tarts aren't difficult to make (they only have six ingredients) but they look so darn impressive. I read a review of the recipe where someone stated they used red food coloring to make the rhubarb and sauce the "right color". Say what?  Just make sure you buy nice red rhubarb in the first place.  No food coloring here!


You start by cooking the rhubarb the day prior to serving, which I always like because it's one more thing out of the way in advance.  The rest of the cooking can be done an hour in advance so you can do that before your guests arrive.  Then all you need to do is assembly work when ready to serve. A little sprig of mint and a dusting of confectioner's sugar is really all you need as a garnish, although La Bastide Odean serves the tart with almond ice cream.  To me that seems like gilding the lily, but to each his own.

The rhubarb actually goes through a double cooking process. First you simmer the rhubarb and some brown sugar together until the rhubarb pieces are tender, then you drain the rhubarb pieces over a bowl (to catch the syrup) and refrigerate overnight.


The next day you cut and bake the puff pastry circles, broil the rhubarb pieces with a little sugar, and reduce the syrup. I adapted the recipe slightly by using an easier technique for baking the puff pastry and by shrinking the size of the tarts from 6" to 5" because it seemed about right to me.  I rummaged around in drawers and cabinets, trying out various saucers and bowls until I found the right size bowl to use as a guide for cutting the puff pastry circles.


If you put a second baking sheet on top of the puff pastry when it bakes, it comes out nice and flat and golden. (I forgot to take a picture of them after they get baked a second time with the ricotta on top, sorry.)


The rhubarb gets broiled while the sauce reduces to a deep red and thick wonderfulness.


All this gets done in advance so it has time to cool.  When you're ready to serve, just pile the rhubarb on the tarts and drizzle with syrup.


Add your garnish (go very light on the confectioners sugar so you don't cover up that beautiful red rhubarb color) and serve to oohs and aahs.


printable recipe

French Rhubarb Tarts
Serves 4

1 lb rhubarb, sliced ½” thick (the reddest you can find)
1 ¼ cups plus 2 tablespoons packed golden brown sugar
1 sheet (half of a 17.3 ounce package) frozen puff pastry, thawed
1 cup whole-milk ricotta cheese
1/3 cup powdered sugar
1 egg, beaten
Mint sprigs and additional powdered sugar for garnish, optional


Make Ahead:  combine rhubarb and 1 ¼ cups brown sugar in a large saucepan.  Cook over low heat until syrup forms and rhubarb is tender but not falling apart, stirring occasionally, about 35 minutes.  Pour rhubarb mixture into a sieve set over a bowl.  Cover sieve and bowl and chill rhubarb and juices overnight.

Day of:  Preheat oven to 400d.  Roll out the puff pastry sheet on floured surface to a 12 inch square.  Using a 5” diameter plate or bowl as a guide, cut four pastry rounds.  Place rounds on ungreased baking sheet and cover with parchment paper and a second baking sheet.  Bake 15 minutes and remove, maintaining oven temperature.

Remove the top baking sheet and parchment paper from the pastry rounds.  Blend ricotta and powdered sugar in a bowl.  Brush each crust with egg glaze.  Leaving a ½” plain border, spread ¼ of the mixture on each crust.  Bake tartlets again until topping is set, about 10 minutes.  Remove and let cool.

Preheat broiler.  Pour rhubarb syrup into a small saucepan and boil about 8 minutes, until slightly thickened; cool (syrup will thicken further as it cools).  Spread the rhubarb pieces ¾” thick on a rimmed baking sheet covered with foil.  Sprinkle with remaining 2 tablespoons brown sugar and broil for about 4 minutes, until the top is browned in spots.  Cool.

Pastry, syrup and rhubarb may be made up to one hour in advance.  Let stand at room temperature. 

When ready to serve, spoon rhubarb over tartlets and drizzle with syrup.  Garnish with mint sprigs and a light dusting of powdered sugar if desired.  Serve immediately.

Friday, March 2, 2012

Lasagna Techniques


Everyone loves lasagna, don't they?  Yes, it's some work but it makes a lot and re-heats or freezes really well.  It's great for a weekend afternoon project.  I'd like to pass along three techniques that I've recently learned for making lasagna in addition to giving you a really good recipe in case you don't happened to have one from your great-grandmother.

1.  Lasagna is too big
Not many of us have huge families any more and it seems a shame to reserve lasagna only for big parties.  If you make it for a small family, you end up eating it every day for the next two weeks which is probably not the best idea.  So what are you supposed to do with a 9x13 pan of lasagna?  Make two smaller pans. I used the following recipe that called for a typical 9x13 pan and instead used two glass dishes that were each about 8" square.  Have one for dinner and freeze the other one for later or give it to a friend or relative.  Why did it take my entire life for me to figure this out? 
baked and cooled - love the way the noodles rise at the corners
2. Lasagna tends to fall apart when you try to serve it
For greater structural integrity, place each layer of noodles in the opposite direction.  Again, why didn't I do this before?  Maybe because the noodles were sized to fit a 9x13 pan.  See #1 above.

3. Lasagna runs all over when you serve it
Take a tip from restaurants and bake the lasagna the day before you want to serve it.  It cuts into perfect, clean pieces the next day prior to re-heating.  This gives you the added benefit of being able to serve lasagna any night of the week.


The following recipe is slightly unusual in its use of zucchini and cremini mushrooms (I always like recipes with lots of vegetables).  Italian sausage is the protein - you can choose a pork or turkey version, mild or spicy.  (You could even use a vegetarian sausage.) We recently made this recipe for The Lawyer's parents (who can't tolerate much spice) so their pan was mild but we added crushed red pepper flakes to our pan.  Everybody was happy.  By the way, if you happen to have roasted tomatoes left from last summer (see my August post), they make a fabulous addition to lasagnas.

One last thought - when The Lawyer and I were making the lasagna for this post (yes, he helps) he asked me why it didn't call for no-cook noodles.  The reason is structural integrity - how the lasagna holds together when you cut and serve it.  This recipe has good structural integrity due to three reasons - the ratio of sauce to noodles, the slight overlapping of the individual noodles, and criss-crossing the noodle layers.  If you use no-cook noodles you have to use more sauce because the noodles absorb moisture as they cook.  You shouldn't overlap them because they expand in all directions as they absorb moisture, and it's harder to criss-cross the layers because you can't neatly cut them to size.  You could try breaking them but that sounds a lot harder.  So, if you value the convenience of no-cook noodles and don't care that the lasagna layers might slide around a little on your plate, go ahead and use them.

* * click here for a printable recipe * *


Lasagna
Makes 1-9x13 pan or 2-8x8 pans

1-1/2 (16 oz) boxes of lasagna noodles
Olive oil
1 pound Italian sausage (hot or mild or a mix)
4 cloves garlic, smashed, divided
Crushed red pepper flakes
1 (12 oz) package cremini mushrooms, stems removed and caps sliced
1 large zucchini, cut in quarters lengthwise and sliced crosswise
2 cups ricotta
2 cups grated parmesan, divided
2 eggs, lightly beaten
6 to 7 fresh basil leaves, cut into chiffonade
1 large jar marinara sauce (or homemade)
1 pound grated mozzarella

Bring a large pot of salted water to a boil. Working in batches, cook the lasagna noodles until they’re soft and pliable but not limp, 6-7 minutes. Remove from the water and lay flat on parchment paper or a sheet tray to cool.

In a large sauté pan, place 1 tablespoon of olive oil over medium-high heat. Remove the sausage from casings, add to the pan and cook, breaking up with a wooden spoon, until brown and crumbly. Remove from the pan and reserve on paper towels.

Pour the fat from the pan and add new olive oil together with 2 cloves of garlic and a pinch of crushed red pepper over medium heat (be careful not to burn the garlic). When the garlic becomes very aromatic, remove it from the heat and discard. Add the mushrooms to the pan and season with salt. Cook until the moisture has evaporated and the mushrooms are golden, 4 to 5 minutes. Remove from the pan and reserve. Repeat the process with the remaining garlic and zucchini.

In a small bowl, combine the ricotta, half the parmesan, the eggs, and the basil. Mix to combine well and season with salt.

Preheat the oven to 350 degrees.

Spray a 9x13 deep baking dish (or two 8x8 baking dishes) with non-stick cooking spray. Spread the bottom of the dish with marinara sauce. Arrange a layer of lasagna noodles, overlapping slightly (cut to fit if needed). Spread 1/3 of the ricotta mixture over the noodles. Arrange a second layer of noodles over the ricotta in the other direction. Spread a light layer of sauce, then add 1/3 of the sausage, 1/3 of the mushrooms, and 1/3 of the zucchini. Sprinkle a layer of mozzarella and some of the remaining parmesan over the vegetables. Repeat these layers until all ingredients have been used up and the pan(s) are full. Be sure there is a layer of pasta on top covered with sauce and sprinkled with mozzarella and parmesan. Cover with foil.

Place the lasagna on a baking sheet and bake in the oven until hot and bubbly, about 75 minutes, removing the foil for the last 20 minutes or so. Let cool for 20 minutes before slicing.

May be baked in advance and reheated for the most perfect slices. May be frozen, baked or unbaked. Thaw overnight before baking or reheating.