Showing posts with label gruyere. Show all posts

Friday, March 11, 2016

Cabbage and Spring Onion Tart

Last Year's Post:  Mushroom & Pea Risotto
Two Years Ago:   Sausage Rolls with Mustard Cheese Dipping Sauce

Before you turn up your nose at the idea of a cabbage tart, let me tell you that I'm not all that huge of a cabbage fan either.  It's just so cabbage-y.  But when cabbage is slowly cooked down it turns into something wonderful, both tender and sweet.  Paired with mild spring onions and nutty Gruyere cheese, it makes an excellent tart for a vegetarian lunch or dinner.  It somehow seemed appropriate for this time of year because the cabbage gives it a vaguely St. Patrick's Day feeling and the spring onions make it sound like spring.

If you're not familiar with spring onions, they're halfway in size between green onions and full-sized onions.  They're also called Mexican onions and have a relatively mild flavor.  If you can't find them, green onions or leeks would work just as well.  I just liked the idea of spring onions.


The recipe calls for blind-baking the crust, which means you bake it before filling it and baking it again.  That ensures the crust is golden and crisp.  Just be aware that the blind-baking and cooling of the crust will add an hour of prep before you fill and bake the tart.
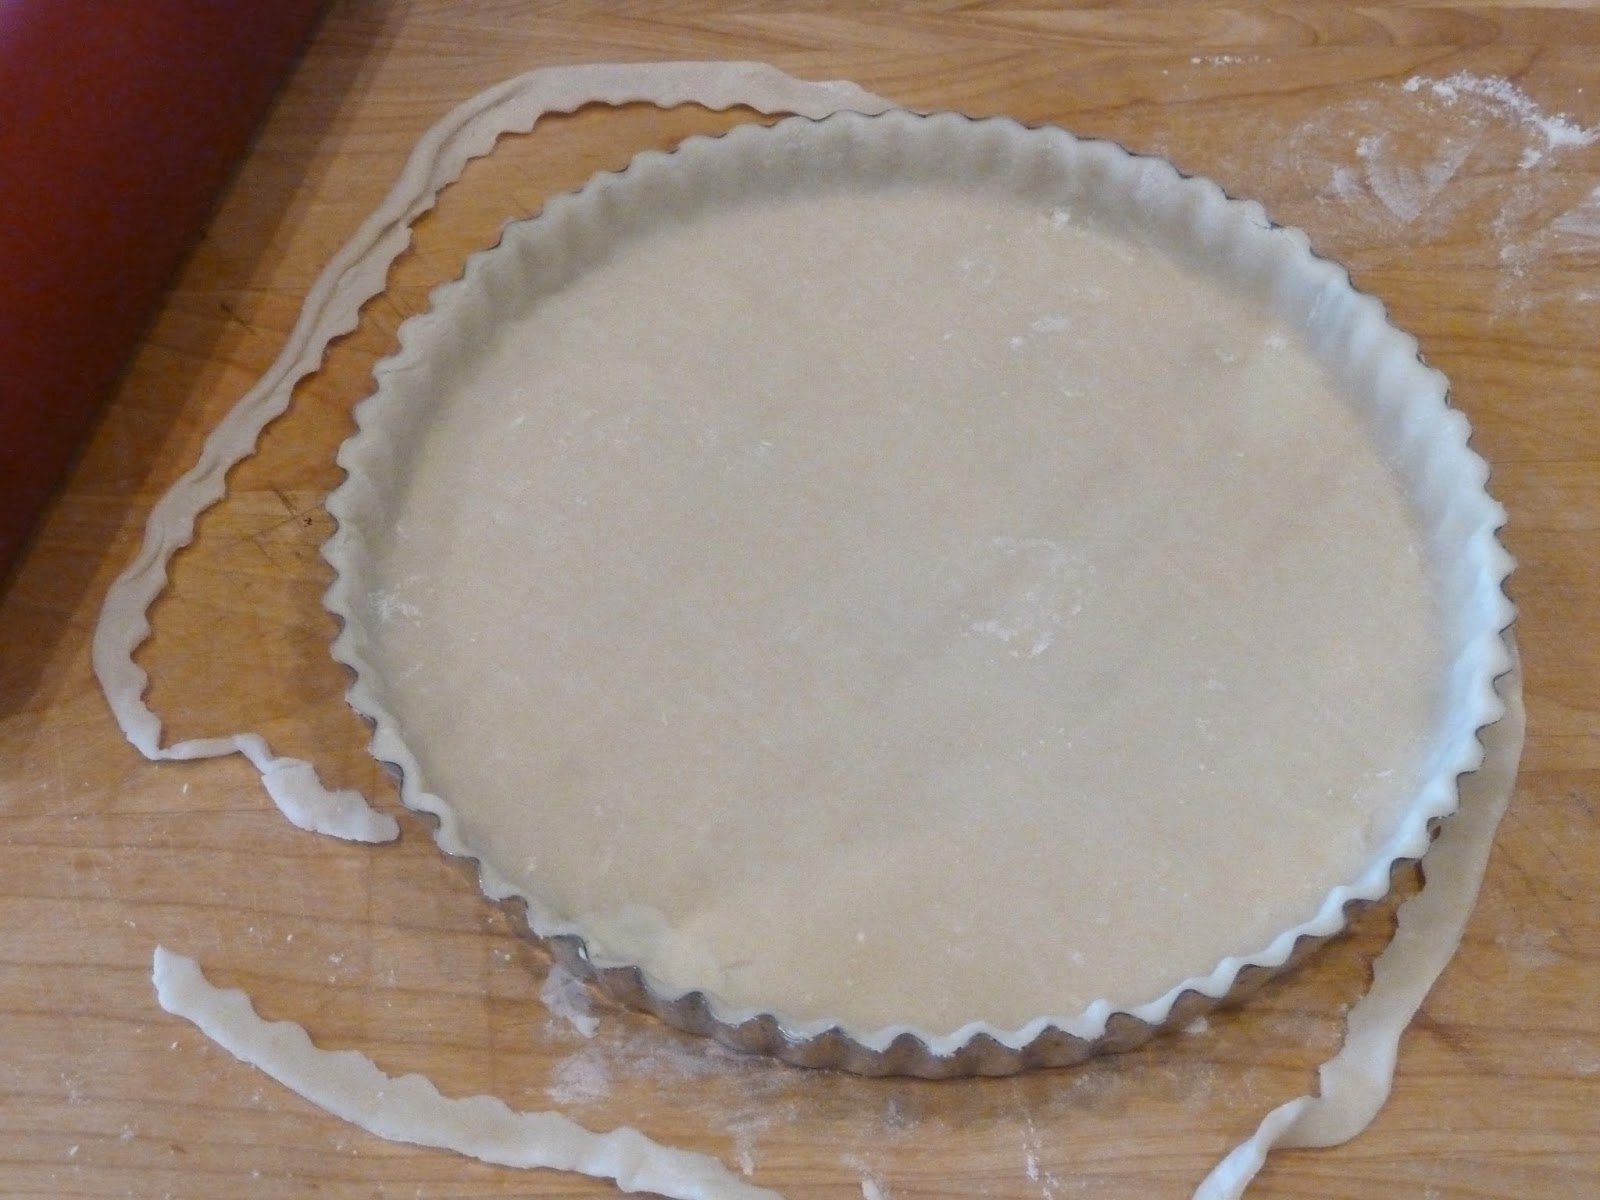

OK, so this isn't the best picture in the world (the red thing in the upper left is my rolling pin) but I was trying to show a tip for how to neatly cut the extra edges off a tart crust by rolling over them with a rolling pin.


The original recipe from the New York Times called for 1/2 medium cabbage, shredded.  I was basically lazy and bought coleslaw mix that included a few shredded carrots which I figured only added to the nutrition.  I pawed through the bag and tossed out any really big pieces of cabbage before cooking and it worked great.


print
Cabbage and Spring Onion Tart
Serves 4-6

1 refrigerated or homemade pie crust dough
2 tablespoons extra-virgin olive oil
1 cup chopped spring onion
1 pound shredded coleslaw mix (or shredded cabbage)
Salt
½ teaspoon caraway seeds
2 egg yolks
2 whole eggs
½ teaspoon salt
Freshly ground pepper
2/3 cup milk
3 ounces Gruyere, grated

For the crust:
Preheat the oven to 400d.

Ease the dough into a 9” tart pan with removable bottom, pressing onto the bottom and fluted sides of the pan.  Place a sheet of heavy-duty aluminum foil in the tart pan, making sure to press it into the fluted edges of the dough.  Fill the foil-line crust with pie weights, dried beans or uncooked rice.  Make sure the weights cover the entire bottom of the crust. Bake for 15 minutes, then check to see if the crust is ready by pulling up one corner of the foil.  (If it sticks, put the crust back in the oven and check every two minutes until the foil doesn’t stick.)  Carefully remove the foil and weights and put the crust back in the oven for 10-15 minutes until light golden brown.  Remove and cool on a wire rack.

For the tart:
Preheat the oven to 350d.

Heat olive oil over medium heat in a large, heavy skillet and add onions.  Cook, stirring often until tender, about 5 minutes.  Add a generous pinch of salt and continue to cook 3 to 5 minutes until beginning to color.  Add cabbage and cook, stirring often, until cabbage wilts, about 5 minutes.  Add another pinch of salt and caraway seeds and continue to cook for another 10 minutes until cabbage is sweet, very tender and lightly colored.  Tasted, adjust salt, and add freshly ground pepper.  Remove from heat.

Beat the eggs and egg yolks together in a medium bowl.  Set the tart pan on a baking sheet.  Using a pastry brush, lightly brush the bottom of the crust with some of the beaten egg and place it in the oven for 5 minutes to seal the crust.

Add ½ teaspoon salt, pepper and milk to remaining eggs and whisk together. 

Spread the cabbage and onion in an even layer in the crust.  Sprinkle cheese evenly over the top.  Slowly pour the egg custard over the filling until almost to the top of the crust (you may not need it all – do not overfill).  Place the tart, on baking sheet, in the oven and bake for 35 minutes until set and lightly browned.  Remove and allow to sit for at least 10 minutes befo

Friday, December 11, 2015

Sugar Snap Pea Salad

Last Year's Post: Bang Bang Turkey
Two Years Ago:  Sausage and Cheddar Breakfast Strata

I saw this interesting treatment for sugar snap peas on a food network show and just had to try it.  The original recipe was supposedly for a side salad but I made it heartier by adding Gruyere cheese and walnuts in addition to the pancetta and sugar snaps, which made a great and satisfying dinner.  You could certainly serve it as a side salad if you want and probably eliminate the pancetta and cheese.  (Or not.)  It would be particularly spectacular on a holiday buffet table, don't you think?  Don't make the mistake of thinking this is some wimpy food just because it's a salad based on a vegetable.  It has BIG flavor and BIG crunch.

The treatment for the sugar snaps is really easy - blanch in boiling water for 15 seconds to set the color, then shock in ice water to stop the cooking.  Remove, pat dry, and cut in half lengthwise.  The result is really pretty and some of the peas stay in the pods and some fall out, giving your salad some textural contrast.  I love it.


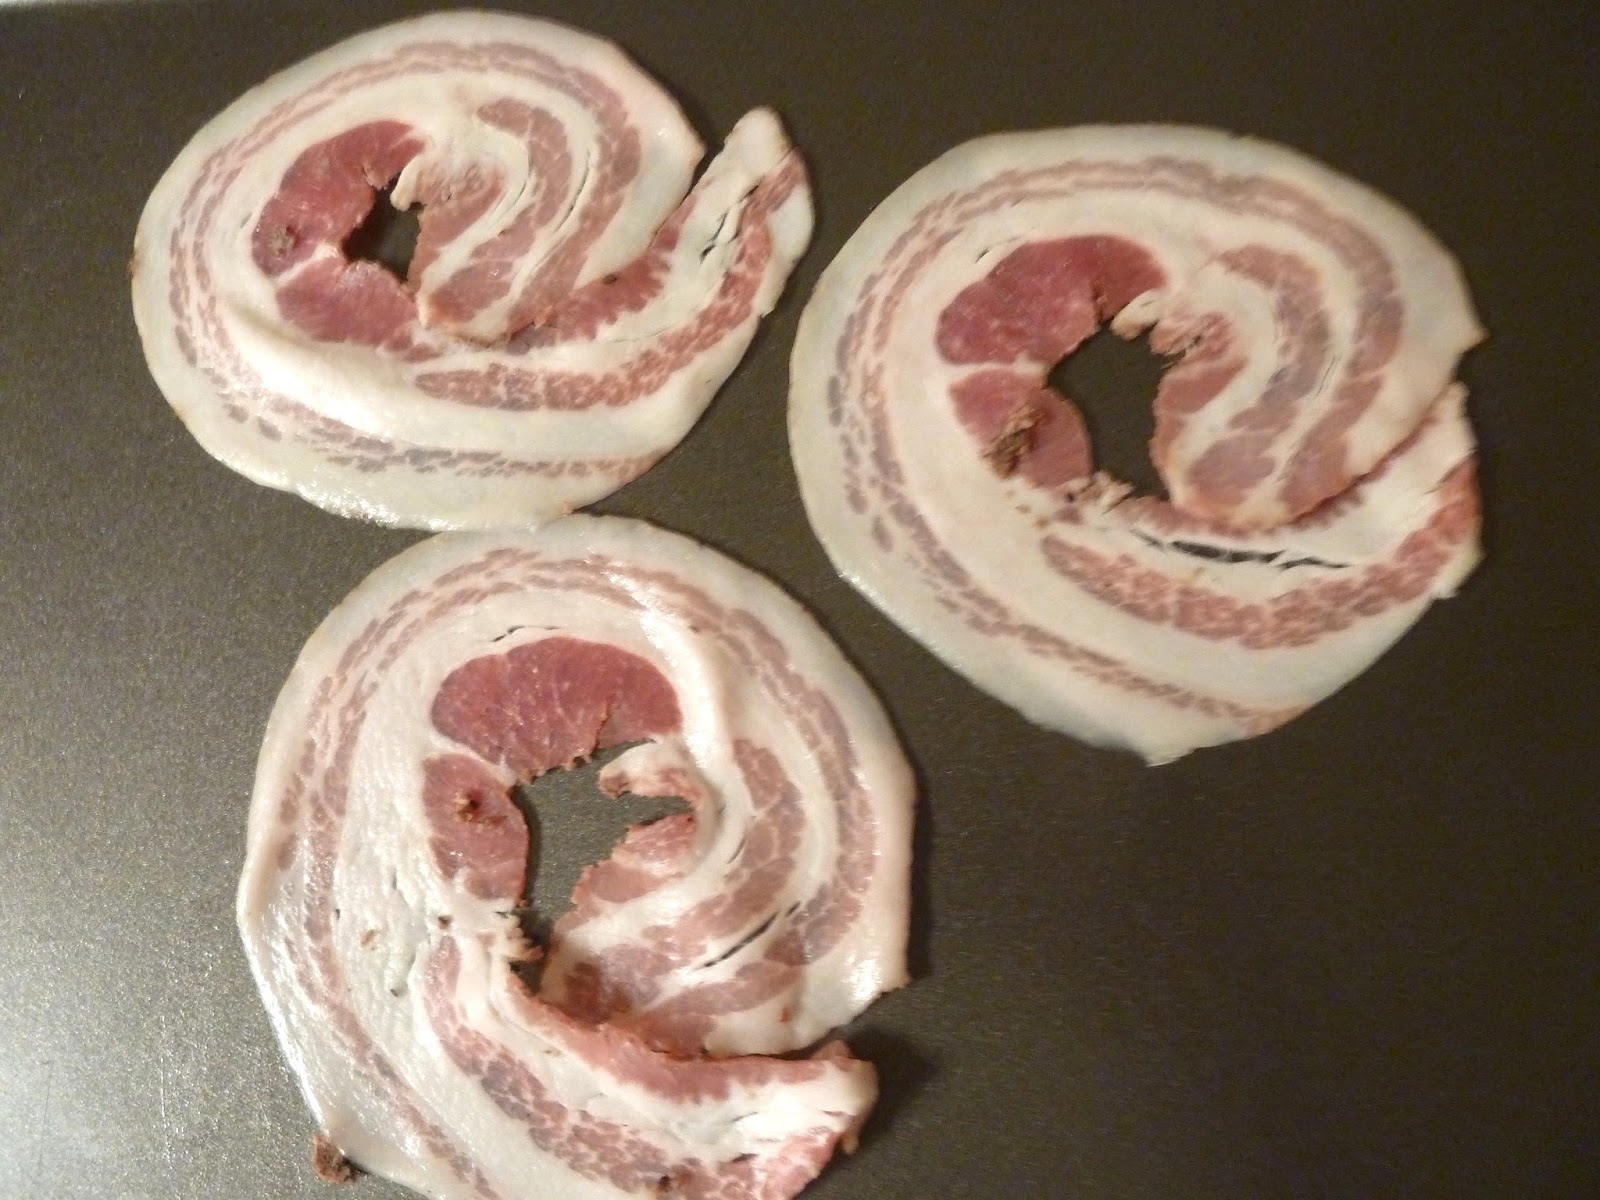
Pancetta is my new-found substitute for bacon because one of my pet peeves is how thick bacon has become. Why does everything have to be super-sized?  One of the great things about bacon is (was) its crispness.  When you have thick-cut bacon (or even worse, slab bacon) the best you can possibly hope for is chewy and greasy.  I once went to a new restaurant and was excited when they asked me whether I wanted my bacon medium or well done.  I should have known just by the question.  The bacon was definitely well done but it was so thick that the result was a literally inedible piece of bacon jerky.  Pancetta, on the other hand, is available in your deli aisle and is cut beautifully and elegantly thin.  The only downside is that it's so thin that it can go from perfect to burnt in about 2.3 seconds.  Mine was about 1 second away from being burnt but it was perfectly crisp and tasted just like great bacon.  The lesson here is keep an eye on your pancetta even though I reduced the roasting time in the recipe slightly when I re-wrote it.  I wandered away and was busy being entranced by the sugar snaps until the pancetta timer went off.  Do as I say, not as I do.


oof, that was close....
The Lawyer pronounced this salad "really, really good" so that's good enough for me.


print recipe
Sugar Snap Pea Salad
Serves 4 as a main dish, more as a side dish

¼ pound pancetta, thinly sliced
Kosher salt
1 pound sugar snap peas, trimmed
½ cup olive oil
2 tablespoons white wine vinegar
2 tablespoons fresh lemon juice
Freshly ground black pepper
¼ cup minced red onion
½ cup Gruyere cheese, cut into small cubes (or your favorite cheese)
½ cup walnuts, toasted and coarsely chopped


Preheat the oven to 450 degrees.

Place the pancetta slides on a baking pan and roast for 7-8 minutes until browned and crisp, watching closely so they don’t burn.  Remove from the oven and place the pancetta on paper towels to drain.

Meanwhile, bring 2-3 quarts of water to a boil in a large pot and add 1 teaspoon of salt.  Fill a large bowl with ice water and have a large sieve or colander ready in the sink.  Put the snap peas in the boiling water for 15 seconds, then immediately drain and put into the ice water.  Cool completely, drain and pat dry.  Cut each snap pea in half lengthwise and place in a large bowl.

To make the vinaigrette, whisk together the olive oil, vinegar, and lemon juice.  Season to taste with salt and pepper. 

Add the red onion, cheese and walnuts to the bowl with the snap peas and crumble the pancetta over the top.  Pour enough vinaigrette on the salad to moisten and toss well.


Friday, May 30, 2014

Chicken Gaston Gerard

Last Year's Post: Grilled Shrimp with Cucumber Horseradish Dipping Sauce
Two Years Ago:  Grilled Shrimp Greek Salad

I've been wanting to try this recipe for over a year, ever since The Lawyer and I took a geat trip to France.  While we were in Burgundy I learned about the classic regional dish called "Poulet (poolay) Gaston Gerard", which translates to "Chicken Gaston Gerard".  It was created by the wife of the mayor of Dijon (Madame Gaston Gerard) in 1930 to commemorate a visit by the famous French "Prince of Gastronomy" Curnonsky.  If you're a foodie geek like me, that story alone is enough to get you hooked.  If not, maybe you'll get hooked when I tell you the dish includes a mustard (Dijon, of course) cream sauce with Gruyere cheese.  Now are you interested?  I mean, how could it taste bad?  Cardboard would taste good with that sauce.

I did some research and discovered that although there are some small variations from recipe to recipe, the standard ingredients are chicken, Dijon mustard, Gruyere cheese, creme fraiche or heavy cream or half in half, and butter,  Pretty simple.  Many recipes call for bone-in chicken pieces but I prefer to work with boneless skinless chicken just for the ease of cooking and eating.  I found truly giant chicken breasts at the store so I first cut them in half horizontally to form thinner chicken cutlets and then again crosswise to make 8 total pieces that were about 3"x 3" - much easier and faster to cook. Can you believe all this came from two chicken breasts?  The chickens must have been the size of small turkeys.


The recipe is surprising fast and easy.  First you brown the chicken, then place it in a casserole dish and make the sauce in the same saute pan.  I used half and half instead of heavy cream, and the resulting sauce was slightly thickened but probably thinner than you would expect from a sauce that contains cheese. I think it's probably because the sauce contains less cheese than a normal "cheese sauce" so the flavor of the mustard can shine.  (After all, it is from Dijon France.)  That was perfectly OK with me, but if you want your sauce thicker I would use heavy cream and simmer it for a little while longer, or maybe add a little more cheese.  The predominant tastes in the sauce are mustard, cheese, and cream in that order.  It tastes very French. The sauce is then poured over the chicken and quickly browned under the broiler.


It's wonderful served with rice pilaf, mushrooms and peas, or farro with asparagus tips.  I think it's certainly company-worthy and I would call it a special occasion meal if for no other reason than the cheese and cream probably take it out of your weekly rotation.  It would make a great birthday meal, for example.  And the story alone is worth it.  I wonder what that Curnonsky guy thought?


printable recipe
Chicken Gaston Gerard
Serves 4

2 very large or 4 medium boneless skinless chicken breasts
Salt and freshly ground black pepper
2 tablespoons unsalted butter
1 bay leaf
1 sprig fresh thyme
2 tablespoons dry white wine
1 cup heavy cream or half and half
2 tablespoons Dijon mustard
¾ cup grated Gruyere cheese
¼ cup dry bread crumbs (Panko preferred)

Cut the chicken breasts in half horizontally to make thinner cutlets, then cut in half crosswise (if the breasts are very large) to make relatively thin pieces of chicken that are approximately 3” wide by 2-3” long.  You should have 8 pieces either way.

Season the chicken with salt and pepper.  Heat a sauté pan to medium-high and melt the butter.  Brown the chicken on the first side (approximately 4-5 minutes), then flip the chicken and reduce the heat to low.  Add bay leaf, thyme and white wine. Cook, covered, until the chicken is browned on the second side and fully cooked through, approximately 6-7 minutes.  Adjust cooking time depending on the thickness of your chicken pieces.  Do not overcook or the chicken may become dry.

Preheat a broiler.  Remove chicken from the sauté pan and place in a shallow casserole dish coated with cooking spray.   Discard bay leaf and thyme from the sauté pan and return to medium-high heat.  Add the cream and cook until it starts bubbling, then remove from the heat and stir in the mustard and all but 2 tablespoons of the grated cheese.  Pour the sauce over the chicken, add the rest of the grated cheese and the bread crumbs to the top, and place under the broiler for 30 seconds or so to brown.  Watch closely so the top doesn’t burn.

Excellent served with rice pilaf, mushrooms and peas, or warm farro with asparagus tips.


Friday, March 28, 2014

Classic Potato Gratin


Last Year's Post: French Chicken Salad
Two Years Ago:  Spring Risotto

Normally I try to publish healthy recipes, but I'll admit right up front that this is an exception in a big way.  Three cups of heavy cream?  I mean, really.  But it's one of those dishes that is so incredibly good, it's worthy of a special occasion like a birthday or holiday.  I wanted to post it because Easter and Mother's Day are coming up, and this is The Dish to accompany ham, roast pork, leg of lamb, or roast beef.  It's so good, it could easily steal the show from any one of those centerpiece dishes.

The first time I made this was for an Easter dinner.  The guests raved about it all during dinner, then followed the few remaining leftovers into the kitchen where they started picking pieces of potato out of the pan and eating them with their fingers.  It's that kind of a dish.  Just be prepared - once you serve it you'll get requests for it at every special occasion dinner thereafter.  Don't be tempted to substitute fat-free half and half or any other fat-and-calorie saving substitute for this one - it's the cream and cheese that provide the luscious richness.  Remember it's only for special occasions!  Think of it like any other favorite indulgence at a holiday.  Would you make low-calorie fat-free pecan pie for Thanksgiving?

Although you technically could slice the potatoes with a knife, it requires more dexterity and patience than I have to slice them all into perfect 1/8" slices.  Do yourself a favor and buy a mandoline, which is a manual slicer. It allows you to set the thickness you want, and slice it perfectly every time.  I bought mine ages ago (probably for this very recipe) and I think I bought the cheapest one I could find, which today costs about $25.  I was recently looking at mandolines on the Consumer Reports website and was surprised to find that they rated my cheap Japanese Benriner Mandoline Slicer as their top pick because it's sturdy, it works well, it's simple, and it stores flat.  You can find it here at Amazon; it's also available elsewhere online.   You can find stainless steel mandolines with fancy stands for up to $200, but why pay the money when the less expensive version works perfectly well?


Target, Bed, Bath & Beyond, Crate & Barrel and other stores also carry inexpensive mandolines if you need one right away.  Just be sure the model you choose has a knob to adjust thickness, and a hand guard to protect your fingers while slicing (that's the blue thing in the picture above).  Some models also have more than one blade for making different types of cuts.  After slicing the potatoes, this is a simple recipe.


Be sure to read the note at the end so you know what to watch for as the cream goes through different stages of cooking. The picture below shows you what butterfat looks like - they're the little yellow drops around the edge.  That's when you take it out.


Don't worry that the cheese on top browns early - it's supposed to be dark brown in spots but it doesn't end up burning so don't be tempted to cover the dish or turn the temperature down. Finally, the recipe calls for a 2 1/2 - 3 quart baking dish; big and shallow is better than narrow and deep so you can spread out the cheese topping and have it get all lovely brown all over.


printable recipe
Classic Potato Gratin
Serves 6-8

2 lbs Yukon Gold or russet potatoes, peeled
3 cups whipping or heavy cream
1 tsp coarse salt
¼ teaspoon freshly ground black pepper
Generous pinch of freshly grated nutmeg
2 cloves garlic, peeled and smashed
¾ cup finely shredded Gruyere, Emmental, or Comte cheese


Preheat oven to 400d. 

Using a mandolin (recommended) or a very sharp knife, carefully cut the potatoes into 1/8-inch slices (no thicker).

Put the potatoes in a large heavy-based saucepan and add the cream, salt, pepper, nutmeg and garlic.  Cook the mixture over medium-high heat until the cream is boiling, stirring occasionally (very gently with a rubber spatula so you don’t break up the slices).

When the cream boils, pour the mixture into a 2 ½ - 3 quart baking dish that has been sprayed with non-stick cooking spray.  Remove and discard the garlic cloves.  Shake the dish a bit to let the slices settle and then sprinkle the surface with the cheese.

Bake until the top is deep golden brown, the cream has thickened, and the potatoes are extremely tender when pierced with a knife, about 40 minutes.  Don’t worry if the dish looks too liquidy at this point; it will set up as it cools a bit.  Before serving, let the potatoes cool until they’re very warm but not hot (at least 15 minutes) or serve at room temperature.
  
Note:  If you cook the potatoes too long, the cream will separate and the butterfat will start to break out.  Watch for this as the potatoes go through distinct stages of cooking; first you’ll see lots of mad bubbling of cream, which makes you think “this can’t possibly be right, it’s swimming in cream”.  Next, the amplitude of the bubbling decreases, but the frequency stays high because the cream is getting thicker; the top of the gratin also starts to brown.  The last phase is small bubbles, thick cream, and just the first few drops of yellow butterfat appearing around the edges of the pan.  Take the dish out of the oven the moment you see any butterfat.


Friday, October 11, 2013

Rustic Greens and Potato Pie


Last Year's Post: Lentil Soup with Spicy Italian Sausage
Two Years Ago:  Savory Breakfast Scones

We all know that dark leafy greens are really good for us, but getting them into your diet is sometimes the hard part.  We also know it's good to eat vegetarian once in a while.  This rustic pie is a delicious option to meet both of those goals.  It's very flavorful and has a rich, creamy texture from the potatoes and cheese.   It's warm, earthy and hearty, perfect for a fall dinner on a cool night.  Serve it with a bright salad of corn, cherry tomatoes and green onions to balance all those earthy flavors.

It would make a wonderful meal for any vegetarians you might happen to know.  Or, you could always add cooked sausage or bacon to the pie if you're serving people who really want meat - and they'll still get the nutritional value of the greens.

I always like to talk about ingredient substitutions.  In this recipe you can use any combination of greens that you want - I chose half kale (bold flavor) and half spinach (milder flavor) but chard, collard greens or mustard greens would also work.  Regarding the cheese, I think you could substitute pretty much any cheese you want for the Gruyere - blue cheese would be an especially interesting choice.  If you go for blue cheese, for some reason a little voice in my head tells me that chopped walnuts would be a good addition.  Blue cheese and walnuts go well together.


This type of rustic pie is also called a galette or a tart.  As I mentioned, it's hearty enough to be a dinner entree, or you could cut it in small pieces served cold for a tapas party.  I particularly like this type of rustic pie because you don't have to be overly perfect with the pie crust - if the edges crack when you roll it out, no big deal - it's just that much easier to fold over the filling. 

The key is to make sure the greens have released their liquid and the liquid has evaporated prior to taking them off the heat, otherwise the filling may give up a little liquid when you cut the pie.  One tip is to set the greens aside for a few minutes to cool.  Drain any liquid that may have accumulated in the bottom of the bowl or pan before adding to the potatoes.  By the way, this goes for any greens added to any pie or quiche - you'll often see recipes for chopped spinach that tell you to squeeze all the liquid out prior to adding it to the other ingredients.  Same principle.


After that it's really easy to add the filling to the pie crust, fold the edges up and over, brush with a little egg and bake.  Although I didn't try it myself, I don't see any reason why you couldn't prepare the pie in advance and refrigerate it covered with plastic wrap, then bake it after coming home from work.  It might take a few more minutes in the oven since it's cold.


If you've been having a hard time figuring out how to get those dark leafy greens into your diet, this might just be the way.


printable recipe
Rustic Greens and Potato Pie
Serves 4-6

Note:  A simple salad of cherry tomatoes, corn and green onions dressed with a little olive oil is an excellent accompaniment.

1 pie crust (homemade or store-bought)
¾ lb small boiling potatoes, such as Yukon Gold or Red Bliss
1 medium onion
2 pounds cooking greens, such as chard, spinach, kale, collards, or a mixture
2 tablespoons olive oil
2 garlic cloves, minced
2 ounces Gruyere cheese
1 ounce Parmigiano-Reggiano
1 cup ricotta
1/8 teaspoon fresh-grated nutmeg
Kosher salt and freshly ground black pepper
2 large eggs

Preheat the oven to 375 degrees.

Scrub the potatoes and cut them into 1 ½” pieces; place in a medium saucepan.  Add cold salted water to cover by 1”.  Bring the water to a boil over high heat; reduce heat to low and simmer the potatoes for 15 to 20 minutes, until tender when pierced with a knife.

Meanwhile, finely chop the onion (about 1 cup).  Thoroughly rinse and spin dry the greens, remove the tough stems, and chop the leaves (about 24 cups).  (The tougher the greens, the finer you should chop.)

Heat the olive oil in a large Dutch oven over medium heat until hot.  Reduce the heat to medium-low; add the onion and cook for 5 minutes until softened.  Add the garlic and cook for 1 minute.  Add half the greens and cook for 4-6 minutes, until wilted.  Remove the greens with tongs to a medium bowl.  Repeat with the remaining greens.  Return the first batch of greens to the skillet and cook everything for 2 minutes more, or until any liquid that collected in the skillet has evaporated.  Set aside.

When the potatoes are done, drain and mash using a potato masher.  Combine the potatoes and greens in a large bowl and set aside to cool slightly.

Roll the pastry out to make a 12” round.  Fit the pastry into a 9-inch pie plate; press against the sides of the plate allowing the excess to hang over the edges.  Put the pie plate in the refrigerator while preparing the remaining ingredients.

Grate the Gruyere (about ½ cup) and Parmigiano-Reggiano (about 1/2 cup); fold the cheeses into the potato mixture along with the ricotta, nutmeg, and salt and pepper to taste.

Lightly beat the eggs, reserving one tablespoon.  Stir the rest of the eggs into the potato mixture and spoon the filling into the pie plate.  Gently fold the overhanging pastry over the filling, pleating as necessary to make it fit.  It will make a border covering the edges of the filling but the center will be uncovered.  Brush the pastry with the remaining 1 tablespoon egg.

Bake the pie for about 40 minutes or until the filling is heated through and the pastry is golden.  Let stand 10 minutes before cutting.


Friday, March 22, 2013

Egg Gratin

Last year's post: Rustic Egg Tart

This recipe would be great for Easter or Mother's Day brunch. It's different from typical egg dishes - omelets, frittatas, scrambled eggs, stratas or souffles  - because it's made with hard-boiled eggs, peas and green onions that are baked in a delicious cheese sauce. It can be assembled in advance so all you have to do is bake it before serving, which makes it great for entertaining. It's also perfect for an easy but impressive dinner any night of the week.

I used to make a similar version fairly often while in college because it was cheap and good, cheap being the most important of the two virtues at the time. That version called for some sort of cream soup but I try to avoid canned soups now due to their additives and high sodium levels, plus it's easy to make the sauce from scratch.  Have you looked at the ingredient list on a can of soup lately?

fun at the grocery store
Let's talk about eggs for a minute. Eggs have a number of good qualities and one drawback. The drawback is that they're fairly high in cholesterol so you don't want to eat them every day, but in my opinion that's outweighed by the good qualities. Eggs are all-natural and packed with a number of nutrients. One egg has 13 essential vitamins and minerals in varying amounts, high-quality protein, unsaturated fats and antioxidants, all for 70 calories. Eggs' nutrients can help you with weight management, muscle strength, eye health, brain function and having a healthy pregnancy. Particularly important for aiding healthy brain function and pregnancy is choline (pronounced KOH-leen), which is amply present in eggs. (Can you tell I've been doing research on the egg council website?)  This recipe calls for six eggs and feeds 4-5 people, so you're only consuming a little more than one egg per serving.

Is this considered a vegetarian meal?  Not to get overly detailed, but most people who describe themselves as vegetarians are actually lacto-ovo vegetarians if they eat eggs and dairy products. "Flexitarians" is a new term that describes people who eat a mostly vegetarian diet but occasionally eat meat.  Vegans, on the other hand, do not eat meat of any kind and also do not eat eggs, dairy products, or processed foods containing those or other animal-derived ingredients such as gelatin.  Undoubtedly that was way more than you really wanted to know, but basically I consider this a vegetarian meal.  Unless, of course, you add a garnish of some crispy bacon.  Umm, bacon.  (If you have vegetarian friends it would probably be a good idea to ask if they eat eggs before serving this dish.)

You could substitute spinach for the peas in the recipe, but my old version had peas so I like them for sentimental reasons. You could also substitute cheddar or swiss cheese for the Gruyere, and use English muffins or French bread instead of Italian bread - just be sure whatever bread you use is toasted or grilled until crisp to provide textural contrast to the creamy eggs.

Obviously the garnish is optional but I thought it made the plate look more springtime-ish and the daikon sprouts add a fresh taste with just the barest hint of radish spiciness.  Or there's always bacon. (If you're feeling wild and crazy you could even fry up some chorizo.)

There's a world of opinions regarding how to hard-boil eggs, the two issues being how to avoid a green ring around the yolk and how to make sure the shell is easy to remove.  All I can tell you is that I cook eggs the way my mother taught me and I've never had green rings and very rarely have issues with the shells.  Here's how: place the eggs in a small saucepan and just barely cover them with tap water.

Bring to a boil uncovered, then turn the heat down and simmer, covered, for 15 minutes.  Stick the saucepan in the sink and run cold water on the eggs for a couple of minutes to cool them down and stop the cooking process.  Done.

If you're planning to serve this for guests I would encourage you to buy a gratin dish because it looks so pretty.  Basically they're shallow baking dishes, usually oval in shape.  This dish is approximately 7.5" by 12" (not counting the handles) and the recipe fit perfectly.  If you plan to double the recipe larger gratin dishes are readily available.  Of course any regular baking dish will work but won't have quite the same wow factor.


printable recipe

Egg Gratin
Serves 4-5

6 hard-boiled eggs
2 tablespoons butter
3 tablespoons all-purpose flour
1 ½ cups milk (whole or 2%)
1 teaspoon salt, divided
½ teaspoon pepper
¼ teaspoon ground nutmeg
1 ¼ cups shredded cheese (Gruyere, cheddar or swiss)
4 green onions, sliced
1 cup frozen peas (not thawed)
paprika
daikon sprouts (optional)
crumbled cooked bacon (optional)
grilled or toasted Italian bread, French bread, or English muffins

Preheat the oven to 450d.

Grease a 6-cup (1.5L) gratin or casserole dish.  Slice the eggs crosswise into 5-6 pieces each and arrange in the dish. 

Reserving a few green onions for garnish, sprinkle the remaining green onions and the peas over the eggs.

 In a medium saucepan, melt butter over medium heat.  Stir in flour and cook, stirring, for about 90 seconds, without browning.  Gradually whisk in milk, then add ½ teaspoon salt, the pepper, and nutmeg.  Continue whisking and bring to boil; reduce heat and simmer for 2 minutes.  Remove from heat; stir in 1 cup of the cheese until melted.  Taste for seasoning and add the additional salt if needed.

 Pour the sauce evenly over the eggs, peas and onions to cover all.  Sprinkle with the remaining cheese.  

Bake on the oven’s center rack until bubbly and very slightly browned, about 25 minutes.  Turn the oven to broil and allow the dish to brown to your liking while watching closely, approximately 30-60 seconds.

Remove and garnish with paprika and the remaining green onions.

 Serve over grilled or toasted bread, garnished with daikon sprouts and/or bacon (optional).

Friday, December 21, 2012

Fondue

Last year's post: homemade chicken noodle soup

Being the planner/organizer that I am, I've already got Christmas dinner pretty well figured out and have moved on to New Year's Eve.  The Lawyer and I make a point of not going out on New Year's Eve for two reasons.  First, it seems kind of odd that some people think the best way to welcome a new year is to drink too much, act silly and wake up feeling terrible.  Even if you avoid the clubs and go out for a nice dinner, your entree choices are more limited, the service is worse, and the prices are higher than any other day of the year.  It just seems more fun and relaxed to stay home, whether you choose a romantic dinner for two or a small party for close friends.  Fondue is the perfect choice either way.  It's unique, it's fun, it's casual and it's easy.  If you have a fireplace, put a coffee table in front of it and serve the fondue on the coffee table with everyone sitting on the floor.  No fireplace?  Try some candles or flowers for fun.  (Fondue also makes a great Valentine's Day romantic dinner!)

For a while I couldn't figure out how to make cheese fondue fit as a food category - it seemed too substantial for an appetizer, but too uni-dimensional as a meal.  I mean, there's only so much bread and cheese a person can eat.  It finally clicked for me when I read a suggestion to add veggies, apples, pears, dried apricots, cooked sausages, even olives, pickles and mustard to a fondue meal to round it out.  It makes it more like a picnic.  You don't have to dip the pickles in the cheese, they just add variety.  Same with the mustard - use it as a condiment for a piece of sausage in between things dunked in the cheese.  The sharp pickle and mustard flavors cut through all that cheesiness and the veggies and fruit round out the meal nutritionally.  Plus, the fondue will feed more people when there are other things to eat.  This platter had apples, bread, red pepper, olives, peppadews, pickles and cooked Italian sausages plus whole-grain mustard on the side.

There are many different cheese fondue recipes (I actually have a small cookbook of nothing but 125 fondue recipes), but I'm sharing the classic made with wine, Emmentaler (or other good Swiss cheese) and Gruyere.  I think it goes better with a wide variety of foods than, say, a chorizo fondue or a crab fondue.  Regardless of the recipe, most will tell you to toss the grated cheeses with flour or cornstarch prior to putting them in the fondue pot.  Why?  Because it helps prevent clumping.  How?  I have no idea.

If you're new to fondue, there are a couple of things you should know.  First, it's a good idea to actually make the fondue in a saucepan on the stove instead of in the fondue pot.  The reason is logistics - if you make it in the pot, that means the fire is already burning and you have to transport hot cheese and live fire from your kitchen to wherever you're going to eat.  Or equally bad, you have to make the fondue in your eating location and hope you don't make a mess.  If you make it in a saucepan, you simply add the finished fondue to the fondue pot, take it to the table, and then light the fire underneath it.  Much safer.

The second thing to know is that you should stir the cheese occasionally while it's in the fondue pot so the bottom doesn't burn.  The final thing is to provide everyone with a plate and table fork in addition to their fondue fork.   The fondue fork is used to spear the food and dunk it in the cheese, then the food is placed on the plate.  The other fork is used to pop it in your mouth.  For obvious reasons you don't want the same fondue forks repeatedly going from cheese to mouths and back into the cheese again.  Oh - one additional thing I just thought of - if you go out and buy a fondue set, check the instructions for what to use in the little burner.  I originally thought they all took a small candle, only to find out that mine wants a gelled fuel made specially for fondue sets.  That would not be a good thing to discover on New Year's Eve night 30 minutes before you want to eat.

I hope everyone has a happy and safe holiday, and think about giving fondue a try for New Year's Eve!

click here for a printable recipe

Cheese Fondue
serve 4-5

For the fondue:
1 cup dry white wine
½ lb shredded Emmentaler (or other good Swiss cheese)
½ lb shredded Gruyere
2 tablespoons all-purpose flour
¼ teaspoon garlic powder
¼ teaspoon salt
¼ teaspoon ground nutmeg

Accompaniments:
cubed French bread
cooked sausages
apples, pears, dried apricots, figs
broccoli, bell pepper, zucchini
pickles, hot peppers, olives
mustard


Prepare the bread, fruits, vegetables, sausages and condiments of your choice and arrange on a platter prior to starting the fondue.

Thoroughly toss the cheeses and flour together in a large bowl.  Bring the wine to a simmer in a large saucepan, then add the cheese/flour mixture ¼ pound at a time, stirring constantly until the cheese is melted before adding more.  When add the cheese has melted, stir in the garlic powder, salt and nutmeg.  Transfer to the fondue pot and carry to the table.  Light the fire and place the fondue pot over it.  Stir occasionally while eating.