Showing posts with label lunch. Show all posts

Friday, May 4, 2018

French Bread with Roasted Tomatoes and Cheese


 Last Year's Post: Spinach Puff Pastry Tarts
Two Years Ago:    Leek, Bacon and Gruyere Tart

I was thinking this week that breakfast doesn't have to be the same old boring thing.  In Europe, breakfast often involves bread and cheese similar to American breakfasts, but served in different ways.  I wanted to serve some French bread with cheese and roasted tomatoes, and I was inspired to use the idea as an excuse to try a new cheese.  I looked up a list of soft cheeses online and headed to my cheese shop, where I found a cow's milk cheese from southwest France called Chaumes.  The online list of cheeses said it was one of the most popular French cheeses so I decided to give it a try.  It's mild and buttery and tastes a lot like Brie.  As for the tomatoes, I found some nice dark ones at the store but decided to roast them anyway - unless you have perfect peak-of-summer tomatoes, roasting almost always helps intensify their flavor.


One of my friends recently told me she was looking for some 20 minute recipes.  If you count roasting the tomatoes this will take more like 30 minutes, but if you roast them in advance it's about 5 minutes to prep.  And it's so simple that it's basically a non-recipe:  roast some tomatoes and put them on a baguette with some nice soft cheese.  Add a little butter to the bread first if you want, and add some herbs to the tomatoes, and you have a really fast and simple breakfast, lunch or light dinner.  And a great excuse to try a new cheese.

print
French Bread with Roasted Tomatoes and Cheese
Serves 2

4 small-ish tomatoes
Olive oil
Salt and pepper
French or Italian dried herb blend (optional but very good)
1 baguette
Butter
Interesting soft cheese (Brie or similar, I used Chaumes)
Chopped parsley, for garnish


To roast the tomatoes:  Preheat the oven to 400d.  Cut each tomato crosswise into slices.  Place on a baking pan and brush with a little olive oil, then sprinkle with salt, pepper and dried herbs.  Roast in the oven for 20 minutes until softened but not collapsed.  Remove and cool.

Cut the baguette crosswise into two pieces, and then cut each piece lengthwise in half.  Spread with a little butter and microwave for a few seconds to warm the bread and melt the butter.  Distribute cheese and tomato slices among the bread pieces and warm for a few more seconds in the microwave if desired.  Sprinkle with parsley and serve.

Friday, March 11, 2016

Cabbage and Spring Onion Tart

Last Year's Post:  Mushroom & Pea Risotto
Two Years Ago:   Sausage Rolls with Mustard Cheese Dipping Sauce

Before you turn up your nose at the idea of a cabbage tart, let me tell you that I'm not all that huge of a cabbage fan either.  It's just so cabbage-y.  But when cabbage is slowly cooked down it turns into something wonderful, both tender and sweet.  Paired with mild spring onions and nutty Gruyere cheese, it makes an excellent tart for a vegetarian lunch or dinner.  It somehow seemed appropriate for this time of year because the cabbage gives it a vaguely St. Patrick's Day feeling and the spring onions make it sound like spring.

If you're not familiar with spring onions, they're halfway in size between green onions and full-sized onions.  They're also called Mexican onions and have a relatively mild flavor.  If you can't find them, green onions or leeks would work just as well.  I just liked the idea of spring onions.


The recipe calls for blind-baking the crust, which means you bake it before filling it and baking it again.  That ensures the crust is golden and crisp.  Just be aware that the blind-baking and cooling of the crust will add an hour of prep before you fill and bake the tart.


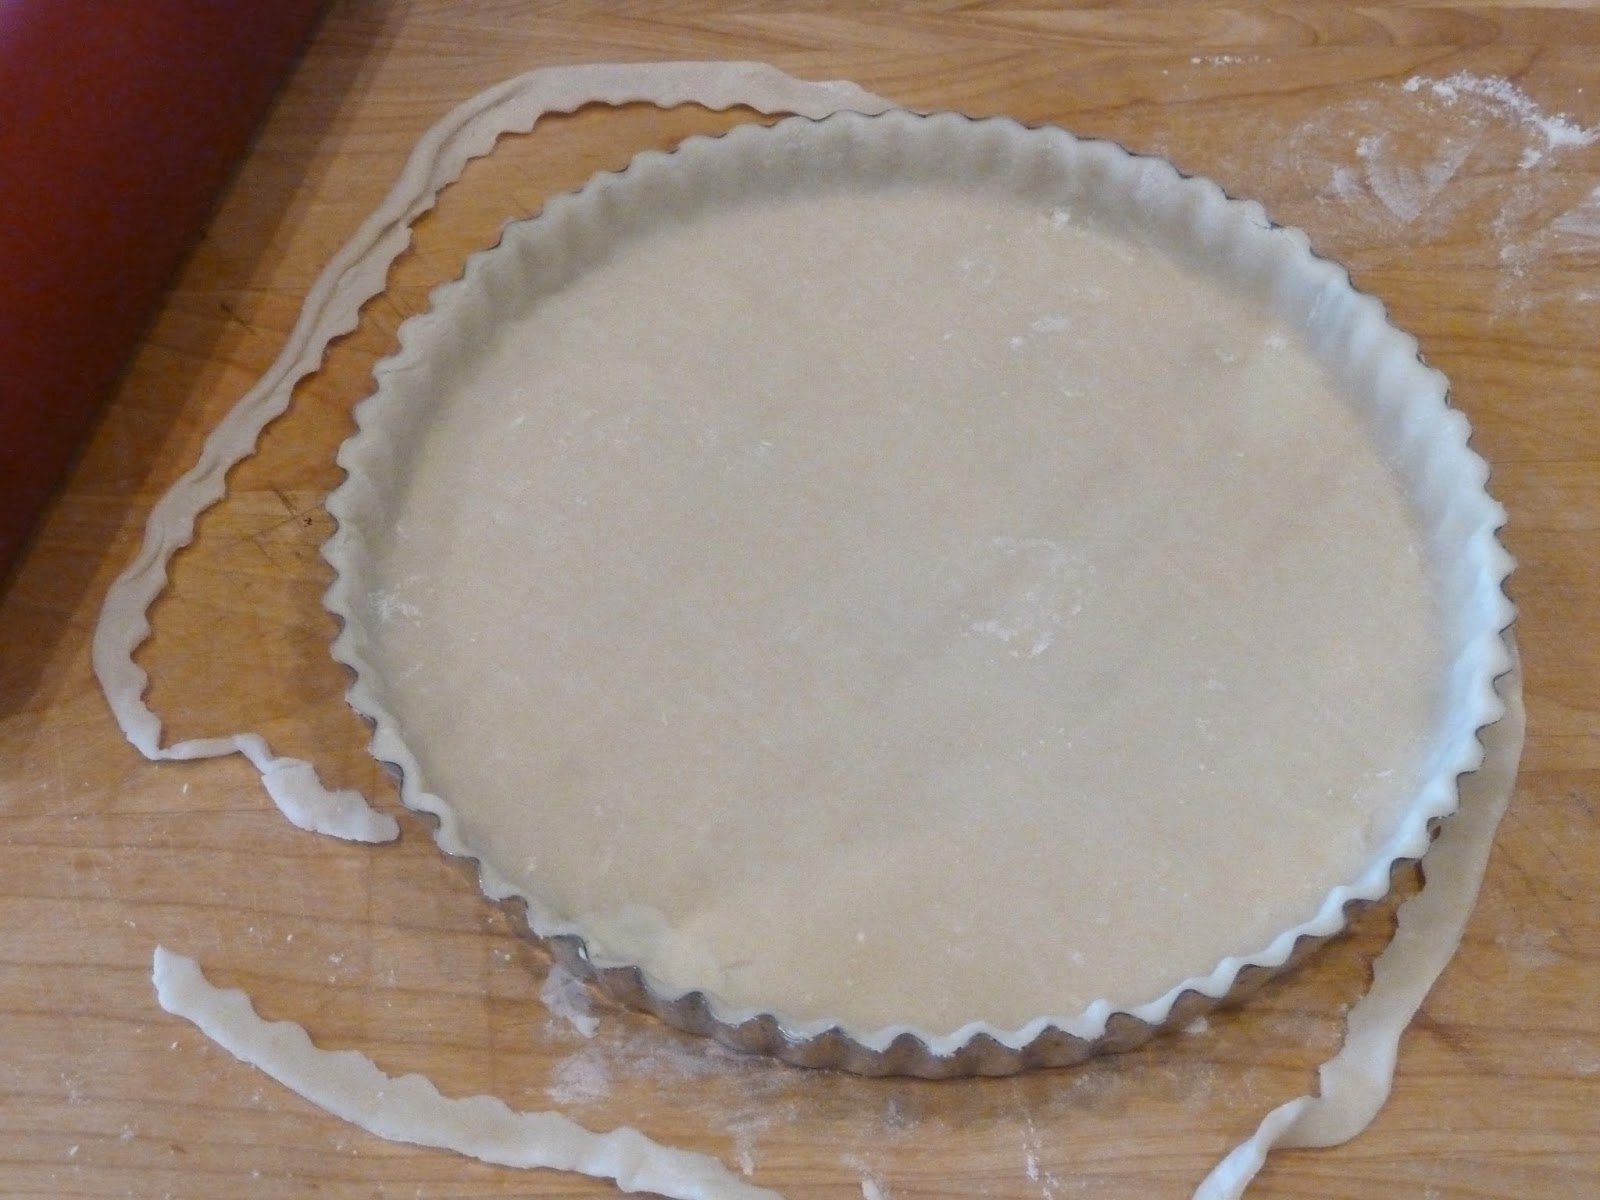
OK, so this isn't the best picture in the world (the red thing in the upper left is my rolling pin) but I was trying to show a tip for how to neatly cut the extra edges off a tart crust by rolling over them with a rolling pin.


The original recipe from the New York Times called for 1/2 medium cabbage, shredded.  I was basically lazy and bought coleslaw mix that included a few shredded carrots which I figured only added to the nutrition.  I pawed through the bag and tossed out any really big pieces of cabbage before cooking and it worked great.


print
Cabbage and Spring Onion Tart
Serves 4-6

1 refrigerated or homemade pie crust dough
2 tablespoons extra-virgin olive oil
1 cup chopped spring onion
1 pound shredded coleslaw mix (or shredded cabbage)
Salt
½ teaspoon caraway seeds
2 egg yolks
2 whole eggs
½ teaspoon salt
Freshly ground pepper
2/3 cup milk
3 ounces Gruyere, grated

For the crust:
Preheat the oven to 400d.

Ease the dough into a 9” tart pan with removable bottom, pressing onto the bottom and fluted sides of the pan.  Place a sheet of heavy-duty aluminum foil in the tart pan, making sure to press it into the fluted edges of the dough.  Fill the foil-line crust with pie weights, dried beans or uncooked rice.  Make sure the weights cover the entire bottom of the crust. Bake for 15 minutes, then check to see if the crust is ready by pulling up one corner of the foil.  (If it sticks, put the crust back in the oven and check every two minutes until the foil doesn’t stick.)  Carefully remove the foil and weights and put the crust back in the oven for 10-15 minutes until light golden brown.  Remove and cool on a wire rack.

For the tart:
Preheat the oven to 350d.

Heat olive oil over medium heat in a large, heavy skillet and add onions.  Cook, stirring often until tender, about 5 minutes.  Add a generous pinch of salt and continue to cook 3 to 5 minutes until beginning to color.  Add cabbage and cook, stirring often, until cabbage wilts, about 5 minutes.  Add another pinch of salt and caraway seeds and continue to cook for another 10 minutes until cabbage is sweet, very tender and lightly colored.  Tasted, adjust salt, and add freshly ground pepper.  Remove from heat.

Beat the eggs and egg yolks together in a medium bowl.  Set the tart pan on a baking sheet.  Using a pastry brush, lightly brush the bottom of the crust with some of the beaten egg and place it in the oven for 5 minutes to seal the crust.

Add ½ teaspoon salt, pepper and milk to remaining eggs and whisk together. 

Spread the cabbage and onion in an even layer in the crust.  Sprinkle cheese evenly over the top.  Slowly pour the egg custard over the filling until almost to the top of the crust (you may not need it all – do not overfill).  Place the tart, on baking sheet, in the oven and bake for 35 minutes until set and lightly browned.  Remove and allow to sit for at least 10 minutes befo

Friday, September 25, 2015

Sausage, Kale and Potato Soup (Copycat Olive Garden Zuppa Toscana)

Last Year's Post: Squash Ravioli with Sage Brown Butter Sauce
Two Years Ago:  Pad Thai

My mother and I are different in many ways, not the least of which is restaurant preferences.  I tend to favor small locally-owned places, and she likes upscale casual chain restaurants.  I've tried a couple of times do the alternating thing (this time your choice, next time my choice) with less than spectacular results.  After one particularly disastrous visit to a local Italian eatery where she kept looking at everything and everyone with deep suspicion, she finally remarked to me "Why would anyone go to any other Italian restaurant when everyone knows that Olive Garden is the best?"  And there you have it.  Since I love my mother and like to see her often, I spend a fair amount of time at Olive Garden for lunch and thus have discovered their Zuppa Toscana soup made with Italian sausage, potatoes and kale.

I fully understand the irony in the fact that I have a less than enthusiastic view of Olive Garden but am not above copycatting their recipe.  In my (weak) defense, there are a lot of copycat recipes out there for this soup.  To my dismay, I discovered the purported "real" recipe contains cream so in my (continued weak) defense, I decided to try to create a healthy version that was just as good.  And the combination of sausage, kale and potato is a classic Italian soup not exclusive to Olive Garden.  Have I rationalized enough yet?

There are three things that I changed:  I eliminated the optional bacon because I haven't noticed bacon in the restaurant version anyway, I substituted hot Italian turkey sausage for hot Italian pork sausage, and I substituted 2% milk for the cream.  The last substitution might seem the most drastic but I have a secret to make it seem just as rich - you puree a few of the cooked potato pieces and stir them back in the pot.  It's a great trick for making cream soups taste rich without cream because the starch in the potatoes thickens the soup, and it worked very well here.  The original restaurant soup is not thick like a cream soup but has a slight richness, which is almost perfectly duplicated here.

You may notice the recipe calls for browning the sausage and onion in a separate skillet, then placing them in the soup pot.  The reason is that the sausage gives off juice and fat, will create a film on the top of the finished soup.  If you don't care about it you can make everything in the same pot.  The whole house smelled wonderful while this was cooking.


At the point (above) where everything was simmering but before pureeing any potatoes or adding the kale and milk the soup looked great and smelled even better. Next time I may just eliminate the puree step and the milk, using more chicken stock in place of the water and milk and serve it just like this.  Can you imagine how pretty it would be after adding the bright green kale?  In the next pictures I added the potato puree, then the kale and milk.


Although the soup requires a fair amount of chopping, it was fun to make and even better to eat.  It would be absolutely perfect for a chilly, rainy fall day or a snowy winter one.  It makes a big pot of soup and it's healthy with all that kale.  What more could you want? Serve with grated parmesan and crusty bread for a complete and comforting meal.

Update one week later:  when we had this for the second time, The Lawyer volunteered that this may be the best soup he's ever had.

Sausage, Kale and Potato Soup
Serves 6-8

16-20 ounces spicy turkey Italian sausage 
1 tablespoon olive oil, divided
1 large onion, chopped
4 garlic cloves, minced
32 ounces chicken broth
2 ½ cups water
1 ¼ cups of 2% milk
4 cups kale (about one bunch Tuscan kale), stemmed and cut into bite-sized ribbons


If the sausage is in the form of links, remove from casings.  Heat a large skillet over medium heat, then add half of the olive oil.  Add the sausage and sauté until cooked through; breaking it up into crumbles with a wooden spoon as it cooks.  Remove from the skillet and add to a large soup pot.  In the same skillet, add the remaining olive oil and the onions and cook until translucent, about 5 minutes.  Remove and add to the soup pot. 

Scrub the potatoes well but do not peel.  Slice each potato lengthwise in half and then crosswise into ¼” pieces.  Add the potatoes, garlic, chicken broth and water to the soup pot and bring to a brisk simmer, then turn down and simmer for 30 minutes until the potatoes are tender. 

Scoop 1-2 ladles of potatoes and broth out of the soup pot, trying not to get any sausage (put any sausage pieces back in the pot).  Put the potatoes and broth in a blender or food processor and process until smooth.  (If you use a blender, be sure to remove the center knob from the lid and cover with a towel to prevent a hot liquid blow-up.)  Pour the puree back into the soup pot and stir.

Add the milk and kale and simmer 15 minutes more, until the kale is tender. 


Friday, March 21, 2014

Lentil Salad with Bacon and Walnuts

Last Year's Post: Asian Roast Pork with Broccoli Slaw and Pasta
Two Years Ago:  Rustic Egg Tart

I never used to like lentils, probably because they looked suspiciously like the split peas in split pea soup which is an unfortunate muddy brown-green color and (in turn) looks a lot like baby food. Amazing how long the food traumas of our youth can stick with us past all rational thought, isn't it?  Once I realized that there are different types of lentils and they aren't all muddy-colored I decided to try them.  Happily, I discovered that they taste great as well as being good for you.  I then embarked on a lentil discovery mission that at one point involving five different types of lentils sitting in my pantry.  Even I admit that's probably overkill.  I discovered that big lentils end up mushy and muddy-colored, and red and yellow lentils end up mushy also although their color is better.  Small green or black lentils retain their shape when cooked and have a very pleasant firm texture while being tender at the same time.

So having come full circle, I now use the small French green lentils called "Lentils du Puy". You can find them in some natural food stores like Whole Foods and high-end grocery stores.  They may also be labeled as "French lentils" in the bulk aisle - just be sure they're dark green and small.


I was recently watching an "America's Test Kitchen" episode on lentil salads (which inspired me to make this recipe), and they confirmed that Lentils du Puy are the best because they hold their shape when cooked and have the best flavor.  They also demonstrated a very interesting technique for brining and oven-baking the lentils, which I'd never heard of.  Apparently brining the uncooked lentils helps make the skin more flexible so they don't burst, and oven-cooking is more gentle and again helps the lentils cook evenly to a creamy tenderness without bursting.  (If you're not familiar with America's Test Kitchen, they try as many as hundreds of variations of a recipe to develop the perfect technique.  They're even more obsessive than I am.)  Anyway, of course I had to try it.

The lentils didn't burst, but it took a long time to soak them and then bake in the oven. I found it took a full 70 minutes of baking before they were tender, which in my opinion isn't worth it.  I've simmered French lentils before without any issues so I decided to compromise for this recipe by calling for brining (which can be done in advance) and then simmering on the stovetop for just 20 minutes, as most other recipes call for.

The reason why I like lentil salads is because they're so versatile and good for you. You can serve them for lunch or dinner, at room temperature or warm or cold, and you can vary the ingredients to suit your taste.  I added cooked egg and avocado in addition to the bacon and walnuts with a little bell pepper for color, but you can add whatever you like.  For example, your favorite cheese could substitute for the egg or avocado.  Even with the tender lentils, the texture of the salad is surprisingly crunchy and very satisfying with the addition of the peppers, bacon and walnuts and the avocado (or cheese) adds creaminess.

For some reason this recipe seems very French to me, probably because of the French lentils and walnuts.  I can just see it served for a light spring or summer dinner with a bottle of very dry Rose wine and some warm crusty bread.


printable recipe
Lentil Salad with Bacon and Walnuts
Serves 4

1 cup French green lentils (lentils du Puy), uncooked
Salt
2 cups low-sodium chicken broth
1 bay leaf
5 tablespoons olive oil
3 tablespoons sherry vinegar
1 minced shallot
1 teaspoon minced fresh thyme
Juice of half a lemon
1 avocado
3 hard-boiled eggs, cut into eighths
1 cup (loosely packed) baby spinach, chopped
3 slices of bacon, cooked and crumbled
1/3 cup walnuts, toasted and coarsely chopped
2/3 cup red bell pepper (or assorted colors), finely chopped


In a medium bowl, combine the lentils and 1 teaspoon salt.  Cover with 4 cups warm water and let stand for one hour.  Drain well.  (Drained lentils can be refrigerated for up to 2 days before cooking.)

Place the lentils in a large saucepan over medium-high heat with 2 cups of water, the chicken broth, bay leaf, and ½ teaspoon of salt.   Bring to boil; reduce heat and simmer until tender, about 20 minutes.  Taste to be sure the lentils are properly cooked.  Drain well.

While the lentils are cooking, combine the olive oil and sherry vinegar with ¼ teaspoon salt in a large bowl, whisking to blend.  Add the shallots and thyme. 

Place the lemon juice in a medium bowl. Cut the avocado in half and remove the pit.  Using a small knife, score each half in a diamond pattern all the way down to (but not through) the shell.  Use a large spoon to scoop the flesh from the avocado shell into the bowl with the lemon juice.   Toss gently to coat the avocado pieces with juice so they won’t discolor.

When the lentils are still somewhat warm, place them in the bowl with the vinaigrette and toss to combine.  Add the spinach, bell pepper and avocado and toss again.

Serve topped with eggs, bacon and walnuts.  May be served warm, room temperature, or cold.


Friday, February 14, 2014

Wild Mushroom and Gruyere Quiche

Last Year's Post:  Wild Mushroom & Wild Rice Chicken Soup
Two Years Ago:   Turnovers

Quiche is very versatile in terms of working well for brunch, lunch or dinner.  The only issue with quiche is getting it out of the dish neatly, even after it rests for a while. (And those of you who know me know I am ALL about neatness.) I have two suggestions for how to get around that issue.  The first is to make individual little quiches, which was my solution for years.  It does, however, require a little more work and some specialized pans that are available in gourmet kitchen stores.


Although I called that a solution, it's really more an avoidance of the original problem.  There is basically only one solution for neatly cutting a whole quiche - make it in advance and refrigerate it, then cut and reheat. If you've ever wondered how restaurants serve such nice neat slices, that's their secret. (The same thing works for pies and lasagna.)

Here's the difference between cutting a slice after the quiche rests for 30 minutes out of the oven (top) and the next day (bottom).


If you don't care whether your slices are perfect or you can't wait because your wild mushroom quiche smells that good or you really like the gooey cheesiness of it all, by all means dig in.  If you're having company for brunch and want it to look really pretty, make it in advance.  The other bonus is that you won't have to worry about any extra liquid in the dish.

OK, so enough about technique.  I chose this particular quiche because I really like the starring role the wild mushrooms play with nutty Gruyere cheese as the perfect complement.  They're left in chunks and browned until they're deeply flavorful and earthy, and there's lots of them.  I used oyster mushrooms, creminis, and shiitakes but you can use all of one or two types if you want.


After cleaning and trimming the stems, cut them into chunks and saute (the mushrooms shrink quite a bit as they lose their liquid). Sauteing until browned is the secret to great flavor.


The mushrooms have such deeply earthy flavor that the quiche makes a very satisfying dinner paired with a fresh green salad and crusty bread.  One other note - the recipe calls for a 9" deep dish pie pan, but a regular 9" pan will also work as long as your crust didn't slip down the side when it was first baked.  Just make sure the pan isn't full to the very top of the crust before baking or it may leak a bit as it bakes and puffs.

printable recipe
Wild Mushroom and Gruyere Quiche
Serves 6-8

 Note:  For the most perfect slices, bake the quiche a day in advance and refrigerate.  Cut slices and reheat.

2 tablespoons (1/4 stick) butter
2/3 cups chopped shallot (about 3 medium)
12 to 14 ounces assorted wild mushrooms (such as shiitake, oyster, cremini)
1 homemade or refrigerated pie crust
3 large eggs
2/3 cup half and half
1/3 cup milk
½ teaspoon salt
½ teaspoon black pepper
1 tablespoon chopped fresh thyme
1 ½ cups (packed) coarsely grated Gruyere cheese (about 5 ounces), divided

Wipe mushrooms with a clean damp cloth to remove dirt.  Remove shiitake stems completely and slice the ends off the stems of other mushrooms.  Cut mushrooms in half or quarters depending on their size and shape to create pieces of ½ - ¾” in size. 

Melt butter in a large heavy skillet over medium-high heat.  Add shallots; sauté until beginning to soften, about 2 minutes.  Add mushrooms; sprinkle with salt and pepper and sauté until mushrooms have released their liquid, are tender and beginning to brown, about 9-10 minutes.  Set aside to cool.

Preheat oven to 450d.  Press the pie crust firmly onto the bottom and sides of a 9” deep-dish glass pie plate.  Bake until light golden brown, pressing on sides of crust with back of spoon if crust begins to slide down sides of dish, about 12-13 minutes.  Remove to cool slightly.  Reduce oven temperature to 325d.

Whisk eggs, half and half, milk, ½ teaspoon salt, ½ teaspoon pepper and thyme in a large bowl to blen.  Stir in 1 cup of grated Gruyere.  Place the sautéed mushrooms in the pie crust and pour the filling over the mushrooms.  Sprinkle the remaining ½ cup cheese over the top.


Bake until the quiche is puffed, golden brown, and just set in the center, about 45 minutes.  Cool 30 minutes before serving.

Friday, July 13, 2012

Tomatoes!


Tomatoes are an obsession for many people, and we're heading right into tomato season.  I plan to feature a few favorite tomato recipes in the coming weeks (including the best salsa ever) so I thought I'd get a little head start now.  Print this recipe and pull it out the first time you see local tomatoes at the market.

The more I thought about this post, the more I realized that I have a lot to say about tomatoes.  The Lawyer and I had a community garden plot for years where we grew almost 30 different varieties of tomatoes, mostly heirloom varieties.  We read tomato catalogs.  We attended tomato tastings at a local hobby farm.  We deliberately grew every color of tomato available to see how they tasted.  So, you can see why I consider myself somewhat of a tomato expert.  Here are a few of the things I learned along the way.

1.  Heirloom tomatoes taste best.  They look funny, they're fussy to grow, and they don't transport well so you'll only find them at local farmers markets.  But the taste is far superior to the nice round, red tomatoes that were engineered to look good and transport over distances.  Be aware that not all tomatoes at a farmers market are heirlooms.  Heirlooms are almost always labeled as such and have funny names like Green Zebra and Mortgage Lifter. If in doubt, ask.  They're probably going to be more expensive than non-heirloom varieties because they're not nearly as prolific (one heirloom vine may produce 5-6 tomatoes compared to 20-30 on a normal tomato plant) but they're SO worth it.


2.  The darker the heirloom tomato, the better the taste.  Green, orange, pink, yellow and striped tomatoes look cool but they don't have much taste.  Deep red and black tomatoes taste best.  (Black tomatoes aren't really black but they're darker than red tomatoes - see below).


3.  Heirloom tomatoes need to be eaten as soon as they're ripe because they can over-ripen quickly.  By the way, did you know that you should never refrigerate a tomato?  It ruins the taste and texture.  That goes for any tomatoes, not just heirlooms.

4.  The reason why a lot of recipes specify Roma tomatoes is beause they have less water/seeds and more meat than regular tomatoes so they aren't as watery in a sauce or salsa.  But they don't have the best flavor for eating raw.

So what are the very best tomato varieties in terms of taste?  In my humble opinion, three stand out.  Two black tomato varieties - Purple Cherokee and Black Russian - are excellent.  I think the picture above was a Black Russian I found last year at the farmers market.  But the holy grail for many tomato fanatics (including me) is Brandywine -  a very large, deep red, lumpy variety that's quite difficult to grow and just about the least prolific variety that exists.  I've always had fond memories of fresh tomatoes that a neighbor used to bring over when I was a kid.  The taste seemed so spectacular in my memory compared to anything I've had since then, that I wondered if I was remembering it wrong.  Then we grew Brandywine and with the first bite I knew it was the exact same taste as in my childhood.  I guess that food memories can lie dormant for a long time and then be recalled with clarity, much like aromas or music, when you encounter them again. 

Brandywine

If you're at a farmers market and happen to see any of these three varieties, buy them immediately and go straight home and eat them.  These are not the type of tomatoes you make into salsa or spaghetti sauce, these are premium eating tomatoes.  Or put them on a sandwich.  How's that for a segue?

Tomato olive melts are a lot like tuna melts but with olive spread instead of tuna.  This is one of my oldest recipes (I have no idea where I found it) and it was originally called "Crostini" and positioned as an appetizer.  The crunchy toasted bread contrasts with the rich olive spread, oozy cheese, and fresh tomatoes to make a classic combination.  We liked them so much that we decided they could be a light meal - just add a green salad on the side.  Or add an egg on the top and they would make a fabulous breakfast.  If you wanted to serve them as an appetizer just use smaller bread or cut them in half.  Any way you serve them, they're absolutely delicious and simple enough that each element really stands out, which is why they need the best tomatoes you can find. 

One last thought about olive spread.  The original recipe called it "olivada".  I've also seen it labeled "bruschetta", "olive pate", and "tapenade".  Basically it's finely chopped kalamata olives with olive oil and a little vinegar.  You can also find green olive or even artichoke varieties.  They're in jars in the olive section of your store.


* * click here for a printable recipe * *

Tomato Olive Melts
Makes 16 pieces

16 slices ½” thick Italian bread
¼ cup olive oil
1/3 black olive tapenade (paste)
½ lb. fresh mozzarella cheese, cut into 16 ¼” thick slices
½ lb. fresh tomatoes, cut into 16 ¼” slices
Salt and pepper


Preheat the oven to 400d. Brush one side of the bread slices with some of the olive oil and arrange on a baking sheet oiled side up. Bake until lightly browned and crusty, about 4 minutes.

Spread the olive tapenade on each toast, cover each with a slice of mozzarella and top with a slice of tomato. Brush the tomatoes with the remaining olive oil and sprinkle with salt and pepper. Bake until the cheese is melted, about 8 to 10 minutes. Serve at once.


Friday, April 6, 2012

In Praise of Asparagus


Asparagus is such a pretty vegetable, not to mention healthy - it contains antioxidants and anti-inflammatories as well as folate (heart health) and vitamin C.  Plus it's delicious!  Fresh local asparagus is one of the first signs of spring but you can also find it almost year-round in the grocery store.  Sometimes the spears are really thick (better for roasting) and sometimes they're really thin (better for stir fries) but for an asparagus tart you want spears that are medium-sized so they don't turn to mush during the baking period and are cooked to crisp-tenderness.

This tart is really easy and fast to assemble and would make a great brunch or lunch entree, a wonderful first course for a dinner party, or even a light vegetarian dinner with a salad.

Although my asparagus was beautiful, it wanted to curve for some reason.  I optimistically thought that I could talk it into straightening out by wrapping it tightly in paper towels and laying it flat in the refrigerator.  Right.  Anyway, I guess it's a matter of aesthetics whether you prefer your tart to have straight asparagus or curved asparagus.  Or maybe you won't have a choice, like me.  Either way, if you're a fan of asparagus you have to give this a try!


* * click here for a printable Asparagus Tart recipe * *


Asparagus Tart
Serves 4 (entrée) or 6 (first course)

1 sheet of frozen puff pastry
1 ½ cups shredded cheese (gruyere and mozzarella mixed)
2 tablespoons Dijon mustard
1 lb asparagus
1 tablespoon olive oil
Salt and pepper

Thaw puff pastry according to package directions. Preheat the oven to 400 degrees.

Roll the puff pastry to a 10” by 12” rectangle and place on a baking sheet. Pierce the dough all over with a fork.


Bake until golden brown, about 15 minutes, then remove and let cool slightly. Brush the crust with mustard and sprinkle evenly with cheese, leaving a 1" edge on all sides.

Cut the woody ends off the asparagus. Tightly line the crust with asparagus spears, alternating ends and tips and cutting to fit where needed. Brush with olive oil and sprinkle with salt and pepper. Bake 20 minutes until the crust is well-browned and the asparagus is tender. Serve warm or at room temperature, cut into squares.