Showing posts with label low calorie. Show all posts

Friday, August 11, 2017

Chicken Paillards

Last Year's Post:  Spanish Omelet
Two Years Ago:   Cold Sesame Noodles with Cucumber

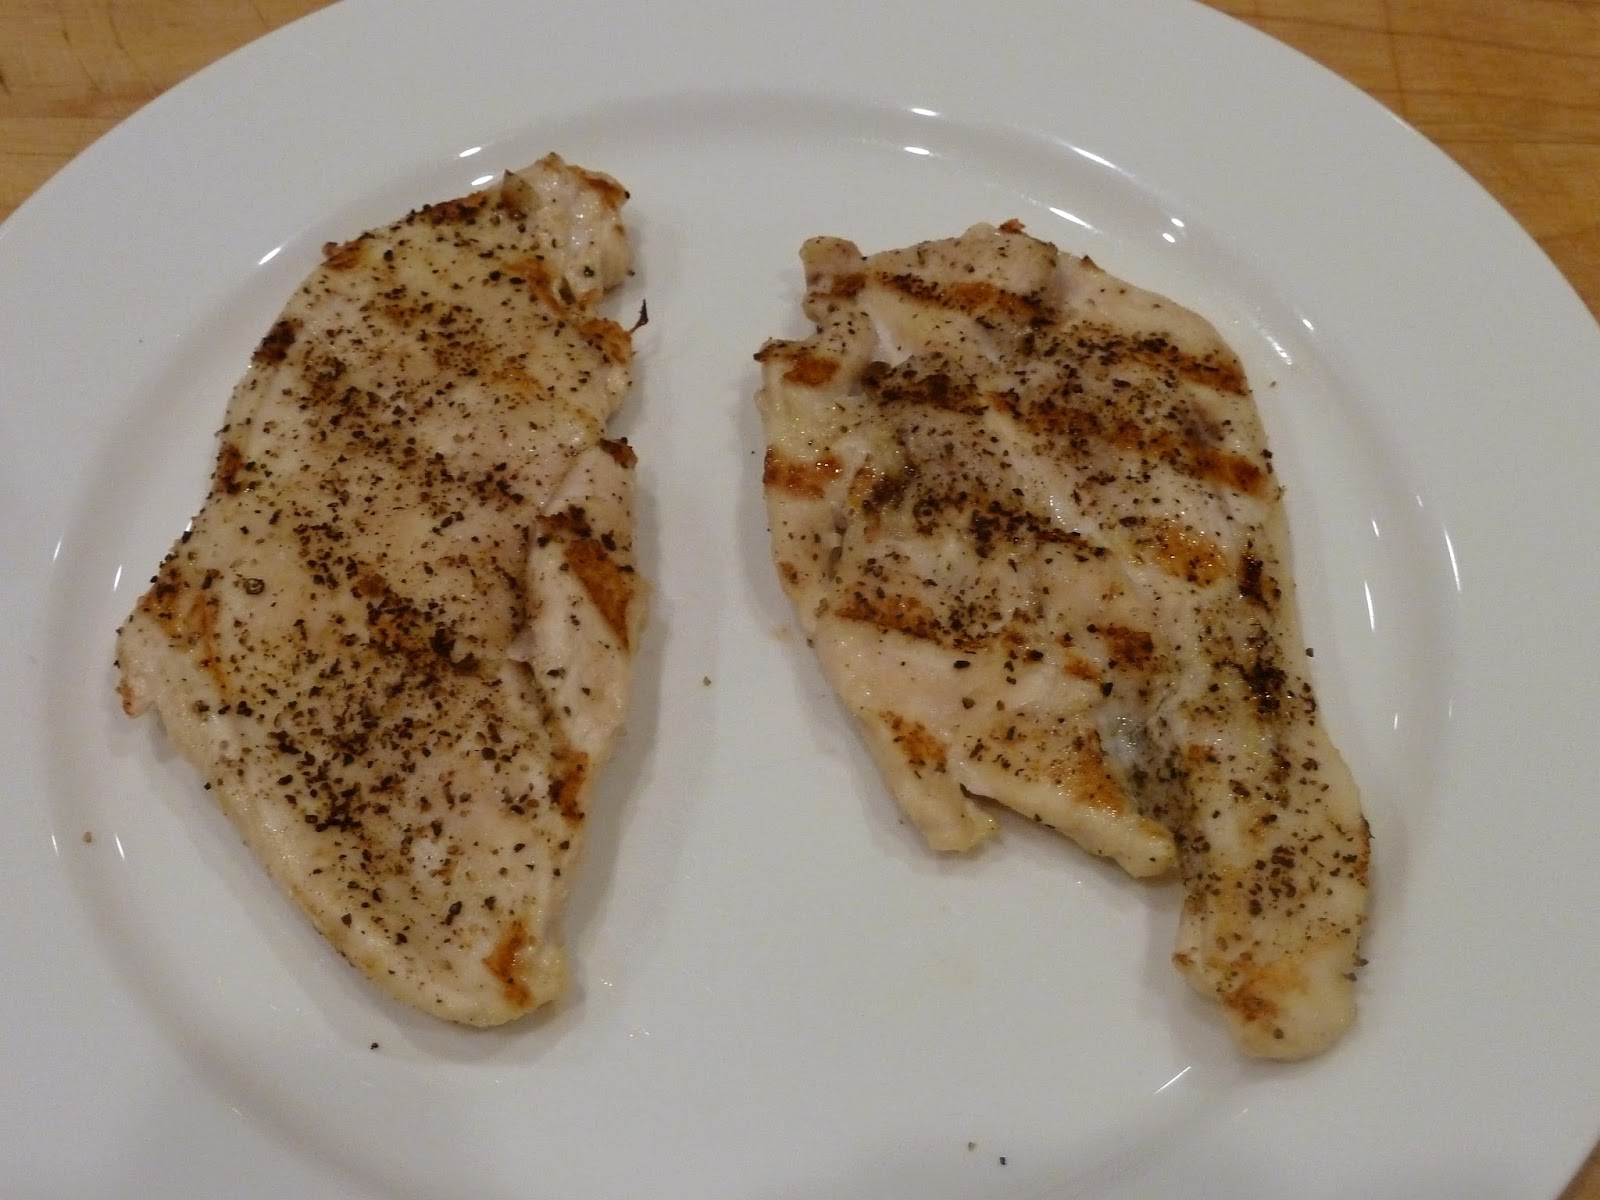
Paillard (pie-yar) is just a fancy term for a chicken or veal cutlet that's been pounded until it's thin and then grilled or sauted.  It's often cooked in a skillet with the pan drippings used to make a sauce, but I like this particular recipe because it's healthier - the additional flavor comes from seasonings, greens and a mustardy vinaigrette instead of a butter sauce.  It's a very quick, elegant and healthy weeknight dinner.

My inspiration for making it this week was the container of baby kale that I found at the grocery store.  Baby kale?  Totally cute, ridiculously healthy, tender and delicious.  If you can find it, try it, but if you can't, use arugula for a similar tender-yet-slightly-bitter taste.


All you have to do is toast some nuts, gently pound the chicken, make the vinaigrette, cook the chicken for about 4 minutes, and toss the greens.  I think it took less than 30 minutes from start to finish.


One last note about pine nuts:  I added them here because I thought they would go perfectly, and they did.  However, there must be a worldwide pine nut shortage because they're expensive and hard to find at the moment, so feel free to substitute toasted almonds or walnuts.


print
Chicken Paillards
Serves 4

2 large or 4 small boneless skinless chicken breast halves
3 tablespoons olive oil, divided
Salt and freshly ground black pepper
Garlic powder
Grated zest and juice of ½ lemon
½ teaspoon grainy mustard
8 cups baby kale, baby arugula, or mixed greens
Shaved parmesan cheese
½ cup toasted pine nuts


To make the dressing, whisk the lemon zest and juice, mustard, and 2 tablespoons olive oil in a bowl until combined (or shake in a small jar).  Season with salt and pepper to taste; set aside.

Preheat a grill pan, outdoor grill, or large nonstick pan to medium high.

If using large chicken breasts, cut each in half horizontally to make two cutlets.  Place the chicken breasts between two pieces of plastic wrap and pound gently using a meat hammer until each is an even thickness and quite thin – about ¼”.  Remove the chicken pieces from the plastic and drizzle them with 1 tablespoon of olive oil, massaging it into both sides with your hands.  Sprinkle both sides with salt, pepper and garlic powder.

If using a nonstick pan, coat lightly with oil.  Grill or sauté the chicken pieces for 2-3 minutes per side until cooked through.  Place on individual plates


Combine the greens with just enough dressing to coat lightly, then mound on top of the chicken.  Top with parmesan shavings, toasted pine nuts and additional freshly ground black pepper.

Saturday, January 21, 2017

Skinny Chicken Caesar Salad

Last Year's Post: Shrimp and Bacon Ramen
Two Years Ago:  Eggplant and Rice Parmigiana

Everybody loves chicken Caesar salad, don't they?  The only part that's not to love is the fat and calories in a classic Caesar dressing that's typically made with lots of oil and raw egg yolks.  A slightly less authentic version uses lots of mayonnaise which gets rid of the ick factor of raw egg yolks but does nothing to help the fat and calories.  This version substitutes Greek yogurt for the oil and/or mayo.  It doesn't taste exactly like the classic version, but it's very close and very good and very much better for you.

The other way to elevate a chicken Caesar salad beyond the typical bag of salad at the grocery store is to use impeccably fresh hearts of Romaine (they tend to dry out when they're pre-chopped in the bag) and make homemade crispy bread crumbs instead of those big, hard croutons.  Add in some shaved Parmesan and you have a Caesar salad worthy of a restaurant, not a bag.


Anchovies are an important part of Caesar dressing - they give it umami, which is a nice savory taste but not at all fishy.  Even so, a tin of oily smelly fish can be off-putting, and heaven forbid your kids catch sight (or smell) of them.  The solution is to buy a tube of anchovy paste, which you'll find near canned tuna and other canned fish.  The paste isn't oily or smelly and lasts a long time in the refrigerator.  Don't tell your family, and they'll never even know they're in there.


print
Skinny Chicken Caesar Salad
Serves 4

For the dressing:
2/3 cup plain Greek yogurt
1 tablespoon olive oil
1 garlic clove, grated
1 ½ teaspoons anchovy paste
Juice of ½ lemon
3 tablespoons freshly grated Parmesan
1 tablespoon water
Salt and freshly ground pepper

For the salad:
2 boneless skinless chicken breasts
2 tablespoons olive oil, divided
Salt and freshly ground pepper
3 hearts of Romaine lettuce
1 slice of stale bread (or leave a piece of fresh bread out on the counter for an hour to dry out)
½ cup shaved Parmesan

To make the dressing, combine all ingredients except salt and pepper in a bowl and whisk until well combined.  Add salt and pepper to taste (remember that Parmesan is salty so go easy on the salt).  Set aside.

Rub the chicken breasts with 1 tablespoon olive oil and sprinkle with salt and pepper.  Cook on a grill, in a pan, or in the oven until golden and fully cooked through.  Set aside to cool, then thinly slice crosswise.

Cut the end off each Romaine heart, then cut crosswise at 1” intervals.  Thoroughly wash and then drain the lettuce; pat dry.

Tear the piece of bread into large pieces, then pulse in a small food processor into coarse crumbs.  In a medium skillet, add the remaining 1 tablespoon olive oil and the crumbs, tossing to coat all the crumbs evenly.  Cook for 3-4 minutes over medium heat, watching closely and stirring often, until golden brown.  Remove from heat and place crumbs in a small bowl.  Add salt and pepper to taste and toss to combine.

If the dressing has been standing for a while, it will probably thicken up.  Add an additional tablespoon of water to thin to desired consistency. 

To plate the salad, toss the greens with just enough dressing to coat and divide among the plates.  Top with chicken slices, shaved Parmesan, and toasted bread crumbs.  Pass additional dressing on the side.  (Alternately, serve the dressing on the side with each salad.)


Friday, November 25, 2016

Three Sisters Quesadilla

Last Year's Post: Dried Fruit Sauce (Mincemeat Sauce)
Two Years Ago:  Couscous with Turkey or Chicken

Time for a change of pace (and effort) after the big meal.  "Three Sisters" is an agricultural term for three of the main crops of Native America:  squash, corn and beans.  They historically benefit from being planted together - the corn provides a stalk for the beans to climb, the beans provide nitrogen for the other plants, and the squash spreads along the ground providing shade and preventing weeds.   I read somewhere that plants that are grown together usually also taste good together.  I don't know why that would be true but it's definitely true in this case, making an excellent vegetarian base for empanadas, soups, stews, tarts, or a quesadilla.


As written, this quesadilla is mild yet flavorful and filling.  If you want, you could increase the spice level in one of several ways:  use a hotter chili powder, substitute Pepper Jack for the cheddar cheese, add jalapenos, or use a spicy salsa.  Either way it's a fast, delicious and healthy option for meatless Mondays or Black Fridays.

print
Three Sisters Quesadilla
Serves 4

1 cup dried black beans (or 1 15 oz can black beans)
1  teaspoon smoked Spanish paprika or chili powder
½ teaspoon ground cumin
salt
2 tablespoons olive oil, divided
1 zucchini or other summer squash, cut lengthwise into quarters and thinly sliced
pinch of red pepper flakes
1 ear of grilled corn, kernels cut from the cob (or 1 cup frozen corn)
cilantro leaves to taste
4 medium flour tortillas
8 ounces sharp cheddar cheese, shredded
Greek yogurt or sour cream, for serving
Salsa
Sliced avocado, optional
Lime wedges, optional


Cook the beans, if starting with dried beans. If using canned beans, drain, rinse and drain again.  Toss with smoked paprika or chili powder and cumin.  Season to taste with salt.

Add one tablespoon of olive oil to a nonstick pan and heat on medium-high. Add the squash pieces and sprinkle with the salt, then cook, stirring and tossing until the pieces go limp and start to turn golden. Sprinkle with the pepper flakes and keep cooking until the squash has released most of its water and has caramelized with some edges becoming crispy and brown.  Add the corn to the pan and for an additional minute.  Remove from pan to a bowl but do not clean the pan.

To assemble the quesadillas, lay out one tortilla, and sprinkle one half with cheese. On top of the cheese, add beans, corn, and squash to taste along with cilantro leaves, then sprinkle a small amount of cheese over the vegetables.    Fold the other half over the filling.

Heat the remaining 1 tablespoon olive oil in the same pan. Place one quesadilla into the pan and cook until the edges turn brown–about 1 minute, then carefully flip the quesadilla and cook until the underside is golden brown and the edges are crispy, about another minute. Repeat with the other quesadillas.

Cut into wedges and serve with salsa, yogurt or sour cream, optional avocado and lime wedges.


Friday, April 10, 2015

Korean Chicken Lettuce Wraps

Last Year's Post: Mixed Berry Jalousie
Two Years Ago:  Joanne Chang's Lemon Bars

At one point in my career I reported to a manager who liked to take job applicants to a restaurant for their interview.  Any restaurant would do as long as the food was particularly awkward or messy to eat - spaghetti or tacos, for example.  He claimed he liked to see how the applicants handled a stressful situation and whether they could maintain poise.  I think he just enjoyed watching those fresh young hopefuls struggle not to get spaghetti sauce all over their brand new suits.

Lettuce wraps would have qualified for his list.  They're right up there with tacos in terms of potential for messiness, but they're just as fun as tacos and a whole lot more healthy.  I've been on a major Korean food jag lately so I already had Gochujang paste sitting in my refrigerator for these Korean chicken wraps, but if you aren't familiar with it, you can find it in Asian markets and it looks like this.


It's one of those Korean food staples so if you like Korean food you'll find plenty of uses for it,  like these Korean sliders.  If you really don't want to buy it, you could substitute some other type of hot sauce to approximate the taste.  The overall flavor profile of the marinade should be slightly sweet, moderately spicy, somewhat salty from the soy sauce, and garlicky - classic bold Korean flavors.  The marinade will taste strong on its own but will be diluted somewhat when it's cooked on the chicken and then again when the other ingredients are added to the wraps.

Other than the marinated and cooked chicken, the wraps contain high-fiber brown rice and veggies so they're really good for you.  If you marinate the chicken and cook the rice in advance, they'll take all of ten minutes to make - just slice up the veggies while the chicken cooks.  They're equally good when the rice and chicken are hot, room temperature, or cold and make a great lunch for work the next day.  And they'll provide your co-workers with amusement at the lunch table as they watch you eat.


print recipe
Korean Chicken Lettuce Wraps
Serves 4

3 tablespoons low-sodium soy sauce plus more for thinning
2 tablespoons dark brown sugar
1 ½ tablespoons dark sesame oil
1 tablespoon Gochujang (Korean hot pepper paste)
1 tablespoon minced fresh garlic (about 3 large cloves)
¼ teaspoon black pepper
1 pound skinless boneless chicken breast halves, thinly sliced
1 cup uncooked brown rice
1 tablespoon canola oil
1 tablespoon toasted sesame seeds
12 Bibb lettuce leaves
24 English cucumber slices
4 radishes, sliced
4 green onions, diagonally sliced

Whisk the first six ingredients together in a bowl until well combined.  Reserve 3 tablespoons of the mixture in a small bowl; thin with a little additional soy sauce (if desired) and set aside.  Pour the remaining mixture into a large zip-top plastic bag and add the chicken slices; seal and toss around to coat.  Refrigerate for at least 2 hours and up to 24 hours.

Cook rice according to package directions.

Remove chicken from bag and discard marinade.  Heat a large skillet over medium heat; add oil to pan and swirl to coat.  Add chicken and coat approximately 2 minutes per side until golden and fully cooked. Sprinkle sesame seeds over chicken. 

To assemble, place 2-3 tablespoons of rice in each lettuce leaf; top with chicken, cucumber, radishes, and green onions.  Serve with reserved soy sauce mix on the side for drizzling.


Friday, January 2, 2015

Miso-Glazed Scallops with Quinoa and Grilled Pineapple

Last Year's Post: Smashed Potatoes
Two Years Ago:  Shrimp, Grapefruit and Avocado Salad

Time for a confession - I totally stole the concept for this recipe from the Waldorf-Astoria Spa at The Boulders Resort in Scottsdale.  Not the recipe, mind you, but the concept.  I was checking out spas for an upcoming girls' weekend (tough duty) and was cruising by the spa restaurant, so I stopped to read the menu.  One of entrees was miso-glazed scallops with quinoa, pineapple, tomatillo salsa and prickly pear glaze.  I wasn't too sure about tomatillo salsa with miso scallops but liked the concept.

So here we are.  I pulled together components of several miso-based scallop recipes and added a few ingredients of my own to the quinoa.  I say this just in case Waldorf-Astoria employs a word-recognition internet-search service that will immediately flag this post because I would hate to get a cease-and-desist letter in the mail, although I'm sure it would be properly monogrammed on heavy cream paper with a nice gilt edge.

There are a few ingredients that you might not be familiar with:  white miso paste, mirin, and quinoa (keen-wah).


Miso is a paste made from fermented soybeans and is a common seasoning in Japanese cuisine.  It comes in different varieties (white, red, mixed) and is typically savory and salty.  You'll find it in upscale grocers or Asian markets, usually in a tub or plastic bag that needs to be refrigerated after opening.  Mirin is a sweet cooking rice seasoning and can be found in the Asian foods section of most grocers.  Quinoa is a grain that comes in different colors - usually white or red - and can be found in upscale grocers or natural food stores.  I like red quinoa in this recipe because of the color, but if you can't find it the white variety will taste the same.

(If you prefer, you could use shrimp instead of scallops, and if you don't feel like buying miso you could use any soy sauce-based vinaigrette.  It won't taste the same, but it'll still be good.)

The miso glaze adds great flavor to the scallops while the quinoa adds nuttiness and the grilled pineapple brings sweetness and juiciness to the party - it's really a great combination.  When you consider that this is also a spa dish and therefore healthy and low calorie, you have to admit those Waldorf people know what they're doing.

printable recipe
Miso-Glazed Scallops with Quinoa and Grilled Pineapple
Serves 4

4 (1/2” thick) pineapple slices, outer skin removed
Canola oil, for brushing
3 tablespoons white miso paste
2 tablespoons mirin
2 tablespoons rice vinegar
2 tablespoons canola oil
1 teaspoon minced fresh ginger
1 teaspoon minced garlic
12 medium sea scallops
2 tablespoons olive oil, divided
1 cup uncooked quinoa (red preferred)
3.5 ounce fresh shiitake mushrooms, cleaned, stems removed and sliced
1/3 cup slivered almonds, toasted
3 green onions, white and green parts sliced


Preheat a grill or grill pan to high heat.  Brush the pineapple slices with canola oil and grill for about 3 minutes per side until nice grill marks appear.  Remove and set aside.

Toast the dry quinoa in a dry pan for a few minutes to develop a toasty flavor, then combine with 2 cups of water in a medium saucepan.  Bring to a boil, then reduce heat and cover.  Simmer for 15 minutes. 

While the quinoa cooks, heat 1 tablespoon of oil in a medium skillet and sauté the shiitakes for a few minutes until beginning to brown.  Set aside. 

In a medium bowl, whisk together the miso, mirin, vinegar, 2 tablespoons canola oil, ginger and garlic.  Rinse and pat dry the scallops, then add to the marinade and turn to coat.  Let marinate for 5 minutes (scallops will begin to break down if left in any longer).  Heat the remaining 1 tablespoon of olive oil in a large skillet over medium-high heat.  Add the scallops and cook until golden brown, about 3 minutes per side depending on thickness.


Combine the quinoa, shiitakes, almonds, and half the green onions; season to taste with salt and pepper.  To serve, place one pineapple ring on each plate; top with quinoa mixture, 3 scallops, and remaining green onions.

Friday, August 23, 2013

Pinchos Morunos

Last Year's Post: Gazpacho
Two Years Ago:  Pork with Thai Peanut Sauce

Color is Important
I grew up in an era where mothers regarded cooking as a necessity and their primary goal was to get food on the table that their family would eat.  Much of that food was beige.  Presentation and garnish were not concepts most moms thought about.  But times have changed, and cooking is now a conscious choice rather than a necessity since there are so many prepared foods and casual restaurants that are available.  There are many reasons to make the choice to cook - including good health, nutrition, dietary needs, or just plain fun - but as long as you made the effort to cook your food, why not make it look pretty?

Color plays a big part in making food pretty, which is why I chose multi-colored mini-peppers for this dish.  I could have used one big red pepper which would have added some color, but the multi-colored peppers are even better.


I've posted recipes in the past that were relatively colorless (Italian Sausage and Wild Mushroom Risotto ) because they are just that good, but it's a lot more impressive when they have all kinds of vibrant colors ( Seafood Cobb Salad ).  In particular, meat tends to be fairly brown so think about livening it up with a colorful sauce, relish, or accompanying vegetables.  Even a fresh parsley garnish on top of soup or rice helps to add color.  I once read about a chef who said he garnishes every meal he makes even if it's just for himself alone, because he felt it made that much difference to the overall eating experience.

Pinchos Morunos is Spanish in origin and is commonly found in tapas bars.  This particular recipe version converts it into a main dish by adding onion and peppers, but the pork by itself on small skewers would be a classic addition to a tapas party served with just a drizzle of lemon olive oil.  What makes it Spanish is the combination of spices on the pork, in particular the saffron.  I love the distinctive taste of saffron.  The pork is spiced but not very spicy in terms of heat, and it's what makes this dish special.  The spice mix colors the pork as it marinates before grilling.


I decided to halve the small peppers so they would fit better on the skewers plus it made them easier to seed, but I decided to leave the stems on for presentation and color.


I think I've mentioned somewhere previously that it's a good idea to separate your meats and vegetables on different skewers because they have different cook times.  If you alternate everything on each skewer your cook times become a compromise between ingredients, although for some reason that's the way skewers are most often shown.  In this case the meat was going to cook faster than the vegetables but the peppers and onions needed about the same amount of time.


One last note - although the recipe calls for marinating the meat for a few hours, it's very flexible.  I've grilled it without any marinating time at all, or you could let it marinate overnight so don't let that stop you from using this as a weeknight meal.  Served with rice or couscous, it's a fast, delicious and very healthy meal.


printable recipe
Pinchos Morunos
Serves 4

¼ cup chopped fresh parsley
1 tablespoon sweet paprika
2 tablespoons olive oil
1 teaspoon dried oregano
1 teaspoon ground cumin
1 teaspoon ground coriander
¾ teaspoon salt
¼ teaspoon saffron threads, crushed
¼ teaspoon ground red pepper
2 garlic cloves, minced
1 (1 pound) pork tenderloin, trimmed and cut into 1” cubes
1 red onion, cut into 6 wedges
8 multi-colored mini-peppers, cut in half lengthwise and seeded
8 (12”) wooden skewers
Cooking spray

Combine the first 10 ingredients in a zip top bag and toss to distribute spices.  Add the pork tenderloin cubes and toss to coat evenly.  Refrigerate for 1-2 hours.

Soak skewers in a water for 30 minutes prior to grilling to prevent burning.

Prepare a grill for direct cooking over medium heat. 

Separate each onion wedge into two pieces.  Thread meat pieces on four skewers; alternate onion and pepper pieces on the other four.

Grill over medium heat for 5 minutes per side for the meat, and 6 minutes per side for the vegetables, flipping once.


Friday, June 14, 2013

Lemony Chicken Saltimbocca

Last Year's Post: Hoisin Burgers with Wasabi Slaw

I enjoy cooking and trying new ingredients and techniques so much that I actually feel sort of cheated if we're having a dinner that we just pulled out of the freezer to reheat.  I mean, what fun is that?  Of course, it's fabulous if you've had a really bad day but hopefully you don't have too many of those.  On the other hand, it's not a good idea to plan a week of meals that all take hours to prepare.  You have to have a break sometime.  This recipe is the best of all worlds - beautiful presentation, delicious flavor, an interesting technique yet fast to make, and low in calories.  It's definitely company-worthy, but easy enough to make any day of the week.  Really, what's not to like?  Moist and juicy chicken, woodsy sage and salty prosciutto covered in a velvety lemon sauce.  Yum.  Saltimbocca (meaning to jump in the mouth) is an Italian dish traditionally made with veal, sage and prosciutto but I love this version, adapted from Cooking Light magazine, even more.

It looks fancy but it's actually very easy.  Start with chicken cutlets, which are just thinner versions of chicken breasts.  You can sometimes find them in the store but it's just as easy to make your own by slicing a boneless skinless chicken breast in half horizontally.


OK,  I didn't do the greatest job of cutting it into two equal-sized cutlets but I'm sure you can do better.  Then you artistically place three fresh sage leaves on each cutlet and wrap with a thin slice or two of prosciutto, partially covering the leaves but letting some stick out. (That was the technique part in case you were wondering.)


Before sauteing  the chicken, heat a pot of water and start cooking some angel hair pasta.  The chicken cutlets cook for just a few minutes because they're thin.


Make a quick pan sauce from lemon juice, chicken broth, and a little cornstarch to thicken, then toss the  pasta with a little garlic and olive oil and you're good to go.  The entire meal takes maybe 30 minutes to make and has only about 400 calories but it tastes like a million bucks.


printable recipe
Lemony Chicken Saltimbocca
Serves 4

For the chicken:
2 (8 oz) boneless skinless chicken breasts, cut in half horizontally to make 4 (4 oz) chicken cutlets
1/8 teaspoon salt
12 fresh sage leaves
2 oz very thinly sliced prosciutto, cut into 8 thin strips
4 teaspoons olive oil, divided
2/3 cup low-sodium chicken broth
½ cup fresh lemon juice
1 teaspoon cornstarch
lemon wedges for garnish, optional

For the pasta:
6 oz angel hair pasta
2 teaspoons olive oil
1 small garlic clove, minced


Bring a large pot of water to a boil and cook pasta according to directions.

Meanwhile, sprinkle the chicken evenly with salt.  Place 3 sage leaves on each cutlet; wrap 2 prosciutto slices around each cutlet, securing sage leaves in place.  Heat a large skillet over medium heat and add 1 tablespoon oil to pan, swirling to coat.  Add chicken to pan; cook for 2-3 minutes on each side or until done.  Remove chicken from pan and keep warm.

Combine broth, lemon juice and cornstarch in a small bowl while the chicken is cooking; stir with a whisk until smooth.  When chicken is removed from pan, add cornstarch mixture and the remaining 1 teaspoon olive oil to pan; bring to a boil stirring constantly.  Cook for 1 minute or until slightly thickened, stirring constantly with a whisk. 

Drain the pasta and toss with 2 teaspoons olive oil and garlic.  Serve the chicken with the sauce spooned over and pasta along side.  Garnish with lemon wedges, optional.