Showing posts with label Spanish. Show all posts

Friday, February 10, 2017

Shrimp and Chorizo Paella

Last Year's Post: Vietnamese Shrimp Baguette
Two Years Ago:   Coconut-Marinated Pork Tenderloin with Pineapple Rice

There's a gourmet cooking store in Minneapolis called Kitchen Window.  They used to have a holiday shopping event for their regular customers where they served food as everyone shopped.  One year they served this paella which had recently won a local food festival contest, and they had me at one bite.  What makes this paella so delicious is not only the combination of shrimp and chorizo, but the unusual addition of sun-dried tomatoes and artichokes.  The oil from both are used to provide additional flavor to the rice.  It's actually the best paella I've ever tasted, and it's not that hard to make at home.

Just note that if you want to have it for a party you need to invest in a paella pan large enough to hold all the ingredients.  If you cut the recipe in half, it'll fit in a large saute pan instead.  You can use the paella pan either on your cook-top or grill and it's great fun at a party.  If you really want to go all out and impress a bigger group, you can sometimes find a really giant paella pan to rent.

The only caution here is to be sure to understand the difference between Spanish and Mexican chorizo.  Mexican chorizo is a fresh bulk sausage; Spanish chorizo is a dry-cured sausage much like pepperoni.  You want Spanish chorizo for this dish.


print
Shrimp and Chorizo Paella
Serves 8

Note: if the recipe is cut in half it may be prepared in a large sauté pan.

1 (7 oz) jar grilled artichoke hearts packed in oil.  
1 (3 oz) jar sun-dried tomatoes packed in oil
1 lb extra-large shrimp
1 large onion, medium dice
5 cloves garlic, minced
4 oz Spanish hot chorizo (dry cured), paper removed and thinly sliced
2 cups paella rice
4 cups chicken stock
1 teaspoon Spanish paprika (pimento) – hot, sweet or mixed
1 teaspoon turmeric
¼ teaspoon saffron
¼ teaspoon dried oregano
Salt and freshly ground pepper

Special equipment:  8-person paella pan

Drain the artichoke hearts and sun-dried tomatoes, reserving the oil from each jar separately.  Coarsely chop the tomatoes to make approximately one cup.

Add turmeric, saffron, pimento, oregano and a small amount of salt and pepper to the chicken stock and set aside.

To prepare the shrimp, peel and devein, then remove the tail segment.  Cut each shrimp in half lengthwise (along the curve).

Add ¼ cup reserved artichoke oil and ¼ cup reserved tomato oil to the paella pan over medium heat. add the shrimp and sauté for about 1-2 minutes per side until curled, opaque, and almost cooked through.  Remove and set aside.

To the same pan, add the onion and sauté until transparent, then add the garlic and cook for 30-60 seconds.  Add the chorizo and cook for about 5 minutes.  Add the rice and sauté for 5 minutes.

Pour in the stock that has been combined with the spices along with the sun-dried tomatoes.  Stir once, but do not stir any more.  (This is important to build up the bottom crust which is signature to paella.)

Cook for 15 minutes, then add the artichokes and shrimp, stirring lightly into the surface.  Avoid scraping the bottom of the pan.

Cook for 5-10 more minutes until the liquid is absorbed and the rice is tender.  Taste and adjust seasonings before serving.  Be sure to serve each person some of the crust from the bottom of the pan.


Friday, August 12, 2016

Spanish Omelet

Last year's post:  Cold Sesame Noodles with Cucumber
Two Years Ago:   Empanadas with Chicken, Corn and Zucchini

Although most people in the United States think of omelets as breakfast food, the Spanish omelet (or Spanish tortilla, not to be confused with Mexican tortillas) is a happy hour or dinner entree.  This omelet is one of the most common tapas items, found all over Spain.  A Spanish omelet closely resembles a frittata because it's cooked in a pan and then cut into wedges to serve.  Although it's typically fried in a fair amount of olive oil, then flipped and fried on the other side, this recipe is a lighter and simpler version.  It uses only the fat from the chorizo, and there's no flipping involved - it bakes in the oven, which makes it puff up beautifully.  It makes an easy, fast and delicious dinner.

One of my good friends in college spent a year studying in Spain.  When she returned, she made a traditional Spanish omelet for her buddies so we could try it out.  She fried potato slices and onions in a lot of olive oil, then added the eggs and let the bottom cook until brown.  She put an inverted plate over the frying pan with her hand on top, flipped the pan over so the omelet was on the plate, then slid the omelet back into the pan to brown the other side.  Impressive, but a little scary unless you don't care about your kitchen, which we didn't because we were in a college apartment, after all.

Anyway, as I mentioned this recipe has chorizo in addition to the potatoes, which really revs up the flavor. Make sure you buy Spanish chorizo - not Mexican chorizo - and take the paper casing off before slicing. If you do happen to buy Mexican chorizo by mistake (or can't find Spanish chorizo), just cook it and crumble it like Italian sausage and use it that way.  It'll taste a little different but will still be very good.

Shallots (a mild onion) are added to a parsley salad that goes on top of the omelet when served.  The lemon, shallots and parsley lend bright and tart notes that balance the omelet beautifully.


A brief discussion about pans - this recipe calls for a 7 or 8" nonstick ovenproof pan (or a larger pan if you're going to double the recipe to serve four).  I bought a cast iron skillet a few years ago to make cornbread, and it works perfectly for this recipe.  If you don't have one, consider buying one - they're cheap and they last forever.  Properly seasoned and cared for, they become perfectly non-stick.  All you have to do after making something is to rinse the pan with hot water (not soap) and scrub with a brush, then dry thoroughly and wipe with a drop of cooking oil.  I had absolutely no issue with taking the entire omelet out of the pan in one piece.  (Just don't use cooking spray, it becomes gummy and sticky and hard to remove.)

Spanish omelets are traditionally served either warm or at room temperature, so they're very versatile for parties (cut in small pieces) or family members who come home at different times.

printable recipe
Spanish Omelet
Serves 2

1 red potato, about 3-4” in diameter, scrubbed and cut into chunks
4 eggs
Salt and pepper
4 ounces Spanish chorizo, paper casing removed and sliced
2 sprigs fresh rosemary, leaves picked
1 shallot, peeled and very finely sliced
1 lemon, juiced
2 tablespoons olive oil
1 bunch fresh flat-leaf parsley, leaves picked

Preheat the oven to 500 degrees.

Put the potato chunks in a pan of boiling salted water and simmer until just cooked through but not falling apart, approximately 8 – 10 minutes.  Drain in a colander.  Beat the eggs with a fork in a mixing bowl, season with salt and pepper, and set aside.  Put the sliced shallot in a medium bowl with the lemon juice, some salt and pepper and the olive oil.  Stir and set aside for the shallots to soften while you make the omelet.

Heat a 7 or 8” nonstick (or cast iron) ovenproof frying pan over medium-high heat.  Add the chorizo slices and potatoes and cook until everything is lightly golden, 3-4 minutes.  Remove from the pan with a slotted spoon and set aside.  Sprinkle the rosemary leaves into the pan, then immediately pour on the egg mixture.  Add the chorizo and potatoes on top, spreading out evenly.  Place the pan in the preheated oven and bake until the omelet is puffed and golden, about 8 – 10 minutes.

Remove the omelet from the pan and cut into pieces.  Add the parsley to the shallots and toss to coat.  Serve the omelet with some of the parsley salad on top.

The omelet may be served warm or at room temperature.


Friday, August 8, 2014

Empanadas with Chicken, Corn and Zucchini

Last Year's Post: Tomato Crumble
Two Years Ago:  Summer Pasta Salad with Fresh Tuna

Empanadas are one of those foods found in many cultures and with many different names.  Basically they're baked or fried turnovers made with bread or pastry dough folded into crescent shapes that enclose a savory meat, cheese and/or vegetable filling. The name "empanada" is used in Spanish-speaking countries of Europe and South America as well as in the United States.  In South America they're very popular as street food, usually fried and eaten out of hand.

I wanted to post this recipe primarily because it's really, really good, but also because it's a baked version (good news), the dough turns out amazingly crisp and light (even better news), and you can freeze them for a really easy dinner during the week (best news).  If you make your own empanadas you can vary the fillings to your taste, and you can make them larger or smaller.  For example, this particular recipe makes ten medium empanadas, which will feed five people (two per person) for a meal with a salad or rice on the side.  One empanada would make a great lunch with some sour cream for dipping plus fruit and carrot sticks, which is what's nice about this particular size.  You could make larger empanadas if you want, or you could make smaller ones as appetizers for a party that would be great as a finger food dipped in salsa or sour cream.

Regarding the filling, I found a recipe for "Three Sisters" empanadas (the three sisters are corn, zucchini and black beans) and substituted some leftover grilled chicken for the black beans.


 If you want a vegetarian version, go with the beans.  I also used pepper jack cheese rather than cheddar, and substituted smoked paprika for chile powder.  All the variations are listed in the recipe below.  You can make the empanadas as mild or spicy as you want by varying the cheese and spices, and you could also add jalapenos for an extra kick.  The way I made them, they were mild but very flavorful which would be good if some of the people you're feeding don't like spice.  The spice-lovers could always use spicy salsa as a condiment to jazz them up.

In the interest of full disclosure, I should tell you that this is a somewhat fussy (read time-consuming) recipe.  First you make the dough - which by the way is fast and easy - and let it rest in the refrigerator for an hour.  While the dough rests, you roast the zucchini and corn and make the filling.


Then the fun begins - rolling out and filling 10 individual dough rounds (sorry no pictures of the process - I was covered in goo).  That's where it would be an advantage to make larger or smaller empanadas - there are simply fewer of the larger ones to roll out, and the smaller ones could be made by rolling out a big sheet of dough and using a cookie or biscuit cutter to cut small rounds.  I guess theoretically you could do that same thing with the 5-6" rounds for this recipe, but you would waste a fair amount of dough.  Whatever.  All I can tell you is that I would do it all over again in exactly the same way, which tells you how pleased I was with the results.  The empanadas are totally worth it, you just have to be in the right mood and know it's a two hour project.  (If you're not in the right mood, you could cheat and use refrigerated pie crusts, but the crispness of this dough makes it worth the effort.)


Three guesses as to which one I rolled out and filled first .  :-)  As I said, they freeze beautifully and can then be tossed in the oven frozen and allowed to bake until golden and hot for a really easy dinner.

Next week we're going to a new restaurant that specializes in Mexican seafood, and I noticed that they have empanadas on the menu with a filling of crab, chorizo, goat cheese and corn with a tomatillo verde sauce.  If they're as good as they sound, I'll try to re-create the recipe and post it.  I guess I couldn't have been too emotionally scarred from all that dough-rolling if I'm already contemplating the next batch.....


printable recipe
Empanadas with Chicken, Corn and Zucchini
Makes ten medium empanadas

For the dough:
2 ¼ cups all-purpose flour
1 ½ teaspoons salt
1 stick (1/2 cup) cold unsalted butter, cut into ½“ cubes
1 large egg
1/3 cup ice water
1 tablespoon distilled white vinegar

For the filling:
½ pound zucchini (2 medium), cut into ½“ cubes
1 cup corn kernels (from 1 medium ear) or 1 cup frozen kernels, thawed
2 tablespoons olive oil
Salt and freshly ground black pepper
¾ cup shredded cooked chicken (or ¾ cup canned black beans, rinsed and drained)
¾ cup shredded Pepper Jack cheese (or cheddar cheese)
½ cup thinly sliced green onions
3 tablespoons chopped fresh cilantro
2 tablespoons canned diced green chiles, drained
1 teaspoon ground cumin
¼ teaspoon smoked paprika (or chile powder)
Sour cream for serving, optional
Salsa for serving, optional

For the egg wash:
1 large egg, beaten
1 tablespoon water

To make the dough, combine the flour and salt in a food processor and pulse briefly.  Add the butter and pulse until the mixture resembles coarse meal with some small butter lumps, 6-8 times.  Beat together the egg, water and vinegar in a small bowl with a fork and add it to the flour mixture, pulsing a few times just until incorporated.  Turn the mixture out onto a lightly floured surface and gather together, then knead gently with the heel of your hand once or twice to bring the dough together.  Shape into a disk or rectangle and chill, wrapped in plastic wrap, for at least 1 hour.

To make the filling, first preheat the oven to 400d.  Line a large baking sheet with parchment paper.  Dump the zucchini and corn on the parchment, then drizzle with the olive oil and a few grinds of salt and black pepper.  Toss everything together with clean hands and spread out into a single layer.  Roast for 20-25 minutes until the zucchini are softened and slightly browned around the edges.  Transfer to a bowl.

Add the chicken (or beans), cheese, green onions, cilantro, chiles, cumin, and paprika (or chile powder) to the bowl and toss.

In a small bowl, prepare the egg wash by mixing together the beaten egg and water.

To assemble the empanadas, divide the dough into 10 equal portions (about 52 grams each).  Shape each portion into a ball and roll into a 5-6” circle about 1/8” thick on a cool, lightly-floured surface.  Working one at a time, moisten the edge of half the circle with egg wash.  Place a ¼ cup (packed) filling in the center of the circle.  Fold the side with the egg wash over the top of the filling to create a half-moon shape and crimp the edges to seal.  Place the empanada on a parchment-lined baking sheet, brush the top with egg wash, and repeat with the remaining dough and filling.  Slice a few small slits in the center of each empanada to help release steam while baking.

Bake at 400d for 22 to 30 minutes or until lightly browned.  If desired, turn on the broiler for a few seconds at the end until the empanadas are browned to your liking.  Serve with sour cream and salsa, optional.

To Freeze Empanadas:

Prepare the empanadas and freeze on a baking sheet or plate, then transfer to a zip-top bag or aluminum foil.  To bake, preheat the oven to 400d and bake on a parchment-lined pan for 30-35 minutes until golden brown and hot all the way through.  Do not thaw before baking.

Friday, August 23, 2013

Pinchos Morunos

Last Year's Post: Gazpacho
Two Years Ago:  Pork with Thai Peanut Sauce

Color is Important
I grew up in an era where mothers regarded cooking as a necessity and their primary goal was to get food on the table that their family would eat.  Much of that food was beige.  Presentation and garnish were not concepts most moms thought about.  But times have changed, and cooking is now a conscious choice rather than a necessity since there are so many prepared foods and casual restaurants that are available.  There are many reasons to make the choice to cook - including good health, nutrition, dietary needs, or just plain fun - but as long as you made the effort to cook your food, why not make it look pretty?

Color plays a big part in making food pretty, which is why I chose multi-colored mini-peppers for this dish.  I could have used one big red pepper which would have added some color, but the multi-colored peppers are even better.


I've posted recipes in the past that were relatively colorless (Italian Sausage and Wild Mushroom Risotto ) because they are just that good, but it's a lot more impressive when they have all kinds of vibrant colors ( Seafood Cobb Salad ).  In particular, meat tends to be fairly brown so think about livening it up with a colorful sauce, relish, or accompanying vegetables.  Even a fresh parsley garnish on top of soup or rice helps to add color.  I once read about a chef who said he garnishes every meal he makes even if it's just for himself alone, because he felt it made that much difference to the overall eating experience.

Pinchos Morunos is Spanish in origin and is commonly found in tapas bars.  This particular recipe version converts it into a main dish by adding onion and peppers, but the pork by itself on small skewers would be a classic addition to a tapas party served with just a drizzle of lemon olive oil.  What makes it Spanish is the combination of spices on the pork, in particular the saffron.  I love the distinctive taste of saffron.  The pork is spiced but not very spicy in terms of heat, and it's what makes this dish special.  The spice mix colors the pork as it marinates before grilling.


I decided to halve the small peppers so they would fit better on the skewers plus it made them easier to seed, but I decided to leave the stems on for presentation and color.


I think I've mentioned somewhere previously that it's a good idea to separate your meats and vegetables on different skewers because they have different cook times.  If you alternate everything on each skewer your cook times become a compromise between ingredients, although for some reason that's the way skewers are most often shown.  In this case the meat was going to cook faster than the vegetables but the peppers and onions needed about the same amount of time.


One last note - although the recipe calls for marinating the meat for a few hours, it's very flexible.  I've grilled it without any marinating time at all, or you could let it marinate overnight so don't let that stop you from using this as a weeknight meal.  Served with rice or couscous, it's a fast, delicious and very healthy meal.


printable recipe
Pinchos Morunos
Serves 4

¼ cup chopped fresh parsley
1 tablespoon sweet paprika
2 tablespoons olive oil
1 teaspoon dried oregano
1 teaspoon ground cumin
1 teaspoon ground coriander
¾ teaspoon salt
¼ teaspoon saffron threads, crushed
¼ teaspoon ground red pepper
2 garlic cloves, minced
1 (1 pound) pork tenderloin, trimmed and cut into 1” cubes
1 red onion, cut into 6 wedges
8 multi-colored mini-peppers, cut in half lengthwise and seeded
8 (12”) wooden skewers
Cooking spray

Combine the first 10 ingredients in a zip top bag and toss to distribute spices.  Add the pork tenderloin cubes and toss to coat evenly.  Refrigerate for 1-2 hours.

Soak skewers in a water for 30 minutes prior to grilling to prevent burning.

Prepare a grill for direct cooking over medium heat. 

Separate each onion wedge into two pieces.  Thread meat pieces on four skewers; alternate onion and pepper pieces on the other four.

Grill over medium heat for 5 minutes per side for the meat, and 6 minutes per side for the vegetables, flipping once.


Friday, December 28, 2012

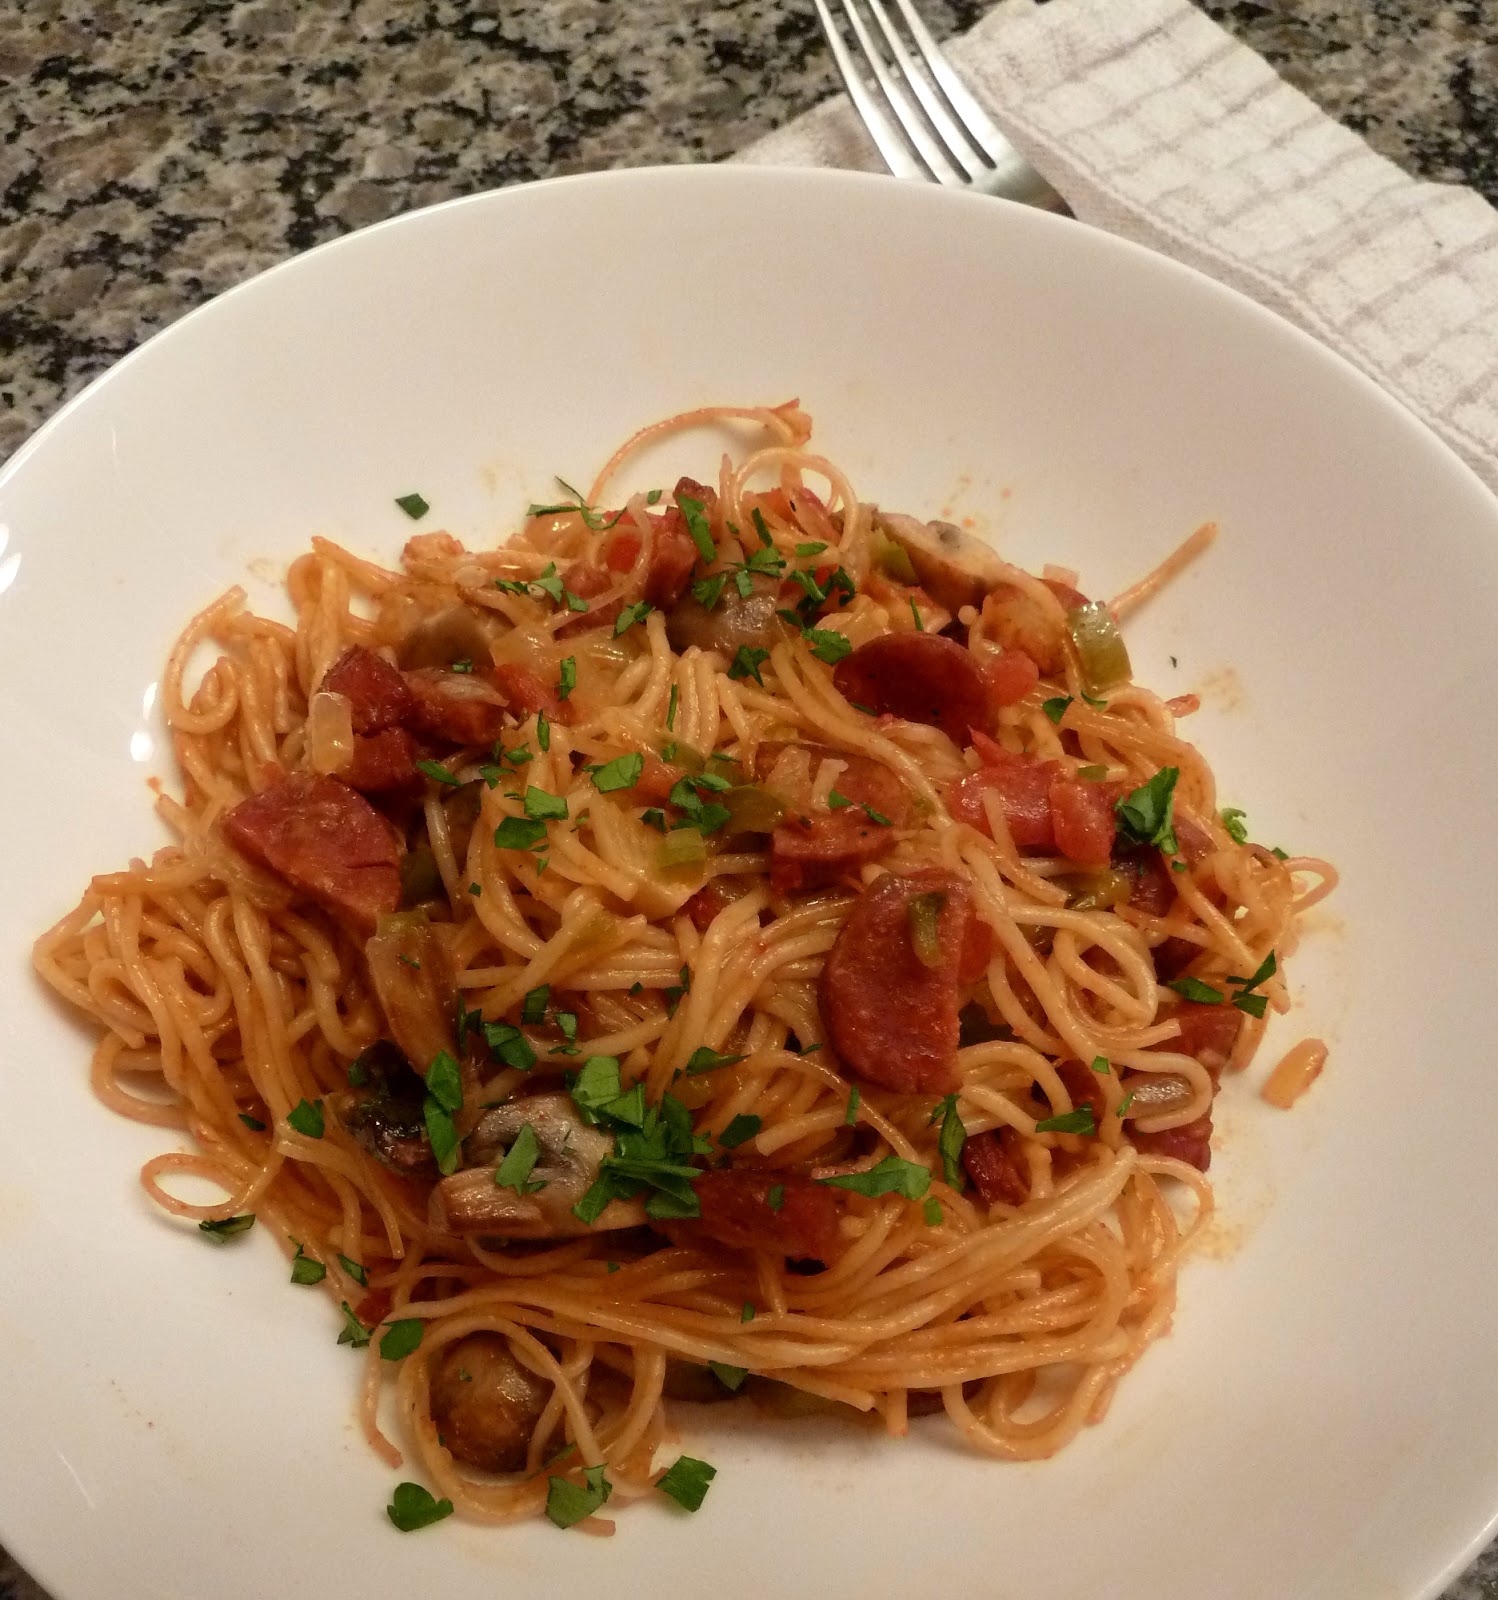
Chorizo and Mushroom Fideua


Last year's post: Tiny Pizzas

Fideua (FID-u-wah) is a pasta dish from Valencia, Spain that's somewhat similar to paella.  It typically contains seafood, paprika, tomatoes, onions, and peppers although this version contains Spanish chorizo and mushrooms in place of the seafood.  If you like paella and pasta, you'll like this dish.

It's very easy to make - you just keep throwing ingredients into a single pan and cooking until everything is done.  The pasta cooks in the broth mixture rather than separately, which infuses it with flavor.


By the end of the baking time all the liquid has been absorbed into the pasta but the dish is not at all dry.

 
A couple of thoughts about the ingredients - the recipe doesn't specify the type of paprika to use, so I use sweet paprika.  If you prefer, you could substitute half of the sweet with either half-sharp or smoked paprika.  And about chorizo - I've mentioned it before but it bears repeating, Spanish chorizo is not the same as Mexican chorizo.  Spanish chorizo is a dry, cured meat that looks a lot like pepperoni.


You can find it in most markets these days.  It comes in regular and hot (caliente) versions.  We prefer the hot (it's not really all that hot) which is why I use regular paprika instead of half-sharp.  It has a paper covering that needs to be removed before slicing.  I mention that specifically because the paper is pretty much the same color as the chorizo so it's not all that obvious until you start slicing, at which point it's a bigger hassle to remove from each little piece.

One last thought - I'm still slightly nervous about any recipe which you first cook on the stovetop, then put the pan in the oven to finish cooking ever since I took a skillet out of a 450d oven, turned away to do something else, then turned back and automatically grabbed the metal handle with my bare hand.  One quick trip to the emergency room later I had a rather spectacular bandage covering four fingers and my palm.  (The Lawyer drove me to the hospital because I was pretty convinced my hand was going to need some sort of dramatic procedure. Turns out it was just antiseptic ointment and lots of bandages.) Be sure to keep those oven mitts on!

* * click here for a printable recipe version * *

Chorizo and Mushroom Fideua
Serves 4 to 6

Note: because the angel hair pasta is cooked in the pan rather than boiled in water, it takes longer than stated on the package.


2 tablespoons olive oil
1 medium onion, chopped
2 large garlic cloves, minced
½ lb mushrooms, quartered
2 teaspoons paprika
Pinch of cayenne pepper
2 medium tomatoes, peeled, seeded and chopped
1 large green bell pepper, diced
3 cups low-salt chicken broth
½ cup dry white wine
5 ounces Spanish chorizo, paper casing removed
¾ lb angel hair pasta
Minced fresh parsley


Preheat the oven to 400d. Cut the Spanish chorizo lengthwise, then crosswise into half-moon slices. Heat the olive oil in a heavy deep paella pan or oven-proof sauté pan over medium heat. Add the onions and garlic and cook until tender, stirring frequently, about 5 minutes. Add mushrooms and sauté 4 minutes. Add paprika and cayenne and stir just until fragrant, about 30 seconds. Add tomatoes and green peppers and sauté 2 minutes. Add chicken broth, wine and chorizo. Bring mixture to a simmer. Break pasta in half and add to pan. Cook until pasta is tender, stirring occasionally, about 7 minutes. Set pan in oven and bake until all liquid is absorbed and pasta is crusty, about 25 minutes. Sprinkle with parsley.