Friday, September 28, 2012

Smoked Salmon with Farfalle and Edamame


Smoked salmon is The Lawyer's signature dish so he gets full credit for this post (well, I made the farfalle and edamame part).  We served it once upon a time to our friends Ted and Judy not knowing that Judy barely tolerates salmon.  I think it was probably the highest praise ever when she said, "I like this salmon so much it doesn't even need tartar sauce!"  The wood smoke adds the same robust flavor to salmon that it does to turkey or ribs.  You can vary the intensity of the smokiness by using different types of wood:  apple or alder wood is more mild, mesquite is medium, and hickory is the most intense. For this particular recipe we used apple wood chips. Different varieties of wood chips are easily found in grocery stores or hardware stores. Whatever type of wood you choose, the smoke will turn the salmon a beautiful burnished mahogany color as it cooks and it's no more difficult than grilling or pan-roasting salmon in the normal way.


By the way, do you know the difference between hot-smoked salmon and cold-smoked salmon?  This recipe is an example of hot-smoked salmon:  typically a thicker fillet that's cooked and smoked over low heat.  In contrast, cold-smoked salmon is cured and smoked without any heat.  You'll usually find cold-smoked salmon in a plastic package as a fillet that's been very thinly sliced.  It's the type of salmon served with bagels.  Hot-smoked salmon is more robust in flavor and flakes easily with a fork; cold-smoked salmon is soft and mild and does not flake. 

Over the years we've serve smoked salmon many different ways: with mashed potatoes, or spaghetti and garlic olive oil, or  grilled vegetables.  This particular recipe for farfalle and edamame is delicious, light and nutritious, and the flavors are a great match for the salmon.  After serving the warm salmon on the warm pasta for dinner, refrigerate any leftovers (breaking the salmon into large chunks) and you have a fabulous cold salmon salad for the next day.


One last thought about smoking food:  The Lawyer has used both gas and charcoal grills for smoking.  In his opinion, kettle-style charcoal grills are better because the air comes from the bottom and causes the smoke to flow over the food before escaping out the top.  Gas grills have vents across the back that don't necessarily force the smoke across the food.  If you have a gas grill, just be sure to use plenty of wood chips and start them early before putting the food on the grill so you have smoke from the get-go. You may also want to use a more intense wood to help the smoky flavor.  Experiment and find out what works best for you.   (Of course, if you have a smoker you're golden.)

I'm listing the salmon recipe separately from the farfalle and edamame recipe because I wanted to emphasize that the salmon can be served with virtually anything.  Print them both to make them together.

* * click here for a printable version of the Smoked Salmon recipe * *

* * click here for a printable version of the Smoked Salmon with Farfalle and Edamame recipe * *

Smoked Salmon
Serves 4

Alder or apple wood will result in the mildest flavor, but mesquite or hickory chips are also excellent.

1 ¼ lb skin-on salmon fillet, preferably fresh and wild caught
2 tablespoons vegetable oil
1 teaspoon sweet paprika
Ground pepper

4 cups of small wood chips, soaked in water at least two hours


Prepare the grill for indirect grilling by heating just one side to medium (gas) or by lighting and piling charcoal on one side 20 to 30 minutes before grilling.

Meanwhile, remove the pin bones from the salmon with tweezers or needle-nose pliers. Rinse and pat dry with paper towels, then rub with vegetable oil on both sides (especially the skin side so it doesn’t stick). Dust the top of the salmon with paprika and pepper.

Remove the wood chips from water. If using a gas grill, put the chips in an aluminum foil pouch and pierce several times with a fork, then put the aluminum foil pouch on the heated briquettes. Alternately, put them in a smoker box if your grill has one. If using a charcoal grill, place the drained wood chips directly on the coals.

Put the grill rack in place and allow to heat for at least five minutes; then clean the rack thoroughly. Place the salmon skin side down on the unheated side of the grill and position the lid with vents opposite the wood chips to draw smoke through the grill (if possible). Grill the salmon without flipping until cooked through and temperature reaches about 145d, approximately 20-30 minutes.

Remove the salmon from the grill carefully using a large spatula or two smaller spatulas. Cut the fillet into individual portions without cutting though the skin, then slide the spatula between the flesh and the skin to remove individual pieces, leaving the skin behind.

Serve hot, room temperature, or cold.


Smoked Salmon with Farfalle and Edamame
Serves 4

2 cups uncooked farfalle (about 6 ounces bow tie pasta)
1 cup frozen shelled edamame (soy beans)
2 tablespoons olive oil, divided
1 cup finely chopped red onion
4 ounces baby spinach
¼ cup chopped fresh dill
4 teaspoons whole-grain Dijon mustard
½ teaspoon salt
¼ teaspoon pepper

Smoked Salmon (see separate recipe)


Cook pasta in boiling water 5 minutes. Add edamame; cook additional 6 minutes or until tender. Drain and rinse with cold water. Drain again and place in a large bowl, then add 1 tablespoon olive oil and toss to coat thoroughly.

Heat a large skillet over medium-high heat and add the other tablespoon of olive oil. Add onion; sauté 4 minutes or until tender. Add spinach; cook 2 minutes or until just wilted, stirring frequently. Add spinach mixture and dill to pasta mixture; toss gently to combine. Add mustard, salt and pepper, toss to combine thoroughly.

Serve on individual plates with smoked salmon piece on top. May be served warm, room temperature, or cold. (If served cold, you may want to moisten with a little additional olive oil prior to serving.)


Friday, September 21, 2012

Pork with Fennel and Caper Sauce


Capers vs Caperberries

We were at a restaurant with friends a while ago and two of the dishes had these green things with long stems that looked like olives but didn't have a pit and tasted like the best olive you ever had.  The chef happened to walk by so my friend Terry asked him what they were.  He replied that they were capers. Well, we know capers and this definitely was much bigger than a caper - more the size of a green olive.  He said they were capers that were left on the bush for a longer time.  I'd seen these things on the olive bar at Whole Foods and they were called caperberries but I had never actually tried them before.

That was enough to get my curiosity going so I researched caperberries when I got home.  Turns out that capers and caperberries come from the same bush but capers are the immature flower buds and caperberries are the fruit (so even the chef didn't actually know!).  Both are usually consumed pickled.  Both have a similar tart, salty burst of flavor although caperberries are more mild.  I found both in the pickle section of my grocery store right next to each other.


If you're curious about the difference, this recipe features them both.  They work ideally in Mediterranean-type recipes with tomatoes and vegetables.  The capers are part of the sauce, and the caperberries are more of a garnish (in my opinion) although they could easily substitute for green olives in any recipe.

If you're not all that curious about caperberries, just leave them out but keep the capers for the sauce - the tartness is an important component of the overall flavor profile with the tomatoes and fennel.  If you're not familiar with fennel, it's a crunchy vegetable with a slight anise flavor that's delicious raw in salads.  I like it equally well when it's sauted  - it becomes very mild and tender.  The important final component of the sauce is the bright note of lemon zest (LOVE lemon). 

I adapted this recipe to use pork tenderloin because it's a favorite of ours, but it would work equally well with pork chops or even a meaty swordfish or tuna steak.  We served it with mashed potatoes but rice or creamy polenta would be great also.  The meal was warm and earthy but light, a perfect fall dinner.

* * click here for a printable recipe * *

Pork with Fennel and Caper Sauce
Serves 4

¼ cup olive oil
1 (1.25 lb) pork tenderloin
¾ teaspoon salt, plus more for seasoning meat
¾ teaspoon black pepper, plus more for seasoning meat
1 large or 2 small fennel bulbs with fronds, cut in half, cored and thin sliced (about 2 cups)
2 large shallots, thin sliced
2/3 cup chopped fresh flat-leaf parsley, divided
½ cup white wine
1 (28 oz) can diced tomatoes with their juices
½ lemon, zested
2 tablespoons capers
Caperberries for garnish, optional


In a large, heavy skillet heat the olive oil over high heat. Season the pork tenderloin with salt and pepper. Add the pork to the pan and brown on top and bottom, about 4 minutes per side. Remove the pork from the pan, cover loosely with foil and set aside.

Add the fennel, shallots, and 1/3 cup parsley to the pan and cook over medium heat until beginning to brown, about 5 minutes. Add the wine. Scrape the brown bits off the bottom of the pan, then add the tomatoes and stir. Add the pork back into the pan between the fennel and tomatoes so it’s mostly submerged in the pan juices. Cover and cook until the fennel is tender and the pork is done, about 12 to 15 minutes.


Place the pork on a cutting board. To finish the sauce, add the lemon zest, remaining 1/3 cup parsley, capers, and ¾ teaspoon each salt and pepper. Stir to combine.

Slice the pork into ½” thick slices and serve with the sauce. Garnish with optional caperberries.

Sunday, September 16, 2012

Apple, Bacon and Fontina Stuffed Acorn Squash


It's squash time of the year!  Acorn squash is one of my favorite varieties both for its flavor and because it's the perfect size to stuff for a meal.  I posted a stuffed squash recipe last fall that included rice, spicy sausage, parmesan, and mushrooms.  If you're interested in that recipe, click here or check the archives at left for September, 2011.

I thought that this fall I'd post a variation that's more fruity with fresh apples, dried cranberries, pecans, couscous and fontina cheese in addition to bacon.  This is my own ingredient combination. I initially thought about adding Brie cheese because it has a mild flavor that I thought would complement the apples, bacon and pecans. The problem with Brie is that it's so soft that I figured it would melt away completely as the squash bakes. My solution was to substitute fontina, which is also mild but firmer than Brie. Ask the person at the cheese counter for a mild fontina since they can range from very mild to quite a bit stronger in flavor. You can always change up other ingredients by adding raisins or currants rather than the cranberries, or by substituting walnuts or pine nuts for the pecans.

The basic concept is to cook the squash first because it takes a long time to get tender, then you stuff the squash and bake some more until the squash is very tender and the filling is hot.  Pretty easy.  All the stuffing prep can easily be done while the squash cooks the first time.  If you're pressed for time, prepare everything in advance and refrigerate the stuffed squash, then just bake until everything is hot again.

* * click here for a printable recipe * *

Apple, Bacon and Fontina Stuffed Acorn Squash
4 servings

2 small acorn squash
3 tablespoons butter, divided
3 slices of bacon, cooked and crumbled
½ cup couscous
¼ cup onion, finely chopped
¼ cup celery, finely chopped
1 firm apple, cored and chopped
1/3 cup dried cranberries
1/3 cup pecans, toasted and coarsely chopped
1/3 cup fontina cut in small cubes
1 tablespoon chopped parsley

Preheat oven to 400 degrees. Cut a thin slice off each end of the squash, then cut in half crosswise. Carefully scoop out seeds and fibers. Line a baking dish with parchment. Place squash halves in the baking dish and rub the cut surfaces and the interior of each with 1 tablespoon butter. Place a small amount of butter in the bottom of each half. Season with salt and pepper. Roast at 400d for 60 minutes.


While the squash is roasting, cook the couscous according to directions and set aside to cool. Preheat a large skillet over medium-high heat and add the remaining tablespoon of butter, then sauté the onion and celery for 4 minutes, stirring frequently. Add the chopped apples and sauté for two more minutes. In a large bowl, combine the couscous, apple mixture, bacon and pecans. When completely cool, add the fontina and parsley and mix thoroughly. At the end of 60 minutes, remove the squash halves from the oven and fill each until mounded. 


If you have stuffing left over, it makes a great lunch the next day. Cover the baking dish with foil. (At this point the squash halves can be refrigerated for baking later. If refrigerated, add 10 minutes or so to the baking time.) Place the squash halves back in the oven for an additional 30 minutes, until the filling is hot. Uncover and serve immediately.


Friday, September 7, 2012

Seafood Cobb Salad


The inspiration for this recipe was a dish that I had at a restaurant on Coronado Island in California a few years back.  I was so impressed with the salad that I wrote the main components down on a piece of paper while we were at the restaurant and then re-created it at home.  If you like seafood you will love this salad.  It's a special occasion dish with the lobster, crab and shrimp, but you could cut down on the cost by eliminating the lobster or substituting imitation crab for the lump crab meat.  You could even cut out the lobster and crab and make it with just shrimp.  My grocer occasionally has small (4 oz) frozen lobster tails on special so I watch for the sale specifically to make this salad.    Even with all the seafood this dinner cost about $16.00 per person.  That's the advantage of making a special meal at home - you can splurge on spectacular ingredients and still spend about the same as you would for an ordinary dinner at a restaurant.  Surprise the seafood-lover in your life!

We prepared this salad to celebrate the first year anniversary of my blog.  I wasn't sure what to expect when I started it last year but it's turned out to be really fun and the best part is that people actually read it!  I can track the number of views (but not the number of people or who they are) and it's gone up steadily over the months.  So, thanks to all of you who find it interesting enough to tune in once in a while!


I had just found the small lobster tails on sale so seafood salad seemed like a natural for a celebration dinner. This salad has several colors of bell peppers, goat cheese, and bacon in addition to the three types of seafood.  Another money-saving tip is to buy a bag of multi-colored mini peppers rather than full-sized versions of each color. One bag of mini-peppers costs approximately the same as one full-sized pepper so you save the cost of the other two peppers.  I've seen the mini-peppers at several different grocery stores so I think they're pretty commonly available.

Once you cook the bacon and lobster this salad comes together really fast.  Serve with a baguette and a nice glass of Chardonnay for a really special feast!

* * click here for a printable recipe * *

Seafood Cobb Salad
Serves 2

Salad:
Salad greens
1 8 - 10 oz lobster tail, thawed (or two 4-oz tails)
6 - 8 cooked shrimp
4 oz. canned lump crab meat
1/3 c. chopped red pepper
1/3 c. chopped yellow pepper
1/3 c. chopped orange pepper
1/3 c. crumbled goat cheese
2 – 3 pieces bacon, cooked and crumbled
chopped parsley for garnish

Salad dressing:
¼ c olive oil
2 T lemon juice
¼ teaspoon salt


Cook lobster tail in boiling water for approximately 6 minutes, then briefly plunge in ice water. Remove and pat dry, then remove the meat from the shell and slice into medallions.

Combine the salad dressing ingredients by shaking in a jar or whisking in a bowl.

Toss salad greens with some of the dressing and place on plates. Arrange shrimp, lobster, crab, goat cheese, bacon and chopped peppers decoratively on top. Drizzle with additional dressing. Garnish with chopped parsley.


Friday, August 31, 2012

Char Siu Chicken with Chinese Long Beans


Technology is amazing.  I published my last two blog posts from Africa!  I drafted them before leaving on vacation and I wanted to do some editing while sitting in the Amsterdam airport on layover.  You can imagine how I felt when my blog appeard in Dutch.  Luckily, I found the language button and all was well.  It was an amazing vacation that I would highly recommend to anyone.  Luckily I had a post or two waiting when I returned as I recover from jet lag!

I have this love-hate relationship with my slow cooker.  I love the idea of slow-cooked foods but don't like everything I eat to be mushy and taste the same.  At least for me, the solution is to use the slow cooker for part of the meal and prepare part fresh (unless you're making chili or some other classic one pot meal).  In this recipe, boneless skinless chicken thighs are marinated in a Chinese barbecue sauce and then slow-cooked until they're so tender and moist that they come apart easily with a fork.  I prepared crisp-tender Chinese long beans for freshness and because they look dramatic on a plate, and served everything with white rice.

Chinese long beans are the drama queens of the green bean family.  Most recipes I reviewed tell you to cut them into smaller pieces but for me that takes away the whole point of using long beans in the first place.


I've never seen long beans in a typical grocery store but have found them at farmers markets and Asian grocery stores.  If you don't have a favorite Asian grocery store, do a little research online to find out where the highest-rated one is in your town and go have a little adventure -  they're really interesting to wander around.  I shared my favorite one with my friend John when he had two Chinese foreign exchange students living at his house for a month.  They went several times and I think he enjoyed it although he did say they needed a shopping concierge to help you figure out what all that stuff is.

Anyway, I discovered why the recipes tell you to cut the long beans before cooking when I tried to stir fry them.

It was like wrestling with an octopus.  Conventional stir fry techniques simply weren't going to happen, so I fried the one side for a minute, flipped the entire mess over and let it fry for another minute, then added a little water and jammed the lid down to let them steam until they became slightly more cooperative.  You could always cut them first or use regular green beans but that wouldn't be nearly as fun.

The marinade turns the chicken a beautiful mahogany color as it cooks and because you use low-sodium soy sauce it's not nearly as salty as you would think.  (I've said it before, Trader Joe's has the best low sodium soy sauce on the planet.)  The flavor is different than a teriyaki marinade and simply delicious.  The chicken is so tender that it shreds easily, so it would make an outstanding filling for moo shu chicken or a chicken banh mi sandwich if you shredded it and put it back into the sauce to thicken for a few minutes.


* * click here for a printable recipe * *

Char Siu Chicken with Chinese Long Beans
Serves 4-5

Note: the chicken must be marinated for at least two hours before placing in a slow cooker for 6-7 hours, so plan ahead. If you can’t find Chinese long beans you can substitute fresh green beans.

For the chicken:
¼ cup low sodium soy sauce
¼ cup hoisin sauce
3 tablespoons ketchup
3 tablespoons honey
2 cloves garlic, minced
2 teaspoons grated peeled fresh ginger
1 teaspoon dark sesame oil
½ teaspoon five spice powder
2 lbs boneless skinless chicken thighs

For the Chinese long beans:
1 bunch Chinese long beans
1 tablespoon vegetable oil
1 clove garlic, minced
1 shallot, minced
Black and white sesame seeds

Hot cooked white rice


For the chicken, combine the first 8 ingredients in a small bowl, stirring well with a whisk. Place in a large zip-top plastic bag. Add chicken to bag and seal. Marinate in the refrigerator at least 2 hours, turning occasionally.

Place the chicken and marinade in an electric slow cooker. Cover and cook on low for 6-7 hours.

During the last 30 minutes of cooking time, prepare white rice and Chinese long beans. For the long beans, trim the ends of the beans and cut into shorter lengths (optional). Heat the vegetable oil over medium-high heat in a large sauté pan or wok. Saute the beans for one minutes, then flip and sauté the other side for 1 minute. Turn the heat down to medium and add 1-2 tablespoons of water, then cover and let steam for 2-3 minutes (depending on the size of the beans). Uncover and let any remaining water evaporate, then add the garlic and shallot and stir fry for one minute more.

Serve the beans with white rice, chicken thighs, and sauce spooned over the chicken. Garnish the beans with sesame seeds and serve.

Friday, August 24, 2012

Gazpacho


Gazpacho is a famous soup that originated in the southern Spanish region of Andalucia.  It's unique for three reasons - it's raw, it's served cold, and it requires the freshest of vegeables so summer is the only time to make it.  This is the soup that I think about in the middle of winter because it embodies all the goodness of summer food in my mind.

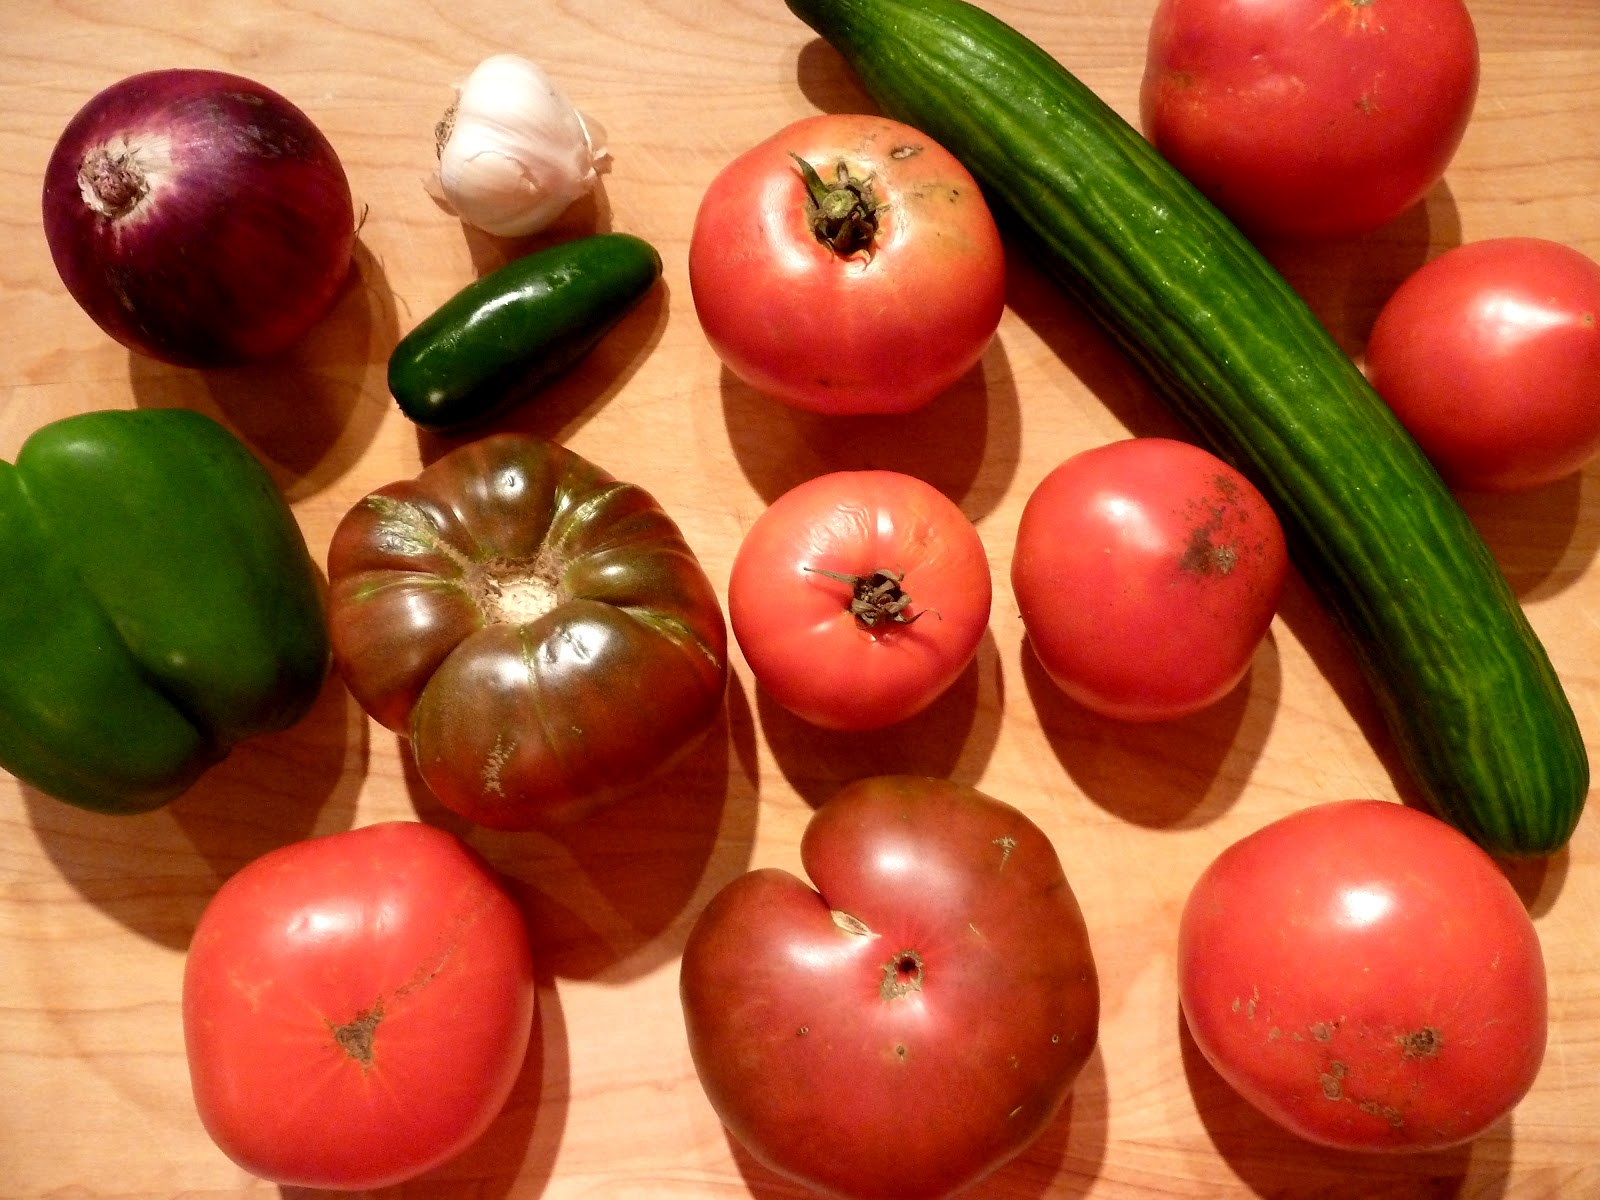
 I've seen recipes for gazpacho that start with tomato juice as the base, but I wanted to make one absolutely from scratch with nothing but produce from the farm stand that day.  I found some beautiful Black Krim heirloom tomatoes (see my post from a few weeks back regarding heirlooms and black tomatoes in particular) that I knew would have great taste but I was a little worried that they would make the gazpacho look weird if used exclusively so I mixed them with normal red tomatoes. 


This is definitely a time to haul out your food processor for all the chopping.  It's a little messy but the recipe makes a lot of soup and it's so refreshing when it's hot out.  You just feel healthier when you eat it and it would be a great way to sneak more vegetables into your family's diet without them realizing it.

We happened to have some goldfish crackers on hand so I had the inspiration for a garnish.  Notice that my goldfish are swimming happily along (above).  To no one's great surprise, The Lawyer had a different idea.  He explained that the whales had driven the fish into a tight school and were taking turns driving up from the depths in the middle to feed so the fish were trying to get away.  Apparently someone has been watching a little too much Planet Earth.


You could use herb croutons as a nice garnish instead but it won't be nearly as dramatic a story.  Serve the soup with a crusty baguette for a light dinner or with a sandwich for something a little more substantial.  This would also be an elegant first course for a summer party.  However you choose to serve it, be aware that it needs to chill for at least an hour so it needs to be made in advance.

* * click here for a printable recipe * *

Gazpacho
Serves 6-8


9 large vine-ripened tomatoes
2 medium cucumbers (or one English cucumber), peeled, seeded and chopped
1 medium red onion, chopped
1 bell pepper, chopped
1/3 cup olive oil
6 tablespoons red wine vinegar
3 garlic cloves, minced
1 jalapeno, seeded and finely chopped
1 tablespoon Worcestershire sauce
Salt and black pepper
Small basil or parsley leaves, or small crackers or croutons for garnish (optional)


Dip the tomatoes into boiling water for about 30 seconds to loosen the skin, then place in ice water to cool. Core and peel the tomatoes, then cut in half and poke out the seeds and juice into a strainer set over a bowl. Reserve the juice and discard the seeds. Puree half of the tomatoes in a food processor or blender with half of the cucumbers, onion, bell pepper, and jalapeno. Coarsely chop the remaining tomatoes.

Combine the puree with the chopped tomatoes and the remaining cucumbers, onion, pepper and jalapeno in a large bowl. Add the olive oil, vinegar, Worcestershire and garlic. Season with salt and pepper to taste. Chill for at least one hour before serving. Taste again and adjust seasonings if needed.

Garnish with herbs, croutons or crackers if desired.

Friday, August 17, 2012

Summer Pasta Salad with Fresh Tuna


I've been posting quite a few salad recipes lately but I can't help it.  I love salads and they're so perfect for summer.  This version has pasta and grilled fresh tuna together with a lot of veggies so it's very healthy and very easy.  If you don't like grilled tuna you could always substitute a high-quality canned tuna or even grilled chicken and it would be equally good.  I just like to have fish on the menu at least once or twice a week because it's good for you and it gives variety to your diet.


Growing up in the Midwest we typically cooked all meats until they were shoe leather so we wouldn't get trichinosis or salmonella or whatever.  I had a revelation about tuna when I was attending a sales meeting on east coast at a seafood restaurant and was planning to order the tuna.  The guy sitting across from me lived in Maine and was an avid sport fisherman.  He looked at me and said "please don't order it medium-well or well done".  Really?  He explained that high quality tuna should be eaten raw, rare or medium-rare for the best flavor and texture.  I wasn't too sure about rare so I ordered medium-rare and was pleasantly surprised.  Since then I've progressed to rare on occasion but I'm still not a sushi person.  I've tried it several times but the texture gets me every time - it's just too mushy.  Don't get me wrong, I really want to like sushi.  I feel like any foodie worth their salt should like sushi.  I see little kids eating sushi in restaurants all the time, but the best I can manage is a California roll.  Embarrassing but true.  Anyway, buy the best quality tuna you can find - preferably fresh - and don't overcook it.

sashimi grade fresh yellowfin tuna
You could make this salad at any time of the year if you just substitute frozen corn for fresh - the rest of the ingredients are available year-round.  I used whole-wheat penne to boost the fiber a little more.  The salad can be served warm, room temperature or cold.

* * click here for a printable recipe * *

Summer Pasta Salad with Fresh Tuna
Serves 4

8 oz penne (regular or whole wheat)
1 lb fresh tuna steak, about ¾” thick
¼ cup olive oil
1 ear of fresh corn, husk and silk removed
1 jar (6-7 oz) roasted red peppers, chopped
1/4-1/2 teaspoon crushed red pepper flakes
1 small zucchini, cut in half lengthwise and sliced
1/3 cup pitted black olives, coarsely chopped
¼ cup roughly chopped parsley
2 lemons
2 tablespoons snipped chives
Salt and pepper


Bring a large pot of water to a boil and drop in the corn. Reduce the heat to medium, cover and let simmer for 8 minutes. Remove the corn from the pot and immediately submerge in a bowl of ice water to stop the cooking. After a minute or two, remove the corn from the water, pat dry, and cut the kernels from the cob.

In the same pot of boiling water, cook the penne until al dente. When the pasta is done drain it, rinse under cool water, and drain again.

In a large bowl combine the olive oil, peppers, red pepper flakes, corn, zucchini, olives, and parsley. Add the juice of one of the lemons. Mix again and add salt and pepper to taste.

Preheat a grill to highest heat. Grill the tuna for 1-2 minutes per side until it has nice grill marks but is still rare to medium-rare in the middle. Let rest for a few minutes, then cut in thin slices.

Serve the tuna slices on top of the pasta salad and garnish with chives. Cut the remaining lemon into quarters and serve with the salads.