Showing posts with label corn. Show all posts

Friday, November 25, 2016

Three Sisters Quesadilla

Last Year's Post: Dried Fruit Sauce (Mincemeat Sauce)
Two Years Ago:  Couscous with Turkey or Chicken

Time for a change of pace (and effort) after the big meal.  "Three Sisters" is an agricultural term for three of the main crops of Native America:  squash, corn and beans.  They historically benefit from being planted together - the corn provides a stalk for the beans to climb, the beans provide nitrogen for the other plants, and the squash spreads along the ground providing shade and preventing weeds.   I read somewhere that plants that are grown together usually also taste good together.  I don't know why that would be true but it's definitely true in this case, making an excellent vegetarian base for empanadas, soups, stews, tarts, or a quesadilla.


As written, this quesadilla is mild yet flavorful and filling.  If you want, you could increase the spice level in one of several ways:  use a hotter chili powder, substitute Pepper Jack for the cheddar cheese, add jalapenos, or use a spicy salsa.  Either way it's a fast, delicious and healthy option for meatless Mondays or Black Fridays.

print
Three Sisters Quesadilla
Serves 4

1 cup dried black beans (or 1 15 oz can black beans)
1  teaspoon smoked Spanish paprika or chili powder
½ teaspoon ground cumin
salt
2 tablespoons olive oil, divided
1 zucchini or other summer squash, cut lengthwise into quarters and thinly sliced
pinch of red pepper flakes
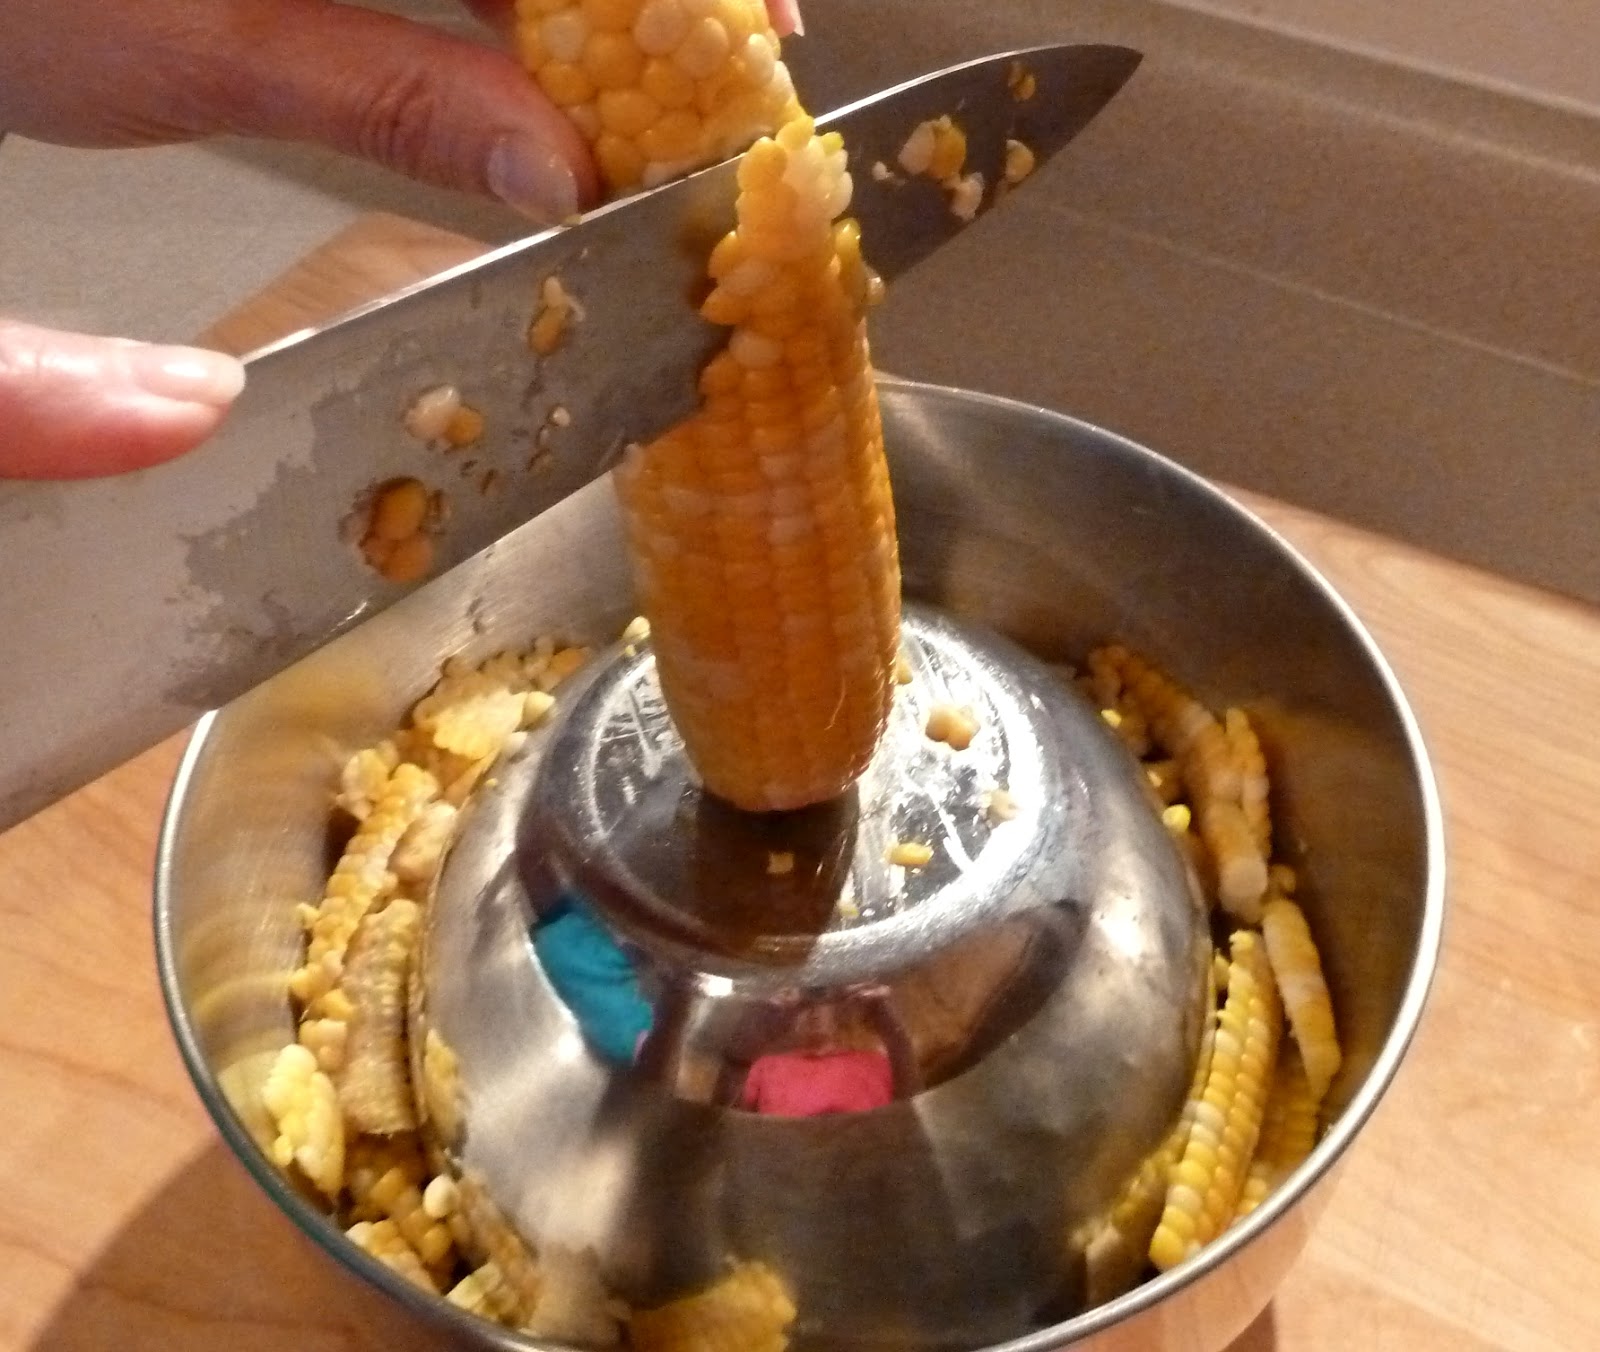
1 ear of grilled corn, kernels cut from the cob (or 1 cup frozen corn)
cilantro leaves to taste
4 medium flour tortillas
8 ounces sharp cheddar cheese, shredded
Greek yogurt or sour cream, for serving
Salsa
Sliced avocado, optional
Lime wedges, optional


Cook the beans, if starting with dried beans. If using canned beans, drain, rinse and drain again.  Toss with smoked paprika or chili powder and cumin.  Season to taste with salt.

Add one tablespoon of olive oil to a nonstick pan and heat on medium-high. Add the squash pieces and sprinkle with the salt, then cook, stirring and tossing until the pieces go limp and start to turn golden. Sprinkle with the pepper flakes and keep cooking until the squash has released most of its water and has caramelized with some edges becoming crispy and brown.  Add the corn to the pan and for an additional minute.  Remove from pan to a bowl but do not clean the pan.

To assemble the quesadillas, lay out one tortilla, and sprinkle one half with cheese. On top of the cheese, add beans, corn, and squash to taste along with cilantro leaves, then sprinkle a small amount of cheese over the vegetables.    Fold the other half over the filling.

Heat the remaining 1 tablespoon olive oil in the same pan. Place one quesadilla into the pan and cook until the edges turn brown–about 1 minute, then carefully flip the quesadilla and cook until the underside is golden brown and the edges are crispy, about another minute. Repeat with the other quesadillas.

Cut into wedges and serve with salsa, yogurt or sour cream, optional avocado and lime wedges.


Friday, December 4, 2015

Southwest Eggrolls (baked not fried)

Last Year's Post: Beer Cheese
Two Years Ago:  Reese's Peanut Butter Cup Cookies

I found this recipe online as a Chili's Copycat for their Southwest-Style Eggrolls at a "top secret recipes" website, and the guy really nailed it - the flavor is just like the restaurant version.  I made one important change to make it healthier because I don't want to deep-fry anything:  I made it using phyllo dough and baked it until crisp and brown.  The result was fabulous and reminded me not only of those famous eggrolls, but also of a good restaurant chimichanga.  The eggrolls satisfied my Mexican cravings without a trip to the nearest Mexican restaurant, which always involves mass quantities of chips and salsa in addition to re-fried beans, none of which are healthy.

There are a fair number of ingredients and a good amount of prep in the recipe, so if you like them I would suggest making a double batch and freezing some for the next time.  To minimize the prep, use already-cooked chicken from the deli and use your mini food processor to mince the bell pepper and onion.  Be sure to mince ingredients before measuring.  How do you know to measure before or after chopping?  If the recipe says "2 tablespoons minced green onion", mince it first.  If it says "2 tablespoons green onion, minced" measure it first.  Make sure everything is prepped before you start cooking the peppers and onions because it goes fast from there on out.


The filling can be assembled in advance, leaving just the wrapping and baking for the end.  Don't worry if the phyllo sheets crack a little here or there, they get rolled up so many times that you'll never know the difference.


You can make these normal size and cut them up for appetizers or leave them whole as an entree.  They're actually bigger than an eggroll - more like a smallish chimichanga.  You could also making a small version by cutting the phyllo sheets in half and using less filling which would make them easier to dunk and pop in your mouth.  Phyllo is very flaky and the edges will crumble as you cut or bite the eggroll, but to me the trade-off is well worth it to avoid deep frying.

The other nice thing about making the eggrolls yourself - besides the fact that they're much healthier -is that you can make them as spicy as you want.  This recipe is very slightly spicy (the restaurant version needs to please everyone) but you can make it spicier by adding more jalapenos or more cayenne.  And then you can have your very own, favorite recipe southwest eggrolls piping hot right at home.

print recipe
Southwest Eggrolls
Makes 8 large eggrolls

Note:  to freeze for later, assemble eggrolls and freeze, then place in a resealable bag.  To bake, thaw eggrolls and bake as directed.

For the eggrolls:
2 cooked chicken breasts (from a rotisserie chicken or leftovers), diced into small cubes
¼ cup minced red bell pepper
¼ cup minced green onion
1 tablespoon vegetable oil
¼ cup frozen spinach, thawed and squeezed dry, finely chopped
¼ cup diced canned jalapeno peppers
2/3 cup frozen corn
½ cup canned black beans, rinsed and drained
1 tablespoon minced cilantro (or substitute parsley)
1 teaspoon ground cumin
1 teaspoon chili powder
½ teaspoon salt
¼ teaspoon cayenne
1 ½ cups shredded Monterey Jack cheese
16 (9”x14”) sheets of phyllo dough (one sleeve from a package of frozen phyllo dough), thawed
Olive oil or olive oil spray, for brushing

For the avocado-ranch dipping sauce:
1 avocado
¾ - 1 cup ranch dressing

Preheat the vegetable oil in a medium skillet over medium heat.  Add the red pepper and onion to the pan and sauté 1-2 minutes until tender.  Add the spinach next, stirring to break up clumps, then add the jalapenos and stir to combine.  Next add the corn and black beans and stir gently, then add the cilantro and spices and stir one final time.  Remove from the heat and let cool.  When completely cool, add the shredded cheese and stir to combine.

Note:  the filling can be made in advance.  Cover and refrigerate.

Preheat the oven to 425d.

When ready to assemble, remove the phyllo sheets from the wrapper and place flat on a work surface.  Immediately cover with a damp towel to make sure they don’t dry out.  Remove one phyllo sheet and place on a second work surface, keeping the remaining sheets covered with the towel.  Brush the sheet with olive oil or lightly spray with olive oil cooking spray.  Top with a second phyllo sheet and brush or spray with oil again.  Working with the short side nearest you, place a heaping ½ cup of filling on the lower part of the sheet leaving a 1” margin on the bottom and sides.  Fold the phyllo from the bottom up over the filling, then fold in 1” on both sides and roll up completely.  Place wrap seam side down on a baking sheet lined with foil; brush with oil.  Repeat with the remaining filling, phyllo sheets and oil.

Bake for 15 minutes until golden brown.  Let stand 5 minutes to cool.  While the eggrolls are baking, remove the avocado from its shell and mash, then combine with the ranch dressing.


Serve the eggrolls with the sauce on the side.

Saturday, August 22, 2015

Summer Harvest Quiche

Last Year's Post:  Chicken Gyros
Two Years Ago:   Grilled Shrimp and Corn Salad

You can never have too much of great summer tomatoes, corn and zucchini, can you?  The only question is how to use them in different ways so they don't get repetitive.  You've probably been using them in salads and as side dishes, but what about a quiche?  It makes a great light dinner or Sunday brunch, not to mention that it's ideal for work lunches throughout the week.

Quiche is easy to make and easy to customize, plus you can go fancy by making little individual ones or family-style by making one big one.  This recipe happens to be vegetarian but you could easily add crumbled cooked sausage, bacon, or even lump crab to make it special. Feel free to substitute whatever vegetables and cheese your family prefers or you happen to have on hand.

Serve with a big green salad and some crusty bread for a perfect late summer dinner. (Is there a sadder phrase than "late summer"?  Oh yes.  It's called "Winter". I remember a guy in my high school - a member of the ski team - who would wear a big "Think Snow" button on his jacket beginning in early November.  I wanted to slap him. )

Anyway, even if you have buckets of fresh tomatoes, roast them for this recipe (see how here) because fresh tomatoes are too watery for quiche.  Not to mention it's a great way to preserve all those fresh tomatoes for Winter.


print recipe
 Summer Harvest Quiche
Serves 6

1 9-inch pie crust
Pie weights or dried beans for blind-baking the crust
                                                                               
1 tablespoon olive oil   
1small zucchini
½ cup chopped onion                                                   
1 ear fresh corn
3 eggs, room temperature                                                          
1 ½ cups milk
½ teaspoon salt
¼ teaspoon pepper                                                       
1/3 cup sun-dried (or roasted) tomatoes, chopped
1 cup grated Gruyere cheese (packed)
2 tablespoons chives, chopped
1 tablespoon fresh rosemary, finely chopped
1 tablespoon basil, chopped


Preheat oven to 350 degrees.

Place the pie crust in a pie pan (preferably glass) and line with parchment paper or aluminum foil.  Fill the pie plate with pie weights or dried beans and bake for 10 minutes or until lightly brown.  Remove from the oven; remove the parchment paper and weights or beans. Let the pie crust cool for a few minutes.   Leave the oven at 350d.

Meanwhile, cut the zucchini in fourths lengthwise, then slice.  Sauté the zucchini and onion in the olive oil until softened and just beginning to brown, about 5 minutes.  Season with salt and pepper to taste and remove from the heat.

Briefly cook the ear of corn by boiling, steaming or grilling for 3-4 minutes.  Let cool, then cut the kernels off the cob.  Set aside.

Combine the eggs, milk, salt and pepper in a large bowl and whisk until well blended.  Add the chives, rosemary and basil and stir well.

Place the zucchini mixture, corn kernels, tomatoes and grated cheese in the pie crust.  Pour the egg mixture over the vegetables. 

Bake in the middle of the oven for 50-55 minutes at 350d until browned and set.

Remove from the oven and cool on a wire rack for at least 10-15 minutes before serving.

Friday, June 26, 2015

Southwest Grilled Shrimp Salad

Last Year's Post:  Chicken with Fresh Cherry Salsa
Two Years Ago:   Farro, Kale and Smoked Mozzarella Salad

I found a bag of seriously gigantic frozen shrimp at Costco the other day and have been amusing myself with finding recipes worthy of their magnificence ever since. This particular recipe is a study in contrasting colors, textures, and flavors that shows off the beautiful grilled shrimp while simultaneously being very light and healthy - a perfect summer meal.

You can vary the heat level by the type of spice blend you choose and also by whether you add the spice to the corn and zucchini in addition to the shrimp.  Living in Arizona, I have a jar of hatch chile spice blend that's pretty potent so I went easy on the corn and zucchini but a little bit heavier on the shrimp.


I could just eat everything on this plate and call it a meal, couldn't you?

If you really like heat, you could always add some sliced jalapenos to the salad as well.  The sweetness of the corn and creaminess of the avocado are a good balance for the heat.

All you do is make a light lime-cumin dressing, quickly grill the veggies and shrimp, then toss everything together.  Easy, quick, healthy and delicious.

printable recipe
Southwest Grilled Shrimp Salad
Serves 4

1 ear corn, husked
2 small zucchini, halved lengthwise
10 colossal or 14 extra-large shrimp, peeled and deveined
Olive oil
Kosher salt and freshly ground black pepper
Southwest seasoning blend
1 small head of butter lettuce, torn into bite-sized bits
1 avocado
2 cups cherry tomatoes, halved
Juice of ½ lemon

Dressing:
¼ cup fresh lime juice
1 tablespoon olive oil
1 tablespoon honey
½ teaspoon kosher salt
½ teaspoon ground cumin
1/8 teaspoon coarsely ground black pepper


Combine all dressing ingredients by whisking in a small bowl or shaking in a jar; set aside. 

Preheat a gas or charcoal grill.  Brush the corn, zucchini and shrimp with olive oil, season with salt and pepper.  Season with southwest seasoning to taste.  Grill the corn and zucchini for 2 minutes on all sides until grill-marked and crisp-tender.  Grill the shrimp until the meat is opaque and cooked through, about 2-3 minutes per side.  Let cool slightly.

Cut the corn kernels from the cob, and chop the zucchini into ½” pieces.  Chop the shrimp into bite-sized pieces, discarding the tails.

Halve and pit the avocado, then score each half with a small knife into a cross-hatch pattern.  Using a large spoon, scoop the flesh into a small bowl and toss with the lemon juice to prevent browning.  (It should be in chunks.)


Place the lettuce in a large serving bowl or individual salad bowls.  Top with corn, zucchini, tomatoes, avocado, and shrimp.  Drizzle with dressing and toss before serving.


Friday, August 9, 2013

Grilled Shrimp and Corn Salad

Last Year's Post: The Best Salsa Ever
Two Years Ago:  Roasted Tomatoes (Preserving)

Ahhh, summer corn season.  Fresh corn is only available for a few short weeks, so we tend to eat it as often as possible in every way possible.  This salad is a great way to enjoy fresh corn in a light, healthy and delicious summer salad that also includes tender grilled shrimp, grilled red pepper and creamy avocado.  Add a glass of chilled dry rose wine and you have the perfect summer dinner.

Our luxury in the Midwest is that we can buy corn at the local farm stand that had been picked just that morning, so it's unbelievably fresh.  The very first corn of the season is always the best - the most tender and sweet, with tiny kernels.  People wait all year for that corn and then just devour it.

When I was growing up, we always had fresh corn one way only - shucked, boiled and served with butter and salt.  I am perfectly happy with that method to this day, but have learned the joys of grilled corn as well. There are two ways to grill corn, and they result in distinctly different tastes, textures and appearance.  The first is to leave the husk on and soak the corn in water for an hour or so, then grill over medium-high heat for eight minutes, turning on all sides.  After grilling the husk and corn silk very easily come off all at the same time and the corn is very tender because it basically steams in its husk.  The husk and silk give it a slightly different taste than boiling that I would almost call grassy (in a good way).  The second way is to shuck the corn first, then grill it directly over the same medium-high heat for the same eight minutes (two minutes per side) until browned and tender.  This method give the corn more of a grilled flavor and fire-roasted appearance.  Grill the pepper at the same time and let it get some of that same fire-roasted look - it greatly adds to the flavor and visual appeal of the salad.


I tend to using the husk-on method of grilling corn if we plan to eat it directly from the whole cob, and the naked grilling method if I plan to cut the kernels off to use in other dishes because they're so pretty.  Here's a tip that I learned a few years ago regarding how to cut the kernels off a cob of corn without having them fly all over the place - stand the cob upright in a shallow bowl (make sure the bottom of the cob is relatively flat) and as you cut them, the kernels fall neatly into the bowl.


Here's another tip regarding grilling shrimp - thread them on two parallel skewers (soaked in water for 30 minutes so they don't burn up) and they won't spin around when you turn them.


The smoky grilled shrimp, corn and red pepper are complemented by a light vinaigrette and the cool, creamy avocado for an irresistible, healthy, fast and easy meal.  What more could you ask for a perfect summer dinner?

printable recipe

Grilled Shrimp and Corn Salad
Serves 4

About 12 bamboo skewers
4 ears fresh corn, shucked
1 large red bell pepper, stemmed and seeded
1 pound medium peeled and deveined shrimp, thawed if frozen (31-40 per pound)
¼ cup olive oil
1 tablespoon cider vinegar
½ large shallot, minced
¼ cup parsley, chopped
Red leaf lettuce for garnish
1 lemon cut in quarters, plus the juice of half a lemon
1 avocado


Soak skewers in water for 30 minutes.  Prepare a grill for medium-high heat.  Holding 2 skewers parallel and slightly apart, thread shrimp onto both skewers at the same time (this makes them easier to turn on the grill).

In a small bowl, whisk together the olive oil, vinegar and shallot and set aside. Cut the avocado into slices and toss with the juice of half a lemon to prevent browning.

Cut the red pepper into quarters.  Lightly brush the shrimp, corn and red pepper pieces with olive oil on all sides.  Grill the corn directly over the heat for 2 minutes per side, until browned and tender.  Grill the red pepper 2 minutes per side, until softened somewhat and browned on the edges.  Grill the shrimp for 90 seconds per side.

Cut the kernels from the cobs and place into a large bowl.  Chop the red pepper into ½” pieces and add to the bowl.  Add the shrimp, parsley, vinaigrette and salt and pepper to taste and toss to combine.

Arrange lettuce leaves on plates and top with the corn mixture.  Place several avocado slices on the side and serve with lemon wedges to squeeze over the salad.


Friday, August 17, 2012

Summer Pasta Salad with Fresh Tuna


I've been posting quite a few salad recipes lately but I can't help it.  I love salads and they're so perfect for summer.  This version has pasta and grilled fresh tuna together with a lot of veggies so it's very healthy and very easy.  If you don't like grilled tuna you could always substitute a high-quality canned tuna or even grilled chicken and it would be equally good.  I just like to have fish on the menu at least once or twice a week because it's good for you and it gives variety to your diet.


Growing up in the Midwest we typically cooked all meats until they were shoe leather so we wouldn't get trichinosis or salmonella or whatever.  I had a revelation about tuna when I was attending a sales meeting on east coast at a seafood restaurant and was planning to order the tuna.  The guy sitting across from me lived in Maine and was an avid sport fisherman.  He looked at me and said "please don't order it medium-well or well done".  Really?  He explained that high quality tuna should be eaten raw, rare or medium-rare for the best flavor and texture.  I wasn't too sure about rare so I ordered medium-rare and was pleasantly surprised.  Since then I've progressed to rare on occasion but I'm still not a sushi person.  I've tried it several times but the texture gets me every time - it's just too mushy.  Don't get me wrong, I really want to like sushi.  I feel like any foodie worth their salt should like sushi.  I see little kids eating sushi in restaurants all the time, but the best I can manage is a California roll.  Embarrassing but true.  Anyway, buy the best quality tuna you can find - preferably fresh - and don't overcook it.

sashimi grade fresh yellowfin tuna
You could make this salad at any time of the year if you just substitute frozen corn for fresh - the rest of the ingredients are available year-round.  I used whole-wheat penne to boost the fiber a little more.  The salad can be served warm, room temperature or cold.

* * click here for a printable recipe * *

Summer Pasta Salad with Fresh Tuna
Serves 4

8 oz penne (regular or whole wheat)
1 lb fresh tuna steak, about ¾” thick
¼ cup olive oil
1 ear of fresh corn, husk and silk removed
1 jar (6-7 oz) roasted red peppers, chopped
1/4-1/2 teaspoon crushed red pepper flakes
1 small zucchini, cut in half lengthwise and sliced
1/3 cup pitted black olives, coarsely chopped
¼ cup roughly chopped parsley
2 lemons
2 tablespoons snipped chives
Salt and pepper


Bring a large pot of water to a boil and drop in the corn. Reduce the heat to medium, cover and let simmer for 8 minutes. Remove the corn from the pot and immediately submerge in a bowl of ice water to stop the cooking. After a minute or two, remove the corn from the water, pat dry, and cut the kernels from the cob.

In the same pot of boiling water, cook the penne until al dente. When the pasta is done drain it, rinse under cool water, and drain again.

In a large bowl combine the olive oil, peppers, red pepper flakes, corn, zucchini, olives, and parsley. Add the juice of one of the lemons. Mix again and add salt and pepper to taste.

Preheat a grill to highest heat. Grill the tuna for 1-2 minutes per side until it has nice grill marks but is still rare to medium-rare in the middle. Let rest for a few minutes, then cut in thin slices.

Serve the tuna slices on top of the pasta salad and garnish with chives. Cut the remaining lemon into quarters and serve with the salads.


Friday, July 20, 2012

Farm Stand Salad


I've read quite a bit recently about the importance of "rebalancing your plate" to eat primarily plants and grains.  Animal proteins are supposed to play a lesser role.  That doesn't mean we all have to become vegetarians and eat tofu, but health advocates often suggest eating meatless one day per week as part of a healthy lifestyle.  If not totally meatless, it's a good idea to cut down on the amount of meat in a meal.  Summer is a perfect time to adjust your diet a little with the abundance of fresh fruits and vegetables that are available.  This salad is an example of a healthy summer meal with plenty of market-fresh veggies and a sprinkling of bacon.  If you're feeling particularly inspired you could leave the bacon out completely but it does add a nice counterpoint to the tangy goat cheese dressing and we all know how well bacon goes with fresh lettuce and juicy tomatoes.  Other major flavor components of the salad include fresh sweet corn, toasted walnuts, red onion, and fresh basil.  The overall flavor profile is very bright, bold and satisfying.

Growing up in the midwest I never really realized that midwesterners are the fortunate few who can eat sweet corn picked fresh that morning and sold at a roadside stand.  At the start of the corn season the ears have tiny, tender kernels that are bursting with sugar.  At that point you can literally cut the kernels off the cob and put them in a fabulous black bean and corn salad without cooking them at all. Of course, if you do cook them, it's only for a minute or two to heat them up enough to cover them with butter and salt until they drip all over your plate (and chin) as you gobble the entire cob, rows upon rows of sweet buttery salty heaven.  Once picked, the sugars in corn quickly turn to starch so corn that's been transported never has that heavenly taste.  And later in the season the corn tends to have starchier, tougher kernels as well.  But oh, those first fleeting days of corn season!  If you've never had that type of fresh corn all I can tell you is that it's a revelation.   A local farmer told me it has something to do with the rich soils and temperature/rain balance in the midwest.  Whatever, all I know is that sweet corn ranks right up there in my food memories with the tomatoes of my youth.  At the beginning of the harvest you can very easily make a meal of corn, tomatoes, and cucumbers and be extremely happy.  Plate rebalanced!

Even if you don't have access to that ephemeral corn, it's still worth it to buy fresh corn at your local market when it's available.  My tip of the day is how to cut corn off the cob without it ending up all over your kitchen.  Put a large bowl on the counter and place a smaller bowl (with a flat bottom) upside down inside it.  Balance the corn cob on top of the small bowl and when you cut down, the kernels fall neatly into the large bowl instead of all over your counter top.


I like to break the large chunks up just a little but not completely so everyone can see they came fresh off a cob when you serve your salad.

Cold crisp salads are perfect for hot summer days like we're all experiencing this year, don't you think?  Serve your salad with a fresh crusty baguette from your favorite bakery and have a (balanced) feast! 

* * click here for a printable recipe * *

Farm Stand Salad
Serves 4

4 pieces of cooked and crumbled bacon
2 ears fresh corn, husked
2 ripe tomatoes
¼ red onion, thin sliced
1 bag baby salad greens or 2 small heads of baby lettuces, rinsed, dried and cored
1/3 cup walnuts, toasted
½ cup olive oil
2 tablespoons cider vinegar
1 tablespoon lemon juice
½ cup soft cheese, such as feta or goat’s cheese, crumbled
2-3 tablespoons chopped fresh basil or cilantro
1/2 teaspoon salt
Pepper


Bring a large pan of water to a boil. Drop the corn in, cover, and cook for approximately 5 minutes. Remove from the water and let cool, then cut the kernels off the cob and set aside. Core the tomatoes and thin slice. Depending on the size of the tomatoes you may wish to cut the slices in half.

In a small bowl combine the oil, vinegar and lemon juice with a whisk. Add the crumbled cheese and whisk. Add the basil, salt and pepper and whisk briskly until creamy and well blended.

Combine the lettuce, onion and tomatoes in a large bowl. Pour half the dressing over the salad and toss. Divide among 4 plates and top with corn, bacon, and walnuts. Drizzle with remaining dressing and serve.


Tuesday, August 2, 2011

The Perfect Little Summer Salad

This is one of my top all-time salads, and we eat a LOT of salads.  It's great for summer for a couple of reasons - you can do the hot cooking in advance and just toss everything together at the last minute, plus it's a wonderful reason to go to your local farmers market to buy all the herbs.  It's light and refreshing, yet very filling and satisfying as an entree.  Serve with a breadstick on the side, or better yet a fresh red ripe sliced tomato.  If you try the recipe please leave a comment, I'd love to hear your thoughts!

I use cavatappi pasta because I like the way it curls and I like saying "cavatappi".  But you can use any short cut pasta such as ziti, penne, or bow ties.  For the corn, it can be fresh or frozen, whichever is available.  The chicken can be grilled, roasted, or pan sauted.  The only thing that really shouldn't be changed is the fresh herbs.  This recipe is all about the herbs.

Advance preparation:  you can cook the pasta, chicken and corn the day prior or in the morning.  Refrigerate all components separately, then assemble at the last minute.  That makes it an easy weeknight meal.

printable recipe
Chicken Pasta Salad with Fresh Herbs and Corn
serves 4

6 oz dry cavatappi pasta
5 T extra-virgin olive oil
2 small or 1 large boneless skinless chicken breast
salt and pepper
1 large or 2 small fresh ears of corn, husks removed (or frozen corn)
3-1/2 T fresh lemon juice
1 clove fresh garlic, minced
1/2 tsp ground cumin
1/4 cup packed fresh flat leaf parsley, torn
1/2 cup packed fresh cilantro sprigs, torn
1/4 cup packed fresh basil leaves, torn
1/8 cup packed fresh mint leaves, torn
1/2 cup packed fresh baby arugula, torn
4 lemon wedges

In a large pot, bring water to boil.  Add cavatappi and cook until done according to package directions.  Drain, rinse, and toss immediately with 1 tablespoon of olive oil to keep from sticking.  Refrigerate until cool.

Heat a grill, grill pan, or saute pan to medium high.  Brush the chicken with 1 tablespoon of olive oil and sprinkle with salt and pepper on both sides.  Grill or saute until golden and cooked through, about 5-6 minutes per side.  Let the chicken cool and then cut it on the diagonal into thin strips.

Cook the ears of corn in boiling water until tender, approximately 5-6 minutes depending on freshness.  Cut the kernels off the cob and reserve.

In a large bowl, whisk together the lemon juice, remaining 3 tablespoons of olive oil, garlic and cumin.  Add 1/2 teaspoon salt and 1/4 teaspoon pepper.  Add all remaining ingredients (pasta, chicken, corn, and herbs) and toss.  Serve garnished with lemon wedges.