Showing posts with label entree. Show all posts

Friday, April 20, 2018

Rosemary Chicken with Red Wine Mushroom Sauce

Last Year's Post:  Broccoli Cheese Stuffed Sweet Potatoes
Two Years Ago:    Benedictine Sandwiches

I paid a visit to a new international market in town today just to see what was there, since they tend to carry interesting and unusual foods.  In particular, I've found that international markets carry all sorts of produce that you can't find in normal grocery stores.  Case in point, I found some very cute little white beech mushrooms that I decided to add to this recipe.  Of course you can use any kind of wild mushrooms you want but I thought they added visual interest as well as taste and texture, and they're a cute garnish.


Having said that, the primary star of the show is the deep rich red wine mushroom sauce. Tremendous depth of flavor is added by soaking dried porcini mushrooms in hot broth, then adding both the reconstituted porcinis and their soaking liquid to the sauce.  Of course the bacon doesn't hurt, either.  The dish tastes like it came from France or Italy and was simmered for hours.

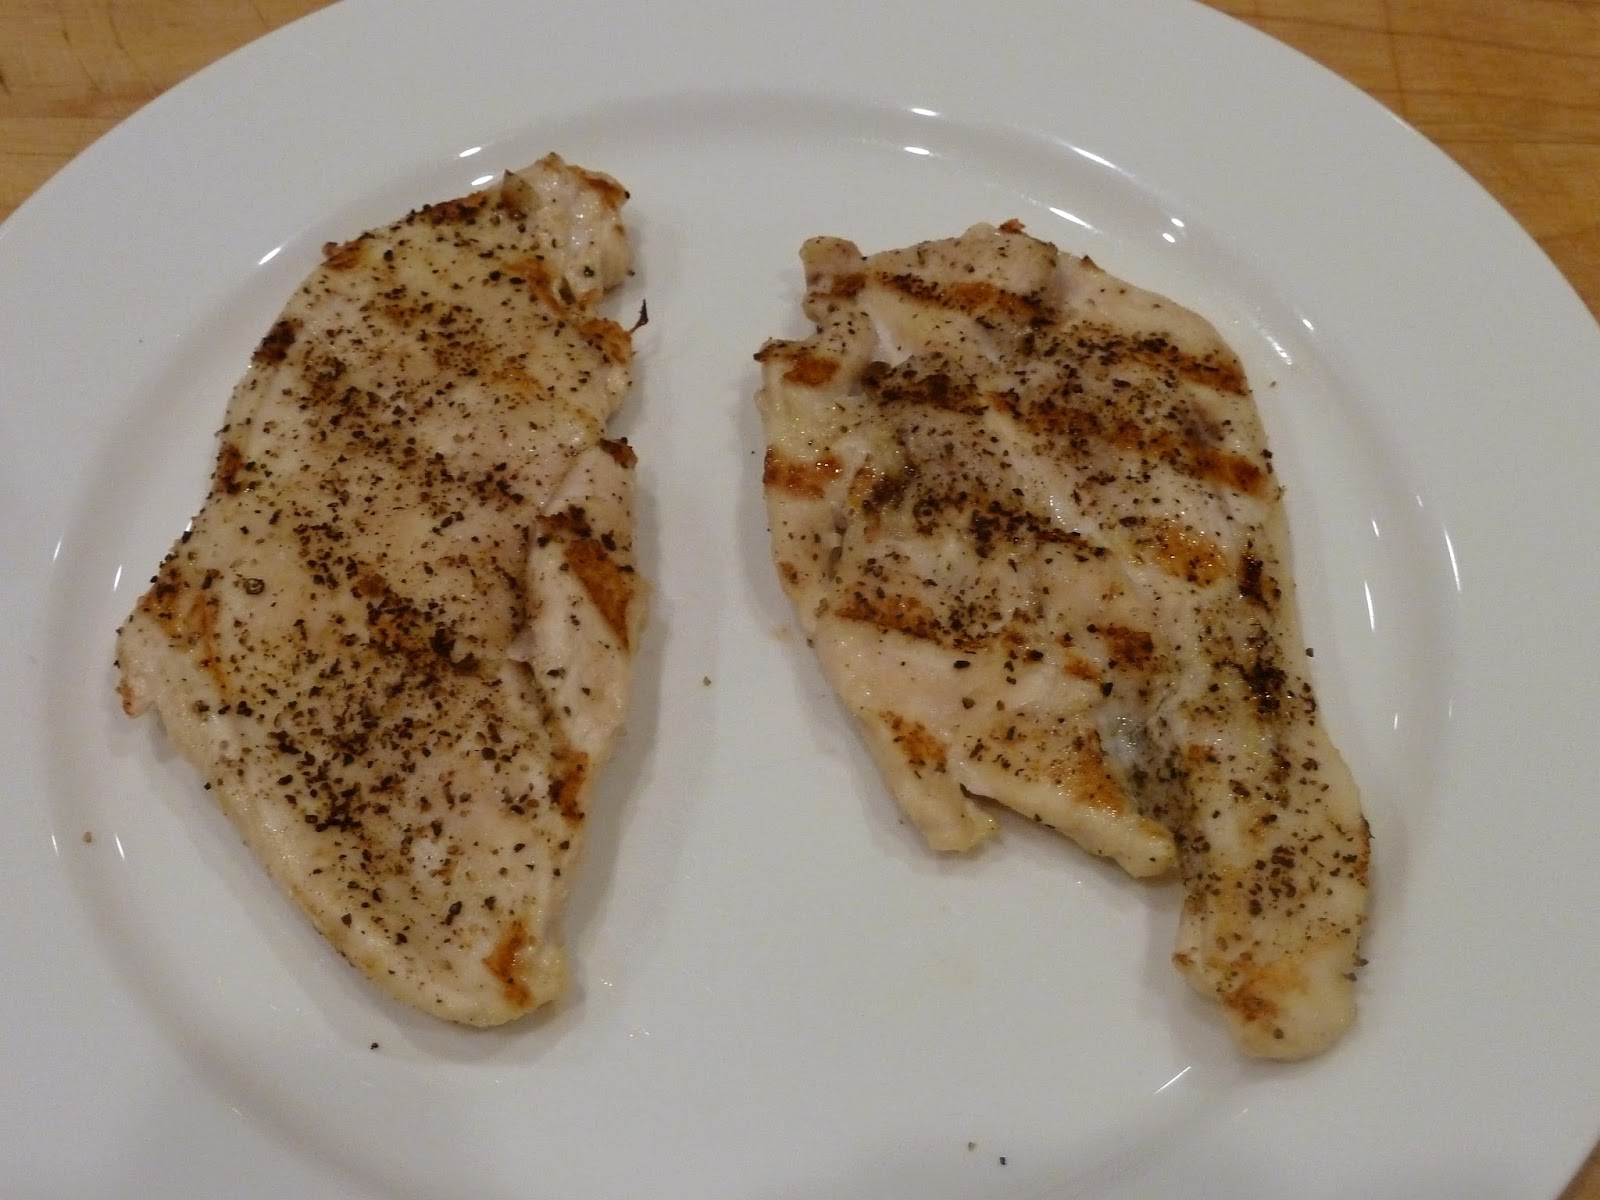
The original recipe called for grilling boneless skinless chicken thighs.  If it's cold outside and you don't want to grill, just grill the chicken on an indoor grill pan or saute in a regular fry pan.  You could also substitute boneless skinless chicken breasts or cutlets for the thighs, whichever you prefer.

Be sure to serve the chicken with mashed potatoes or pappardelle pasta to soak up all the delicious sauce.

print recipe
Rosemary Chicken with Red Wine Mushroom Sauce
Serves 4

1 ½ pounds boneless skinless chicken thighs or breast cutlets
2 tablespoons olive oil, plus more for for drizzling
Salt and pepper
3 stems fresh rosemary, leaves stripped and chopped
1 cup chicken stock
2 slices bacon, chopped
2 cloves garlic, minced
1 shallot, finely chopped
8 ounces cremini mushrooms (can also use other wild mushrooms or a mix), cleaned, stemmed and sliced
1 tablespoon all-purpose flour
1 cup dry red wine


Heat an outdoor grill, grill pan or sauté pan over medium-high heat.  Drizzle chicken with oil, season with salt, pepper and rosemary.  Cook chicken 4-5 minutes on each side until golden and cooked through.  Remove from heat and let rest 5 minutes.

Place stock in a small saucepan and heat on high until hot but not boiling.  Add dried porcinis, stirring to make sure the mushrooms are submerged.  Cover the pan and simmer over low heat for 10 minutes to reconstitute the mushrooms.  Remove the mushrooms from the broth and chop.  Strain the broth through a paper towel over a sieve to remove any grit, then set the broth aside.

In a medium skillet, add 2 tablespoons olive oil over medium heat.  Add the bacon, garlic and shallot and sauté, stirring occasionally, for 3 minutes.  Add the cremini mushrooms to the pan and season with salt and pepper.  Sauté mushrooms for 10 minutes until browned.  Add flour and cook, stirring, 1 minute.  Add red wine to the pan and stir for 1 minute to reduce and thicken the sauce.  Add reserved mushroom stock and porcinis to the pan and simmer 1-2 minutes longer to combine.


Add the cooked chicken back to the pan and spoon sauce over to re-warm the chicken pieces for a minute or two.  Serve chicken with sauce over the top.

Friday, August 11, 2017

Chicken Paillards

Last Year's Post:  Spanish Omelet
Two Years Ago:   Cold Sesame Noodles with Cucumber

Paillard (pie-yar) is just a fancy term for a chicken or veal cutlet that's been pounded until it's thin and then grilled or sauted.  It's often cooked in a skillet with the pan drippings used to make a sauce, but I like this particular recipe because it's healthier - the additional flavor comes from seasonings, greens and a mustardy vinaigrette instead of a butter sauce.  It's a very quick, elegant and healthy weeknight dinner.

My inspiration for making it this week was the container of baby kale that I found at the grocery store.  Baby kale?  Totally cute, ridiculously healthy, tender and delicious.  If you can find it, try it, but if you can't, use arugula for a similar tender-yet-slightly-bitter taste.


All you have to do is toast some nuts, gently pound the chicken, make the vinaigrette, cook the chicken for about 4 minutes, and toss the greens.  I think it took less than 30 minutes from start to finish.


One last note about pine nuts:  I added them here because I thought they would go perfectly, and they did.  However, there must be a worldwide pine nut shortage because they're expensive and hard to find at the moment, so feel free to substitute toasted almonds or walnuts.


print
Chicken Paillards
Serves 4

2 large or 4 small boneless skinless chicken breast halves
3 tablespoons olive oil, divided
Salt and freshly ground black pepper
Garlic powder
Grated zest and juice of ½ lemon
½ teaspoon grainy mustard
8 cups baby kale, baby arugula, or mixed greens
Shaved parmesan cheese
½ cup toasted pine nuts


To make the dressing, whisk the lemon zest and juice, mustard, and 2 tablespoons olive oil in a bowl until combined (or shake in a small jar).  Season with salt and pepper to taste; set aside.

Preheat a grill pan, outdoor grill, or large nonstick pan to medium high.

If using large chicken breasts, cut each in half horizontally to make two cutlets.  Place the chicken breasts between two pieces of plastic wrap and pound gently using a meat hammer until each is an even thickness and quite thin – about ¼”.  Remove the chicken pieces from the plastic and drizzle them with 1 tablespoon of olive oil, massaging it into both sides with your hands.  Sprinkle both sides with salt, pepper and garlic powder.

If using a nonstick pan, coat lightly with oil.  Grill or sauté the chicken pieces for 2-3 minutes per side until cooked through.  Place on individual plates


Combine the greens with just enough dressing to coat lightly, then mound on top of the chicken.  Top with parmesan shavings, toasted pine nuts and additional freshly ground black pepper.

Friday, August 4, 2017

Zucchini Parmesan

Last Year's Post:  Savory Kale and Corn Galette
Two Years Ago:    Spanish Shrimp

It's summer, which means fresh tomatoes and zucchini are everywhere.  If you have a garden or made a recent trip to the farmer's market this is a perfect way to use some of them up.  I recently made a similar recipe for zucchini roll-ups stuffed with ricotta and topped with a tomato sauce that was very good but pretty fussy and time-consuming so the idea of simply layering the zucchini, cheese and sauce was appealing.

The original recipe didn't have ricotta cheese, which made it a nice light side dish.  Adding the ricotta makes it a satisfying vegetarian entree. It's your choice either way.

If you don't have a bunch of fresh tomatoes, you could always used good quality canned tomatoes.  To make it even easier,  you could buy a marinara sauce at the store.

First you thinly slice the zucchini, then bake until tender. Layer the zucchini, sauce, and ricotta mixture (if using) with Parmesan and bake.  I wanted to use a pretty oval baking dish for the pictures, but couldn't quite figure out how to layer the rectangular zucchini slices in an oval dish.  Next time I think I'll just bake more zucchini and overlap them every which way, if that makes sense.


This is not only healthy, but truly delicious.

print
Zucchini Parmesan
Serves 6


For the tomato sauce:
2 to 2 ½ pounds fresh ripe tomatoes
1 tablespoon extra-virgin olive oil
1 small onion, chopped 
2-4 garlic cloves, to taste
Salt and pepper
1/8 teaspoon sugar
2 sprigs fresh basil
1 tablespoon chopped fresh basil

For the zucchini parmesan:
2 to 2 ½ pounds zucchini
Salt and pepper
3 tablespoons extra-virgin olive oil, divided
½ teaspoon red pepper flakes (or more to taste)
¾ cup freshly grated Parmesan
1 cup ricotta cheese
2 egg yolks
2 garlic cloves, grated
3-4 sprigs fresh basil


Preheat oven to 450 degrees. 

Line 2 sheet pans with parchment.  Trim ends off zucchini and cut in half crosswise, then cut into thin lengthwise slices about ¼ to 1/3” thick.  Season both sides with salt and pepper and toss with 2 tablespoons olive oil.  Arrange zucchini slices on baking sheets in a single layer and sprinkle with red pepper flakes.  Roast for 12-15 minutes until lightly browned and tender.  Remove and let cool.  Reduce oven to 375d.

While the zucchini cooks and cool, make the sauce:  if you have a food mill, quarter the tomatoes.  If not, peel, seed and chop them.  Heat 1 tablespoon olive oil in a large, heavy skillet over medium heat and add onion.  Cook, stirring often until tender, about 5 minutes.  Add garlic and cook, stirring, until fragrant, about 30 seconds.  Add tomatoes, salt, pepper, sugar and basil sprigs.  Increase heat to medium-high.  When tomatoes are bubbling briskly, stir and reduce heat to medium.  Cook, stirring often, until tomatoes have cooked down and are beginning to stick to the pan, 15-25 minutes.  Remove basil sprigs; taste and adjust seasonings.  If using a food mill, put sauce through medium blade.  If not, pulse sauce in a food processor until just coarsely pureed.  Stir in chopped basil.

To assemble and bake:  place the ricotta, egg yolks, grated garlic and basil in a small food processor and pulse to combine.  Set aside. Oil a 2-quart dish with olive oil or nonstick spray. Spread ¼ cup tomato sauce over the bottom of the dish.  Arrange a third of the zucchini slices in an even layer over the tomato sauce.  Spoon a third of the remaining sauce over the zucchini and sprinkle with ¼ cup Parmesan.  Repeat one additional layer, then spread the ricotta mixture evenly over the second layer.  Add one more layer of zucchini, sauce and Parmesan.  Drizzle on the remaining 1 tablespoon olive oil. 


Bake 30-35 minutes until bubbling and browned.  Allow to stand for 5-10 minutes before serving.  

Friday, July 28, 2017

Grilled Shrimp Quesadillas


Last Year's Post: healthy white bean dip
Two Years Ago:  chicken quinoa salad with nectarine vinaigrette

Ahhh, summer.  Ideal summer foods are light, simple and tasty.  If they involve grilling, so much the better.  These shrimp quesadillas fit the bill in every way - they involve a grand total of five ingredients (not counting vegetable oil, which really shouldn't count) plus two brief grill visits to create something pretty special and very delicious.

You start by grilling some shrimp and red onion.  While they grill (a total of maybe 10 whole minutes) you could a) sip a glass of wine and enjoy the breeze or b) shred some cheese for the next step.  If you're really good you can do all three at the same time, but stay close to the grill - those shrimp go fast.


When the shrimp and onion are done, the onion is chopped and the shrimp sliced in half to form crescents.  Dump the cheese, onion and shrimp on flour tortillas and grill until pretty, folding partway through.  Serve with your favorite salsa or pico de gallo - just nothing too hot or bold that might overpower the shrimp.


A note about this recipe - it's from Rick Bayless, one of my favorite chefs.  He calls for a young Manchego cheese, which is Spanish.  He probably specifies young cheese because it gets stronger as it ages and again, he doesn't want to overpower the shrimp.  It was very good with Manchego but you could certainly substitute Monterey Jack if you felt like it.  You could also add lobster or crab in addition to the shrimp to make the quesadillas really special.

One quesadilla per person makes a light dinner with a side salad, or you could cut them into small pieces to use as an appetizer or part of a Mexican party table.

print recipe
Grilled Shrimp Quesadillas
Makes 6 quesadillas

½ medium red onion, cut into ½-inch rounds
12 ounces peeled and deveined shrimp
 ¼ cup vegetable oil, divided
3 cups (about 12 ounces) shredded young Manchego cheese
6 (8-10 inch) flour tortillas
Salsa, for serving

Heat a gas grill to medium-high on one side, medium on the other, or light a charcoal fire and let it burn until the charcoal is covered with white ash, then bank the coals to one side. Using an oil mister or pastry brush, oil each onion round on both sides and lay on the hottest side of the grill. Cook, flipping them half way through, until soft and grill-marked, 8 to 10 minutes. Let cool, then cut into ½-inch pieces.

Place shrimp on skewers for easy cooking.  Oil the shrimp on both sides and lay the hottest side of the grill. Cook, flipping halfway through, until just cooked through, about 5 minutes total. When the shrimp are cool enough to handle, cut them in half through the back making two crescents.

Lay the tortillas on the cooler side of the grill. Top each with about ½ cup of cheese and cook until the cheese starts to melt.  Divide the grilled onion and shrimp among the tortillas. When the cheese is about half melted, fold the tortillas in half, enclosing the filling. Cook the quesadillas until the tortillas are lightly grilled and the filling is warmed through, about 2 minutes per side. Serve with your favorite salsa.


Friday, June 30, 2017

Spaghetti with Lemon and Walnuts

Last Year's Post: Grilled Lobster Tails
Two Years Ago:   Southwest Grilled Shrimp Salad

If spaghetti with marinara and meatballs is classic winter comfort food, then this is its summer cousin - spaghetti with a light but very flavorful sauce of lemon, garlic, parsley and walnuts. It's definitely an unusual combination for spaghetti, don't you think?  You can serve it either warm or at room temperature, making it even more appealing for warm summer months.  And of course you could add some grilled chicken or shrimp if you really want, but I find it very satisfying as a vegetarian entree.

I think of this recipe as being minimalist in concept but definitely not in taste.  Just because it doesn't have a long list of ingredients, don't be fooled.  Each ingredient plays an important part for big impact: fruity olive oil, fragrant lemon zest and bright juice, mellow garlic slices, grassy parsley, crunchy toasted walnuts, grated Parmesan, and freshly ground black pepper.  Because there are so few ingredients, be sure to use the best you can find.

The original recipe called for adding the parmesan into the pasta while it's still in the pan, and stirring to make a "creamy sauce".  I found it made big gooey clumps of parsley and half-melted cheese instead, so I adapted the recipe to add the parmesan later.  Same tastes, happier result.


Spaghetti with Lemon and Walnuts
Serves 3-4

May be served warm or at room temperature.

8 ounces uncooked spaghetti
Salt and freshly ground black pepper
1 tablespoon olive oil plus more for drizzling
4 garlic cloves, thinly sliced
1 ½ cups chopped fresh flat-leaf parsley
Zest from ½ lemon
2 ½ ounces grated Parmesan cheese (about 2/3 cup)
1/3 cup toasted walnuts, coarsely chopped
1 lemon, cut into quarters, for garnish


Bring a large pot of water to a boil and add 1 teaspoon salt.  Add pasta and cook until al dente according to package directions.  Reserve 1 cup cooking liquid, then drain the pasta.

Heat 1 tablespoon olive oil in a skillet over medium heat.  Add garlic and cook 2 minutes until pale golden-brown.  Place the pasta in the skillet, tossing to coat.  Add the parsley and toss, adding some pasta water if the pasta looks dry.  Taste and adjust salt if needed; sprinkle with pepper. 

Divide among shallow bowls and garnish with lemon zest, parmesan and walnuts.  Drizzle lightly with olive oil and add lemon quarters on the side for squeezing.

Friday, May 19, 2017

Zucchini, Goat Cheese and Lemon Tart

Last Year's Post: Cold Pasta Salad with Smoked Salmon, Peas and Asparagus
Two Years Ago:   Melon Ribbon Bowls

This beautiful and delicious tart originated with Maria Sinskey of Sinskey Vineyards, home of Ina Garten's favorite rose wine.  Ina was so impressed she included it in her new book, "Cooking for Jeffrey".  It tastes as good as it looks - maybe even better, because the picture doesn't tell you about the lemon and goat cheese under all that zucchini.  It's a perfect light summer meal with a glass of cold, bone-dry rose and would be equally impressive on a buffet table cut into thin slices.  I fiddled with the recipe only a little bit by cutting out the salt in the goat cheese mixture since the zucchini already has plenty of salt, and by upping the amount of lemon because it really tastes fabulous.  Be sure your goat cheese is at room temperature before you start, otherwise it will be too stiff to spread.


The homemade pastry crust is easy to work with and very light and flaky, but you could easily substitute a premade pie crust if you want. A great tip I recently learned for making a nice round crust - roll the dough out slightly larger than you need, then fold it in fourths and trim around the outside edge to make it even.


 It's going to be difficult (and time-consuming not to mention frustrating) to cut the zucchini slices thin enough and uniform enough without a mandoline so if you don't have one already I would suggest you buy one before trying this recipe -they're not expensive.  It's very useful for slicing all kinds of foods to a uniform thickness - it's invaluable for au gratin potatoes, for example.  Some mandolines have their own stand, but it stores more compactly without one.  The important part is to make sure it comes with different types of blades and that the slicing thickness is adjustable.


The original recipe uses only zucchini, but I added in some summer squash for a little color variation just for fun. The dough needs to chill for 30 minutes and the zucchini slices drain for 30 minutes so it takes a while to assemble plus it bakes for 40 to 50 minutes.  The good news is that I assembled the tart and put it in the refrigerator for 45 minutes while I ran an errand before baking without anything bad happening, so I assume you could assemble the tart an hour or so in advance.  In addition, it's just as good warm or at room temperature so you could bake it a few hours in advance of serving.  The next day the leftovers were equally good cold and the tart crust was still crisp and flaky.


print
Zucchini, Goat Cheese and Lemon Tart
Makes 1 (11”) tart; 6 main dish servings or 12 buffet servings

1 ¼ cups all-purpose flour
Kosher salt and freshly ground black pepper
10 tablespoons cold unsalted butter, cut into ½” cubes
½ teaspoon white wine vinegar
5 tablespoons ice water
1 ½ pounds zucchini (can substitute some yellow summer squash)
2 tablespoons olive oil, divided
8 ounces plain creamy goat cheese, at room temperature
1 teaspoon minced fresh thyme leaves
Zest from one small lemon

Place the flour, ¾ teaspoon salt, and the butter in the bowl of a food processor and pulse 12 to 14 times, until the butter is the size of peas.  With the processor running, pour the vinegar and ice water through the feed tube and continue to process and pulse until the dough just comes together.  Dump out onto a floured board, form into a disk, wrap in plastic and refrigerate for 30 minutes.

Meanwhile, slice the zucchini (and summer squash, if using) to 1/8” thick on a mandoline.  Place the slices in a colander set over a plate and gently toss with 2 teaspoons of salt (the salt will draw out some of the moisture).  Set aside for 30 minutes to drain.  Spread the slices out on a clean dish towel, cover with a second clean towel and gently pat to remove some of the moisture.  Place the slices in a bowl and gently toss with 1 tablespoon of olive oil.

With a fork, mash together the goat cheese, thyme, lemon zest and ¼ teaspoon black pepper.  Set aside.

Preheat the oven to 400d.

Roll the dough out on a floured board to an 11” circle (tip:  roll the circle slightly larger, then fold the dough into quarters and trim the outside edge to make a smooth circle).  Place the dough on a sheet pan line with parchment.  Spread the goat cheese mixture evenly on the dough leaving a ½” boarder.  Lay the zucchini slices in tightly overlapping circles, starting at the very edge of the dough (the zucchini will shrink as it bakes).  Continue overlapping circles of zucchini until the whole tart is covered.  Drizzle with the remaining tablespoon of olive oil and sprinkle with black pepper.


Bake for 40 to 50 minutes until the dough is golden brown.  Serve hot, warm or at room temperature.

Friday, May 5, 2017

Spinach Puff Pastry Tarts

Last Year's Post: Persian Grilled Chicken with Saffron
Two Years Ago:   Toasted Couscous Salad

The filling for these tarts is very similar to Greek spanakopita, but puff pastry is substituted for phyllo dough which makes them much easier and faster to prepare.  You could cut them into small pieces for an appetizer, or serve them as a vegetarian entree with a tomato and cucumber salad on the side.  They're savory, crisp and light with the airy puff pastry and some crunch from the sesame seeds and pine nuts.

Valbreso sheep's milk feta from France is one of my recent discoveries.  I prefer it to normal chunk or crumbled feta that you find in the grocery store deli section, which I think is quite sharp and very salty.  The Valbreso feta is less salty and more creamy than other varieties, so it's worth looking for.  I've found it in upscale grocers, natural food stores and Costco (of course).

Puff pastry needs to thaw for about 40 minutes before unfolding, which gives you time to thaw the spinach and prepare the filling.  After rolling, cutting and assembling the tarts they bake for about 20 minutes, so start to finish the recipe takes a little over an hour.


print
Spinach Puff Pastry Tarts
Yields 2 - 6” square tarts

1 sheet of Puff Pastry (thawed according to instructions on the packet)
1¼ cups frozen spinach
¼ yellow onion, finely diced
1 clove of garlic, grated
1 tbsp olive oil
½ cup ricotta
½ cup feta, crumbled
¼ cup pine nuts, toasted (optional)
Salt and pepper, according to taste
1 egg + 1/2 tbsp water for egg wash
Sesame seeds for garnish


Preheat oven to 425d.  Line a baking sheet with parchment paper.

Thaw spinach in the microwave and drain well.  Place in a clean dishtowel and squeeze to remove as much liquid as possible.  Set aside.

Heat olive oil in a skillet on medium heat and sauté the onion until it turns soft and translucent. Add the garlic and sauté for 30 seconds, then add the spinach.  Stir to combine, then place the pan off the heat to cool.

 While the spinach mixture is cooling, season the ricotta cheese generously with salt and pepper in a large bowl.  Add the cooled spinach mixture to the ricotta and mix thoroughly with a fork. Add the feta and optional pine nuts and mix gently to combine.

Whisk the egg and water together in a small bowl and set aside.

When ready to assemble, unfold the puff pastry sheet on a lightly floured surface and roll to form a roughly 12”x12” square.  Cut in half horizontally and vertically to form four 6”x6” squares.  Divide the filling equally between two squares and spread evenly to within ½” of the edge on all sides.   Place another sheet on top of the spinach mixture and use your fingers to press down and seal the edges around the spinach, then use a fork to crimp the edges.  Brush the top of the pastry with egg wash and lightly sprinkle with sesame seeds. Make three small slits in the top of each tart with a sharp knife to allow steam to escape while baking.

Transfer the tarts to the prepared baking sheet and bake for 20-22 minutes until golden and puffed.  Cut in half to serve.


Friday, July 15, 2016

Coconut Chicken Fingers


Last Year's Post:Ravioli with Fresh Corn
Two Years Ago:  33 Recipes for Hot Summer Days

If you've ever enjoyed coconut shrimp, you'll like this recipe.  It's very easy to make - just cut up boneless skinless chicken breasts, bread them, brown them until golden, then bake until cooked through.  If you want to save calories and fat you could skip the browning step and just bake them for 20 minutes, flipping halfway through, but the pan browning step gives you a browner and crunchier coating.  Your choice.


Coconut shrimp (and chicken) are traditionally served with a dipping sauce that's both sweet and spicy.  The two most common versions are a spicy orange sauce (recipe below) and sweet chili sauce, which is a bottled sauce found in the Asian aisle of most grocery stores.  The sweet chili sauce is actually pretty mild right out of the bottle, but here's a secret that a chef once told me - if you warm it on the stove, it gets progressively hotter in terms of spice level so you can adjust it to your preference.  We chose the sweet chili sauce this time around because we already had a bottle open (and didn't want to open another jar of marmalade since The Lawyer already had three open in the refrigerator, which is another story entirely).  He like the chicken so much that at one point he asked "just where did you get this recipe?" which was pretty funny at least to me.  By the way, sweet chili sauce also makes an excellent dipping sauce for spring rolls or eggs rolls if you're wondering what to do with the rest of the bottle.


You could use unsweetened coconut if you prefer, but we liked the subtle sweetness from using sweetened coconut and felt it went well with the sweet and spicy sauce.  Again, it's your choice.  Isn't cooking great?

print recipe
Coconut Chicken Fingers
Serves 4

1 ½ pounds skinless, boneless chicken breasts or cutlets
1 cup sweetened shredded coconut
¾ cup Panko bread crumbs
1 teaspoon salt
½ teaspoon black pepper
2 eggs
¼ cup canola oil
½ cup sweet chili sauce (found in the Asian section of grocery stores)
-  or Spicy Honey Orange Sauce (below)


If using chicken breasts, pound to an even thickness.  Cut chicken breasts or cutlets lengthwise into several long strips.

Preheat oven to 400d and line a baking sheet with parchment paper.  Set aside.

Pulse the shredded coconut in a food processor to make smaller pieces.  Combine with Panko in a shallow bowl.  In a second shallow bowl, whisk the flour, salt and pepper together.  In a third shallow bowl, whisk the eggs.  Line the bowls up in order:  flour, then egg, then coconut/Panko mixture.

Heat the oil in a large skillet over medium-high heat.

Coat each chicken strip in flour, shaking off excess.  Then, dip in egg and let excess drip off.  Finally, generously roll in the coconut mixture and place on a clean plate or baking sheet.  Repeat with the remaining chicken pieces prior to putting any in the pan.

When all chicken pieces are ready, place them in the pan (may be done in batches if the pan isn’t large enough).  Fry until the first side is golden brown, about two minutes, then turn and fry until the second side is golden.  One each piece is done, place on the prepared baking sheet.

When all pieces are done, place the baking sheet in the oven for 6-10 minutes until chicken is completely baked through.  Serve with sweet chili sauce or Spice Honey Orange Sauce for dipping.

Note:  baked coconut chicken freezes well for 2-3 months.  Bake frozen chicken in a 350d oven for 20 minutes or until warmed through.

Spicy Honey Orange Sauce
½ cup orange preserves/marmalade
¼ cup honey
3 tablespoons Dijon mustard
1 teaspoon crushed red pepper flakes
 Salt, to taste


Combine all ingredients and add salt to taste.

Friday, January 15, 2016

Shrimp and Bacon Ramen

Last Year's Post:  Chicken Pho
Two Years Ago:   Italian Sausage Soup

I love ramen noodles because I love all things pasta, but ramen has the additional benefit of all those fun curls.  Plus, it's cheap, easy to cook, and a perfect blank canvas for nearly any sauce and ingredients.  This particular recipe is sort of an American-Asian mashup of ingredients much like you'd find at a good food truck - good old American bacon pairs up with the typical Asian flavors of soy sauce, sesame oil, shiitake mushrooms, red bell pepper and shrimp for an absolutely delicious result.  Of course, if you want to make it a little lighter you could leave out the bacon but it really added that little extra something.  I adapted it from a recipe that called for a lot of special Asian ingredients and substituted readily-available ingredients instead.

I love my serrated grater for making the thinnest carrot strips, but if you don't have one (hint:  Bed, Bath and Beyond) just cut them as thin as you can.  The benefit to having long thin strips is that after they're briefly sauteed they soften a little and start to mimic the noodles in shape and twirl-ability.


Start by doing all your prep, of course, including the shrimp - peel and devein them, take off the tail shells, then cut them through the back all the way down to (but not through) the tail to butterfly them open.  That does two things:  it allows them to cook faster and more evenly, plus they curl into the coolest shapes as they cook.  Very fancy.


When everything is ready, cook the bacon while you're cooking the ramen noodles.  Use half the bacon fat to cook the shrimp and vegetables, then use the other half to briefly fry the noodles to make them a little crispy.  Toss everything with the sauce until it's absorbed, and you're done - very fast and easy.  And again, if you don't want to include the bacon, just use a little peanut oil instead.  You could also skip the step of frying the noodles to cut down on fat and calories - the noodles will just be a little softer.


I would put this up against your favorite food truck food any day, plus you get to eat it piping hot at home whenever you want.


print recipe
Shrimp and Bacon Ramen
Serves 4

For the sauce:
1/3 cup soy sauce
1 tablespoon rice wine vinegar
1 ½ teaspoons toasted sesame oil

For the ramen:
4 (3 ounce) packages ramen noodles
1 teaspoon toasted sesame oil
4 strips of bacon, cut crosswise into 1/2-inch pieces
12-14 ounces large shrimp (about 4 per person), peeled and deveined, tails removed
4 green onions, thinly sliced
1 red bell pepper, thinly sliced
1 carrot, peeled and cut into matchsticks (or julienned)
1 tablespoon peanut or olive oil
6 ounces shiitake mushrooms, cleaned, stems removed, and sliced
Toasted sesame seeds for garnish, optional


For the sauce, whisk all ingredients together in a small bowl and set aside.

Cut each shrimp in half lengthwise almost to the tail end (but not cut in half completely). 

For the noodles:  bring a large pot of salted water to a boil.  Cook the noodles until just barely cooked according to package directions (they will cook more later).  Drain and rinse with cold water.  Using a kitchen shears, cut the noodles into approximately 8-inch lengths.  Toss with 1 teaspoon sesame oil to prevent sticking. Set aside.

Cook the bacon in a large skillet over medium heat until crisp and brown, then transfer to a paper towel-lined plate.  Remove and reserve half of the bacon drippings in a small bowl for later.  Re-heat the remaining bacon drippings over medium heat, then add the shrimp to the pan and sprinkle with salt and pepper.  Sauté, turning occasionally, until the shrimp are curled and cooked through, about 4 minutes.  Remove to a plate.

Add a tablespoon of oil to the same pan and place over medium heat.  Add the mushrooms and sauté for 2-3 minutes, stirring occasionally.  Add the red pepper and carrots and sauté for additional minute or two, then add the green onions and sauté for 30 seconds.  Remove to a large bowl.

Add the remaining bacon fat to the pan and heat to medium-high.  Add the noodles and cook, stirring minimally, until the noodles are crispy and charred in places, about 3 minutes.

Add the noodles to the bowl with the mushrooms, green onions, red pepper, and carrots.  Add the sauce and toss again.  Divide among bowls, then top with shrimp and bacon.  Garnish with sesame seeds, optional.


Friday, January 1, 2016

Chicken and Wild Rice

Last Year's Post:  Korean Seafood Pancakes
Two Years Ago:   Smashed Potatoes

I was watching a cooking show the other day where the star was making a casserole with what she claimed was wild rice.  It was actually a rice blend that was probably 90% white rice with a few grains of wild rice sprinkled in.  If you're from the Upper Midwest as I am where wild rice is hallowed, this is unforgivable.  When we talk about wild rice, we mean 100% wild rice.  It got me thinking nostalgically about Byerlys, the best grocery store in the world, and all their great wild rice recipes (they also have a cooking school, a catering function, gift shops, and chandeliers....in. the. grocery. stores.) Plus, they have every gourmet ingredient you could ever imagine - kind of like Whole Foods but ten times bigger and better.  I miss Byerlys.

Anyway, it inspired me to look up their chicken and wild rice recipe, which I've had for probably 20 years at least.  One way I could tell it was relatively old (and from Minnesota, where ketsup is a spice) is that it called for canned mushroom soup and canned mushrooms but almost nothing in terms of seasoning.  I remember really liking the recipe but had a strong suspicion that if I made it today it would taste really bland.  

So, I fell down the recipe-remake rabbit hole and ended up changing almost everything. Chicken cutlets were substituted for chicken breasts to cut down on portion size and calories.  Kale and roasted red peppers were added for taste, nutrition and color. A healthy homemade sauce replaced the canned soup, and fresh wild mushrooms replaced the canned mushrooms.  Fresh thyme and garlic were added for seasoning, and toasted almonds for crunch.  Whew.

The wild rice can be cooked in advance.  (For that matter, you could prepare the whole thing in advance and just bake it on the night on the night you want it.)  After cooking the wild rice, the sauce is prepared starting with wilting the kale, then sauteing the mushrooms.


The sauce continues by making a roux with butter and flour, then adding the liquids slowly so it doesn't get lumpy.  The kale and red peppers are added, then some of the sauce is reserved before adding the wild rice and most of the almonds (save a few for garnish) to the remainder.


The wild rice goes in a prepared dish, topped with the chicken cutlets.  I had two small chicken cutlets and one large breast so I ended up cutting them into similar pieces which resulted in 6 smallish pieces total.


Top the chicken with the remaining sauce and cheese, then bake.


When you change a recipe that much you have to be prepared that it isn't going to be right the first time, but I was really happy with the results and wouldn't change a thing.  It was delicious and had great texture from the chewy wild rice and crunchy almonds.  Yes, it's more work than opening a few cans, but it tastes better and it's so much healthier.  You could use rotisserie chicken or leftover chicken, turkey or ham just as easily. Or as an alternative, you could saute the cutlets separately and place them on top of the plated wild rice so you can see the chicken better, but I like serving it this way...the Byerlys way.  Sigh.

Chicken and Wild Rice
Serves 4

2 cups water or low-sodium chicken broth
1 cup wild rice
1/2 bunch of kale, leaves stripped off steams and chopped
8 ounces cremini mushrooms, cleaned and sliced
2 tablespoons olive oil
1 tablespoon butter
1 clove garlic, minced or grated
1 tablespoon fresh thyme, chopped
1/8 teaspoon nutmeg
1/4 teaspoon salt
1/4 teaspoon pepper
4 tablespoons flour
1 cup 2% milk
3/4 cup low-sodium chicken broth
¼ cup dry sherry
¼ cup sour cream
½ cup chopped roasted red bell peppers
4 chicken cutlets or 2 chicken breasts cut in half horizontally
1/2 cup gruyere cheese, shredded (or parmesan, or a combination of both)
1/3 cup slivered almonds, toasted
Salt and pepper

Rinse and drain the wild rice.  Bring water or broth to boil in a medium saucepan.  Add the wild rice; cover, reduce heat, and simmer 35 minutes.  Check to determine if grains are swollen and most are split.  If not, check again every five minutes until done (typically 45-50 minutes).  Remove from heat, drain, and set aside to cool. (May be made a day or two in advance.  Keep covered and refrigerated.)

Spray a 9”x12” baking dish with cooking spray. Set aside. Preheat the oven to 375 degrees F.

Heat a large saucepan over medium-­high heat. Add the kale and 1 cup of water to the skillet. Cover and cook for 10­ minutes, stirring occasionally, until the kale is wilted. Once the kale is wilted and most of the water has been absorbed, remove the kale and drain well.

Return the saucepan to medium heat and add 2 tablespoons olive oil. When the skillet is hot, add the mushrooms in a single layer. Let cook until browned on the bottom, about 2 minutes, then stir and season with salt and pepper. Continue to cook, stirring occasionally, for about 5 minutes. Add the butter to the skillet. Once the butter is melted reduce the heat and add the garlic, thyme and nutmeg and cook for about 10 seconds.

Combine the milk, broth and sherry in a measuring cup.  Sprinkle the flour over the mushrooms and cook, stirring, for 1 minute. Add the broth combination a little at a time, stirring constantly to allow the flour to absorb the liquid before adding more (this prevents lumps).  Increase the heat and bring to a boil; cook stirring constantly for 2-­3 minutes until thickened. Add the sour cream and stir to combine, then add the kale and roasted red peppers. Season to taste with salt and pepper. Remove and reserve 1 ½ cups of sauce, then add the remaining sauce to the cooked wild rice. Pour the wild rice mixture into the prepared casserole dish.


Lay the chicken pieces on top of the rice mixture and cover with the remaining sauce.  Sprinkle the cheese on top and cover with foil.  Bake the casserole for 30 minutes, then uncover and bake or broil a few more minutes to lightly brown the top.