Showing posts with label fast. Show all posts

Friday, September 7, 2018

Saffron Chicken with Sugar Snaps


Saffron is an exotic spice with a unique flavor that I can't even begin to describe.  It's expensive because the little saffron threads have to be hand-harvested from crocus flowers, but the good news is that a little goes a long ways in terms of both flavor and color in a recipe.  If you like saffron, I guarantee you'll love this dish.

You can tell this recipe is from a restaurant when you notice the butter and olive oil.  Although it seems like a lot, this recipe does serve four and you could always cut down on the amounts but the taste is absolutely worth it.  The secret is the chicken marinade of saffron, thyme, parsley and lemon zest with just enough olive oil to make a paste.  The incredible flavor is achieved by marinating the chicken for at least 4 hours and preferably overnight which allows the marinade to both stick to and permeate the chicken.  The good news is that if you plan ahead and marinate the chicken the night before, the whole dinner takes about 20 minutes to make the next day.  The chicken is cooked over moderate heat to preserve the flavors of the paste and to keep it from drying out.  The sugar snaps add healthy veggie crunch while the couscous or rice rounds out the meal.  Beautiful, delicious and (mostly) healthy.

P.S.  Make extra chicken for the best-ever chicken salad sandwich with toasted almonds, currants, celery and a tiny amount of mayo on a crusty roll.

print

Saffron Chicken with Sugar Snaps
Serves 4

Note that the chicken needs to marinate for at least 4 hours and up to overnight so plan ahead.

Scant ½ teaspoon saffron threads
3 tablespoons unsalted butter
5 tablespoons olive oil, divided
2 large boneless skinless chicken breasts, cut in half horizontally to form 4 cutlets
1 tablespoon chopped fresh thyme leaves, divided
2 tablespoons chopped fresh Italian parsley
1 lemon, zested and cut into quarters (for garnish)
3-4 cups sugar snap peas, ends trimmed
4 green onions, sliced, white and green parts divided
Kosher salt and freshly ground black pepper
Hot cooked couscous or rice

Crush the saffron as finely as possible in a mortar and pestle.  Reserve about a quarter of the saffron for later, then add the remaining saffron to 4 tablespoons of olive oil.  Add the saffron oil, 2 teaspoons of thyme, the parsley and the lemon zest to a large zip-top bag.  Close the bag and massage to combine the ingredients, then open the bag again and add the chicken pieces.  Close and move the chicken around to make sure each piece is coated evenly.  Marinate in the refrigerator for at least 4 hours and preferably overnight.

When ready to cook, remove the chicken from the bag and season with salt and pepper.  Heat a large sauté pan over medium heat and add the remaining one tablespoon of olive oil.  Place the chicken in the pan and cook for 3-4 minutes until lightly golden.  Flip the chicken and continue to cook until the internal temperature reaches 160d, about 3-4 minutes more.  (Watch the temperature so the chicken doesn’t get too dark before it’s cooked through.)  Remove the chicken and set aside.

Return the pan to the stove over medium heat and add 2 tablespoons of butter.  When it melts, add the sugar snaps, green onions and remaining thyme.  Season with salt and pepper.  Saute for 2-3 minutes until the sugar snaps are bright green and crisp tender.  Add the remaining tablespoon of butter and the reserved saffron and stir until the butter melts.  Remove from the heat.

To serve, plate the chicken with the sugar snap mixture and hot couscous or rice.  Garnish with the green onion tops and a lemon quarter to be squeezed on everything.


Friday, December 15, 2017

Sheet Pan Pasta with Broccoli

Lat Year's Post: Spiced Pecans
Two Years Ago:  Sugar Snap Pea Salad

This is an innovative alternative to the traditional baked pasta with broccoli and cheese, that uses a sheet pan to roast the broccoli and then crisp up the pasta and topping while warming the ricotta.  The whole thing goes very fast since you boil the pasta while the broccoli roasts and broiling at the end takes only a few minutes, making it much faster than a baked pasta.  Another time-saver would be to buy pre-cut broccoli florets, at which point this whole meal could be made in about 40 minutes.


The recipe is slightly adapted from one by Melissa Clark of the New York Times. She emphasized that since this is such a simple recipe with few ingredients, the quality of each ingredient really matters.  In particular, she suggested going to a cheese shop to buy the best quality artisan ricotta you can find rather than the typical supermarket tub.  And this would also be a great recipe to use a really fun pasta shape - just be sure the pasta is approximately the same size as the broccoli for ease of eating.

As for my adaptations - I cut down on the amount of broccoli to 2 pounds (she called for 2.5 pounds) and you can see it's still plenty of broccoli - and 10 ounces of pasta rather than 12 ounces.  With the adaptations, this still makes 4 generous servings.  If you use her 2.5 pounds of broccoli and 12 ounces of pasta I would say it would serve 6 and hopefully you have a big sheet pan to boot.

Be sure to use your best quality olive oil to drizzle over the finished dish, squeeze on some lemon juice and shower with freshly ground black pepper.


print
Sheet Pan Broccoli Pasta
Serves 4

2 pounds broccoli, cut into bite-sized florets
2 tablespoons extra-virgin olive oil, more as needed
¾ teaspoon kosher salt, more as needed
½ teaspoon red pepper flakes, or to taste
10 ounces medium-sized pasta such as rigatoni, or similar-sized other shapes
1/3 cup grated Parmesan cheese
1/3 cup panko bread crumbs
1 tablespoon finely grated lemon zest
½ teaspoon freshly ground black pepper, more as needed
12 ounces best quality, whole milk ricotta
Fresh lemon juice, for serving

Heat oven to 425d.

On a rimmed baking sheet, toss together broccoli, oil, ¾ teaspoon salt and the red pepper flakes.  Roast until tender and browned at the edges, 18 to 25 minutes, tossing halfway through.  Remove from the oven and set the oven to broil.

Meanwhile, bring a large pot of salted water to boil.  Cook pasta according the package directions; drain.

In a small bowl, stir together Parmesan, panko, lemon zest, a pinch of salt and the black pepper.


Toss cooked pasta with broccoli on baking sheet.  Season with salt and pepper, then dollop with ricotta.  Sprinkle with the Parmesan mix, drizzle generously with oil, and broil until topping is crisped and golden, 2-3 minutes.  Watch closely so the topping doesn’t burn.  Place portions in individual shallow bowls, then sprinkle with lemon juice, drizzle with a little additional olive oil, and shower with coarse black pepper before serving.

Friday, July 14, 2017

Spanish Chicken Salad with Manchego and Smoky Almonds

Last Year's Post:  Spiced Carrot Soup (Hot or Cold)
Two Years Ago:   Baked Falafel

This is a sophisticated salad that's incredibly easy to throw together in the time it takes to toast some almonds.  But there are a few somewhat unusual ingredients that are key:  Manchego cheese, smoked paprika, piquillo peppers and really good sherry vinegar.  Manchego cheese is a Spanish cheese similar to Gruyere that you can find in most good cheese shops.  Smoked paprika can be found in some spice aisles and at Penzeys, my favorite spice store.  Smoked paprika is very Spanish and makes the salad much more interesting so don't be tempted to substitute regular paprika.  Piquillo peppers can be found in most grocery stores next to regular jarred roasted red peppers.  I think they have a brighter and more interesting taste than regular roasted red peppers but if you can't find them, regular roasted peppers would be fine.


And finally, sherry vinegar.  Sherry vinegar is my favorite vinegar ever since I had the opportunity to sample a really good quality one from Spain, and I'll never go back.  Please don't buy one of those little bottles from the grocery store.  Take the time and effort to get a high-quality bottle from your local gourmet store or online - the difference in taste is amazing.  I bought this one online from iGourmet.


Anyway, after you buy the Spanish ingredients it's a very quick salad to assemble because you use precooked deli chicken.  The only cooking you do is to toast the almonds.  Stay nearby and stir frequently while they toast because they can burn fast.


print
Spanish Chicken Salad with Manchego and Smoky Almonds
Serves 4


2 tablespoons unsalted butter
½ cup sliced almonds
½ teaspoon smoked paprika
Salt and pepper
1 small shallot, minced
2 tablespoons sherry wine vinegar
6 tablespoons extra-virgin olive oil
8 cups salad green, preferably red and green
½ cup drained piquillo peppers from jar, cut into thin strips
4 cups shredded deli chicken meat
1 cup Manchego cheese, cut into cubes or strips


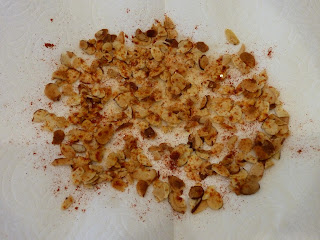
Melt butter in a medium skillet over medium heat.  Add almonds and cook, stirring frequently, until golden and fragrant, about 10 minutes.  Watch closely so they don’t turn too dark.  Transfer almonds to paper towels and sprinkle with smoked paprika and salt.  Let cool.


Whisk shallot, vinegar and oil in a small bowl (or shake in a small jar with lid) to blend.  Season dressing with salt and pepper.  Place salad greens in a large bowl.  Add dressing and toss to coat.  Divide among plates, then top with rows of chicken, peppers, cheese, and almonds.  (Alternately, toss everything together except the almonds and divide between plates, then sprinkle almonds on top.)

Friday, June 3, 2016

Blackberry Hoisin Ginger Pork Tenderloin

Last Year's Post: Red-on-Red Chicken Salad
Two Years Ago:  Chicken Gaston Gerard

Pork tenderloin is one of the most popular cuts of pork because it's so tender and doesn't dry out, plus it's so easy to cook. It pairs particularly well with fruit-based sauces.  Although blackberry preserves are the main ingredient in this sauce, it's not as sweet as you would think due to the hoisin sauce, ginger and vinegar.  The taste is complex and delicious even though it's very easy to make.


Speaking of ginger, have you discovered food tubes?  They make life so much easier.  I currently have four in my refrigerator - anchovy paste, grated ginger, wasabi paste and lemongrass paste.  I usually have a tube of tomato paste also.  No more tedious grating of ginger and throwing the rest away, or opening a can of tomato paste and using one tablespoon and tossing the rest.  Or worse yet, dealing with a tin of oily little fish.  You use exactly what you need and the rest keeps fresh for months.  You'll find the veggie/herb tubes like ginger and lemongrass in the produce section of your store near the herbs.  The anchovy paste will be next to the tins of anchovies, the wasabi paste will be in the Asian section, and the tomato paste tubes will be next to cans of tomato paste.  Try one, they're great!


Anyway, back to the pork tenderloin - this was a very easy, delicious and healthy dinner.  I served it with couscous and French green beans and felt that it was totally company-worthy.  We had leftovers so we thin-sliced the pork and served it over salad greens with a drizzle of the sauce and some fresh blackberries the next day and it was equally great cold.


One last note:  careful with the hot pan when it comes out of the oven!  I once burned my hand badly when I turned around for a second and grabbed the handle out of habit.  Put a towel or a mitt over the handle to remind yourself.

print recipe
Blackberry Hoisin Ginger Pork Tenderloin
Serves 4

1 tablespoon butter
2 cloves garlic, minced
1 teaspoon freshly grated ginger
¼ teaspoon red pepper flakes
½ cup blackberry preserves
¼ cup hoisin sauce
2 tablespoons red wine vinegar
¼ teaspoon salt
¼ teaspoon pepper
1 (1 ¼ pound) pork tenderloin
1 tablespoon olive oil
Salt and freshly ground black pepper
Sliced green onions, for garnish (optional)

To prepare the sauce, melt butter in a small saucepan over medium heat.  Add garlic, ginger and red pepper flakes and sauté for 30 seconds.  Stir in blackberry preserves, hoisin sauce, red wine vinegar, salt and pepper.  Taste and adjust seasonings if needed.  Remove about ½ cup for glazing the pork and set aside the saucepan with the remainder.

Preheat oven to 425d.

While the oven preheats, heat olive oil in a large oven-safe sauté pan over medium-high heat.  Sprinkle the pork on all sides with salt and pepper.  Carefully add the pork tenderloin to the pan and sear on all four sides for 1-2 minutes per side to brown.  Brush with some of the glaze and place the pan in the oven for 10-15 minutes.  Brush with the glaze again and return to the oven for an additional 5-10 minutes until the internal temperature is 140d.  Remove and let rest for 10 minutes.

While the pork is resting, re-heat the sauce.  Slice the pork thinly and drizzle with the sauce.  Garnish with optional green onions and pass the remaining sauce separately at the table.


Friday, April 1, 2016

Manchego Cheese Quesadilla with Pepper Jam

Last Year's Post: Labneh
Two Years Ago:  Classic Potato Gratin

This is my version of a no-recipe dinner.  I was on the way home last night with no idea of what to have for dinner except I knew The Lawyer wanted to grill something.  When I stopped at the store nothing in the meat case looked appealing so I grabbed some flour tortillas, a wedge of Manchego cheese, some pepper preserves and a container of micro-greens.  Done.

This is so easy I'm not even going to pretend it's a recipe - just grate your favorite cheese (fontina, manchego or goat cheese would work particularly well with the pepper jam), put it on some flour tortillas, top with another tortilla, brush both sides with a little olive oil and grill outdoors or on a grill pan or in a skillet until the cheese has melted and the tortillas are golden on both sides.  Serve with the pepper jam (which you can find in almost any grocery store with the other jams) or onion jam if you can find it, and any kind of small greens.  Dinner is served in about 15 minutes.


It's basically an interesting twist on a grilled cheese sandwich, and it makes the perfect light dinner for one of those nights when you've had one of those days.


No recipe (see above)

Saturday, January 23, 2016

Sesame Salmon en Papillote

Last Year's Post:  Eggplant and Rice Parmigiana
Two Years Ago:   Lobster and Shrimp Gratin

Cooking something "en papillote" (pronounced en pa-pee-oh) is French for cooking "in parchment" - basically cooking in a paper pouch to seal in moisture.  It's a great way to cook delicate fish because it seals in the moisture so the fish doesn't dry out, and at the same time it becomes infused with the flavors of the sauce.  I've previously posted recipes for swordfish en papillote (with an Italian twist) and sea bass en papillote (with a Mediterranean theme) so I thought this Asian salmon would be a good complement.   

It's not only flavorful, it's a very healthy dinner as well.  I modified a recipe that I found online to include spinach for nutrition and color, mushrooms for flavor, and sesame seeds for crunch and because they look great.  A mix of white and black seeds is especially attractive - you can find black sesame seeds at Asian markets and at Penzeys - but all white seeds would work also.  Tip: you can usually find a large container of toasted white sesame seeds in the Asian section of your grocery store for much less than a small bottle in the spice aisle.

The recipe is really easy once you get the parchment paper technique down.  Basically you just take a big piece of paper, fold it in half, and cut it in a folded semi-circle with one end slightly more pointy than the other.  Open it up, pile the ingredients on one side of the fold, and close the other side over the top.  Then you start make tight little overlapping folds to ensure the packet is sealed.  Or, you could just use aluminum foil and crimp the edges which is easier, but not as traditional or pretty.  If you plan to serve the packets at the table, parchment is definitely the way to go.


Sometime I remove the contents from the packets before serving, depending on my mood and the contents of the packet.  If there's going to be a lot of cutting involved it tends to be easier to take them out of the paper although it's less dramatic and fun.   Either way, it's a fast, easy and delicious meal that's very healthy.


print
Sesame Salmon en Papillote
Serves 4

For the sauce:
Zest of ½ orange
1 tablespoon fresh orange juice
1 teaspoon peeled minced fresh ginger
3 tablespoons soy sauce
2 teaspoons rice vinegar
2 teaspoons toasted sesame oil
1 teaspoon honey

10-12 leaves baby spinach per packet, about ½ bag of baby spinach
1 red bell pepper, seeded and thinly sliced
7 ounces shiitake mushrooms, cleaned, stemmed and thinly sliced
4 (6 ounce) salmon fillets, skinned
Freshly ground black pepper
¼ cup toasted white or black sesame seeds, or a mix
1/3 cup green onions, thinly sliced on the diagonal
Parchment paper (or aluminum foil)

Preheat oven to 425d.

Combine all sauce ingredients in a small bowl and whisk until blended; set aside.

Cut 4 large (approximately 16” by 12”) sheets of parchment paper.  (If you don’t have parchment paper, foil works just as well but definitely transfer the contents out of the foil before serving.) Fold each sheet in half. Place the fold on the bottom edge nearest you. Starting at the right side, cut a large semi-circle with the fold as the spine and one end more pointed then the other.  Open the paper and place ¼ of the spinach leaves, red bell pepper and shiitake mushrooms in a pile on one side, near the fold.  Moisten with one tablespoon of the sauce.  Place a salmon fillet on top; season with black pepper and additional tablespoon of marinade.  Sprinkle the top of the salmon with sesame seeds.

Fold the other half of the paper over the fish. Starting at the flatter end of the semicircle (not the pointy end), fold 1-2 inches of the edge inwards. Work your way around the circle making a series of tight, overlapping folds to enclose the fish. When you reach the pointy edge, fold the last pleat several times and wrap it under the pouch.  Repeat with the other three packets.

Place the packets on a baking sheet and bake for 11-12 minutes, depending on thickness.


Transfer the packets to plates and cut open.  Garnish with green onions prior to serving.  Alternatively, transfer the package contents to a plate and garnish prior to serving.  Serve any remaining sauce on the side.

Friday, January 15, 2016

Shrimp and Bacon Ramen

Last Year's Post:  Chicken Pho
Two Years Ago:   Italian Sausage Soup

I love ramen noodles because I love all things pasta, but ramen has the additional benefit of all those fun curls.  Plus, it's cheap, easy to cook, and a perfect blank canvas for nearly any sauce and ingredients.  This particular recipe is sort of an American-Asian mashup of ingredients much like you'd find at a good food truck - good old American bacon pairs up with the typical Asian flavors of soy sauce, sesame oil, shiitake mushrooms, red bell pepper and shrimp for an absolutely delicious result.  Of course, if you want to make it a little lighter you could leave out the bacon but it really added that little extra something.  I adapted it from a recipe that called for a lot of special Asian ingredients and substituted readily-available ingredients instead.

I love my serrated grater for making the thinnest carrot strips, but if you don't have one (hint:  Bed, Bath and Beyond) just cut them as thin as you can.  The benefit to having long thin strips is that after they're briefly sauteed they soften a little and start to mimic the noodles in shape and twirl-ability.


Start by doing all your prep, of course, including the shrimp - peel and devein them, take off the tail shells, then cut them through the back all the way down to (but not through) the tail to butterfly them open.  That does two things:  it allows them to cook faster and more evenly, plus they curl into the coolest shapes as they cook.  Very fancy.


When everything is ready, cook the bacon while you're cooking the ramen noodles.  Use half the bacon fat to cook the shrimp and vegetables, then use the other half to briefly fry the noodles to make them a little crispy.  Toss everything with the sauce until it's absorbed, and you're done - very fast and easy.  And again, if you don't want to include the bacon, just use a little peanut oil instead.  You could also skip the step of frying the noodles to cut down on fat and calories - the noodles will just be a little softer.


I would put this up against your favorite food truck food any day, plus you get to eat it piping hot at home whenever you want.


print recipe
Shrimp and Bacon Ramen
Serves 4

For the sauce:
1/3 cup soy sauce
1 tablespoon rice wine vinegar
1 ½ teaspoons toasted sesame oil

For the ramen:
4 (3 ounce) packages ramen noodles
1 teaspoon toasted sesame oil
4 strips of bacon, cut crosswise into 1/2-inch pieces
12-14 ounces large shrimp (about 4 per person), peeled and deveined, tails removed
4 green onions, thinly sliced
1 red bell pepper, thinly sliced
1 carrot, peeled and cut into matchsticks (or julienned)
1 tablespoon peanut or olive oil
6 ounces shiitake mushrooms, cleaned, stems removed, and sliced
Toasted sesame seeds for garnish, optional


For the sauce, whisk all ingredients together in a small bowl and set aside.

Cut each shrimp in half lengthwise almost to the tail end (but not cut in half completely). 

For the noodles:  bring a large pot of salted water to a boil.  Cook the noodles until just barely cooked according to package directions (they will cook more later).  Drain and rinse with cold water.  Using a kitchen shears, cut the noodles into approximately 8-inch lengths.  Toss with 1 teaspoon sesame oil to prevent sticking. Set aside.

Cook the bacon in a large skillet over medium heat until crisp and brown, then transfer to a paper towel-lined plate.  Remove and reserve half of the bacon drippings in a small bowl for later.  Re-heat the remaining bacon drippings over medium heat, then add the shrimp to the pan and sprinkle with salt and pepper.  Sauté, turning occasionally, until the shrimp are curled and cooked through, about 4 minutes.  Remove to a plate.

Add a tablespoon of oil to the same pan and place over medium heat.  Add the mushrooms and sauté for 2-3 minutes, stirring occasionally.  Add the red pepper and carrots and sauté for additional minute or two, then add the green onions and sauté for 30 seconds.  Remove to a large bowl.

Add the remaining bacon fat to the pan and heat to medium-high.  Add the noodles and cook, stirring minimally, until the noodles are crispy and charred in places, about 3 minutes.

Add the noodles to the bowl with the mushrooms, green onions, red pepper, and carrots.  Add the sauce and toss again.  Divide among bowls, then top with shrimp and bacon.  Garnish with sesame seeds, optional.


Friday, October 9, 2015

Chicken Limone Pasta

Last Year's Post: Pretzel Chicken Bites
Two Years Ago:  Arroz Con Pollo

As the weather turns cooler many of us start to crave rich, hot cheesy pasta dishes.  Unfortunately, they're usually full of fat and calories.  I recently came across this dish on the menu of a local wine bistro and was attracted to it for three reasons:  it fulfills the hot pasta requirement, I love lemon, and it sounded much lighter than a typical spaghetti or lasagna.  I re-created it at home and was very happy with the results - it's very lemony and tastes rich even though the sauce is much lighter than a red sauce.  The herbs add a pop of fresh flavor and the rotisserie chicken is moist and meaty.  The entire meal takes less than a half hour to prepare, so it qualifies as a quick and easy weeknight meal.

Really, who doesn't like lemons?


I made it a little extra-special by using this fun egg tagiatelle with cool edges I found at the store, but you could use regular tagiatelle or pappardelle or even linguine or fettucine.


Buying pre-shredded rotisserie saves even more time than buying a whole rotisserie chicken and shredding it yourself - many stores now carry it in their deli or on their salad bar.  All you have to do is make a quick pan sauce while the pasta cooks, then toss the pasta with the sauce and herbs and top with chicken.


It not only satisfied my pasta cravings, it somehow managed to do so without the help of any cheese at all.  That's saying something.

print recipe
Chicken Limone Pasta
Serves 2

½ - 1 cup shredded rotisserie chicken
6 ounces dry pappardelle pasta (or spaghetti or linguine)
2 tablespoons butter, divided
2 garlic cloves, minced
¼ cup white wine
1 cup chicken broth
Zest of half a lemon
Juice of a whole lemon
2 tablespoons capers
Salt and pepper
2 tablespoons mixed chopped herbs (parsley, chives, thyme, etc.)


Bring a large pot of salted water to a boil and cook pasta until just al dente – it will cook further in the sauce.  Drain and set aside.

Meanwhile, melt 1 tablespoon butter in a large skillet over medium heat.  Add garlic and sauté for 30 seconds or until fragrant but do not brown.  Add wine and simmer to reduce by half.  Add chicken broth, lemon juice and capers, then turn heat to medium-high and cook until reduced by half.  Add remaining tablespoon of butter, then add salt and pepper to taste.


Add pasta to the skillet and cook on low for a minute or two, tossing to combine the pasta and sauce.  Add the herbs and toss to combine right before serving.  Serve in shallow bowls topped with chicken and  lemon zest.

Friday, October 2, 2015

Smoked Salmon Cakes

Last Year's Post: Perfect Apple Crisp
Two Years Ago:  Forbidden Rice with Turkey, Roasted Squash and Walnuts

I came across a salmon cake recipe the other day that looked interesting, but I thought it might be a little bland made with plain old salmon.  Since The Lawyer has a smoker I asked him to smoke some salmon, thinking that would make them more interesting.  And were they ever!  The results were outstanding and the mild horseradish sauce made them even better.

If you don't want to smoke your own salmon, it's readily available in most stores.  Look for it in vacuum-sealed packages at the seafood counter.  Just be sure to buy hot-smoked salmon, not cold-smoked.  You can tell the difference just by looking at it - hot-smoked salmon is darkened from the smoke and is sold as a chunk.  Cold-smoked salmon is much lighter in color (it almost looks uncooked) and is sold as an entire fillet, typically thinly sliced.  Hot-smoked salmon has a more pronounced smoke flavor and a meatier texture which makes it perfect for the salmon cakes.


The key is to treat the salmon like you would treat lump crab meat - gently.  Break it into coarse flakes with your hands, then mix and shape the cakes gently so you don't break the flakes up.  Because there's very little binder, treat the cakes gently in the pan also - using two spatulas to turn them (one on top, one on the bottom.)


This meal comes together very quickly and it's healthy if you go easy on the horseradish sauce.  The Lawyer and I were so impressed with this dish that we agreed it would be appropriate for our Gourmet Club - high praise indeed.

print recipe
Smoked Salmon Cakes
Serves 4

For the sauce:
1/2 cup mayonnaise
1/4 cup finely chopped onion
1 tablespoon capers
1 tablespoon chopped fresh parsley leaves plus additional for the salad
1 tablespoon prepared horseradish
Salt and freshly ground black pepper, to taste

For the salmon cakes:
18 ounces hot-smoked salmon
1 1/3 cups panko bread crumbs
2 eggs, beaten
2 rounded teaspoons Old Bay seasoning blend
½ small red bell pepper, seeded and finely chopped
3 tablespoons fresh chives, finely chopped
3 tablespoons fresh dill, finely chopped plus additional for the salad
1 teaspoon hot pepper sauce
2 tablespoons vegetable oil
1 lemon, zested and juiced
1-2 teaspoons olive oil
Salad greens
Salt and pepper
Lemon wedges, for serving


To make the sauce, combine all ingredients in a small bowl.  Add salt and pepper to taste.  Refrigerate covered until ready to serve.

For the salmon cakes, break the salmon apart into coarse flakes using your hands.  (Make sure there aren’t any bones as you’re doing this.)  In a large mixing bowl, combine salmon, bread crumbs, eggs, Old Bay, red pepper, chives, dill, hot sauce and lemon zest (not lemon juice). Mix together gently with your hands, then form into 8 patties.  Place in the refrigerator for 10-15 minutes to firm up.

Heat a large fry pan over medium heat, then add the vegetable oil.  Place the salmon cakes in the pan and fry on the first side until golden brown, about 3-4 minutes.  Gently flip over (using two spatulas, one on top and one on bottom) and fry 3-4 minutes more until browned on the second side.  Remove to a paper-towel-lined plate to drain for a minute.

Toss salad greens with the lemon juice, olive oil and salt and pepper.

To plate, divide salad green among plates and top with additional parsley leaves and chopped dill.  Place two salmon cakes on each plate and serve with lemon wedges and the sauce on the side.


Friday, April 17, 2015

Mustard Swordfish Kebabs

Last Year's Post: Prosciutto, Gruyere and Egg Toasts
Two Years Ago:  Cotswold Quiche

I'm surprised I haven't posted this recipe before.  I've had it for at least 20 years and have made it countless times, refining along the way.  The original recipe called for one big swordfish steak, which I modified to individual portions and finally to kebabs, all to get more of the great mustard marinade in every bite.  I also added red onion and zucchini to the kebabs because I'm a vegetable kind of person, but you can change them to any vegetables you like or leave them out entirely.

The kebabs are grilled or broiled so you can make them any time of the year, and they stay moist and juicy on the inside while becoming crusty on the outside with that great mustard flavor.

I knew it was time to make this recipe when I found some beautiful fresh wild swordfish on sale.  If you haven't had swordfish before, it's a mild yet meaty fish that's not oily.  Trim off the skin and the dark red portion before cutting it into chunks.


First you make the spicy mustard sauce, then you make the actual marinade.  The marinade doesn't use all the spicy mustard sauce, but it keeps beautifully and is really good on sandwiches or served with pork or poultry dishes.

The swordfish and vegetables marinate for 20-30 minutes while you preheat the grill or broiler, then you place them on separate skewers because they cook for different times.  I know it's prettier to alternate everything on the same skewer, but then some pieces are either under-cooked or over-cooked.  As a rule of thumb it's always best to put the meat and vegetables on separate skewers whenever you make kebabs.  The Lawyer likes to use two skewers rather than one because it makes the kebabs easier to turn without the individual pieces spinning around.


Served with couscous tossed with parsley and toasted pine nuts, the kebabs make a delicious, fast and healthy meal.


Mustard Swordfish Kebabs
Serves 4

Note: extra mustard sauce keeps well and is delicious on sandwiches or served with pork or poultry.

For the Spicy Mustard Sauce:
1/3 cup (1 ounce) Coleman’s dry mustard
¼ cup dry sherry
¼ cup Dijon mustard
¼ cup coarse-grained mustard

For the Kebabs
¼ cup extra-virgin olive oil
2 tablespoons fresh lemon juice
2 tablespoons Spicy Mustard Sauce (see above)
1 teaspoon kosher salt
1 teaspoon minced garlic
1 pound (1½ – 2” thick) swordfish, trimmed and cut into cubes
1 medium red onion, cut into 1” chunks
1 zucchini, sliced lengthwise and cut crosswise into 1/2” pieces
1 lemon, cut into 4 pieces

Wooden or metal skewers


If using wooden skewers, submerge in water weighted down with a plate for 30-60 minutes prior to assembly.

To prepare the spicy mustard sauce, place the dry mustard in a small bowl and gradually whisk in the sherry to form a smooth thick paste.  Whisk in the Dijon and coarse-grained mustards until well blended.  Store in a glass jar in the refrigerator for up to 2 months.

To prepare the kebabs: in a small bowl, combine the olive oil, lemon juice, 2 tablespoons of spicy mustard sauce, salt and garlic.  Divide evenly between two quart zip-top bags.  Place the swordfish in one bag and the onion and zucchini in the other.  Seal both bags and toss briefly to coat all ingredients evenly with marinade.  Set aside for 20-30 minutes to marinate.

Meanwhile, heat a grill or broiler on high heat.

After 20-30 minutes, remove the swordfish, onion and zucchini from the bags and place on the skewers.  The swordfish should be placed on skewers by itself and not crowded; the onion and zucchini can be placed on the skewers together.  Sprinkle the skewers with pepper.

Grill or broil the swordfish skewers for 3 minutes per side, turning once.  Grill or broil the vegetable skewers for 4-5 minutes per side, turning once.  

Serve kebabs immediately with lemon on the side.