Showing posts with label light. Show all posts

Sunday, June 23, 2019

Tuna and Hummus Sandwiches


I know this sandwich sounds weird - it did to me too.  That's why I didn't make it for over two years after seeing it on Ina Garten's TV show.  She said she had a tuna and hummus sandwich with radishes at Le Pain Quotidien restaurant in Brussels and loved it.  But it still sounded weird, and beige.  Fast forward two years and I happened to catch the re-run and decided I had to make it just to satisfy my curiosity if nothing else.  I did tweak her recipe to include cucumbers, herbs and lemon zest to brighten it up, and used crusty French rolls in place of sourdough bread for more texture since both the tuna and hummus are soft.

First I made the tuna salad, and really liked her version which has much less mayo than a normal version.  She includes a little olive oil and some lemon which I liked as well - the lighter dressing really lets the tuna shine.  Speaking of tuna, I know you should use tuna packed in water if you're watching calories but tuna packed in oil has so much more flavor.  I specifically like Genova canned tuna if you can find it - the flavor is delicate and not fishy, much like fresh tuna.  (And no, I don't get any paid endorsements, I just like it.)  If I can find it at Fry's, you can probably find it in your store also.

The hummus adds a layer of creaminess and a little earthiness to the light and lemony tuna salad that I really liked.  I also really liked the crunchy veggies and bright herbs as a contrast to the tuna and hummus - the radishes and cucumbers reminded me just the littlest bit of a banh mi sandwich, one of my favorites.  

All in all, this is an unusual tweak on a tuna sandwich that I really enjoyed, and I'm very picky about my tuna sandwiches.  Give it a try and see what you think.

Tuna and Hummus Sandwiches
Serves 2

The tuna mixture should be refrigerated for a few hours for the best flavor so plan ahead.

1 - 5 ounce can tuna in olive oil
¼ cup diced celery
2 tablespoons minced red onion
1 teaspoon grated lemon zest
1 tablespoon fresh lemon juice
1-2 tablespoons mayonnaise
1 tablespoon olive oil
½ teaspoon Dijon mustard
Pinch of kosher salt and pepper
Hummus
Sliced radishes and cucumbers
Fresh herbs – parsley, dill, cilantro
2 crusty French rolls


Drain the tuna and flake it into a medium bowl.  Add the celery, red onion, lemon juice, 1 tablespoon of mayonnaise, olive oil, Dijon, and salt and pepper.  Mix well and decide if you want to add the second tablespoon of mayonnaise.  Taste and adjust seasonings if needed.  Cover and refrigerate for a few hours to let the flavors develop.


Cut the French rolls in half horizontally and pull most of the bread out of the top part (save the bread in a bag in the freezer to make bread crumbs or croutons later).  Spread a layer of hummus on the bottom of each roll, then top with the tuna mixture, radishes and cucumbers, and herbs of choice.  Sprinkle with grated lemon zest.  Replace the top of the roll and press together gently.  Serve at once.


Thursday, May 23, 2019

Spring Carrot Pasta with Herbs


The James Beard awards were just announced, and Arizonans were excited to hear that Charleen Badman of FnB restaurant in Phoenix was named "Best Chef - Southwest".  FnB has been on my list of restaurants to try for several years but I haven't made it there yet, and I suspect reservations are going to be pretty hard to come by for a while.  I was looking at a sample menu on their website in anticipation and one entry made me pause: "pasta, carrots, marjoram, goat cheese, crispy prosciutto".  What?  Pasta and carrots?  Never heard of that particular combination. Chef Badman is known as "the vegetable whisperer" because of her delicious and innovative use of vegetables, so I decided I needed to investigate further.  I did some research online and came up with a recipe that sounds similar even though I haven't actually seen Chef Badman's creation.

I tweaked the recipe by adding sauted cabbage to underscore the carrot's natural sweetness, and added a bunch of fresh herbs from my garden for flavor.  The carrots, pasta, goat cheese and crispy prosciutto work together wonderfully well in terms of contrasting flavors and textures.  You could leave the prosciutto out if you want it to be vegetarian, but it really does add a lot in terms of flavor and texture.

If possible, don't use a box grater to shred the carrots and cabbage because you end up with short shreds that don't work as well with the spaghetti - longer shreds are easier to twirl together with the pasta.  You can buy bags of shredded carrots at the store that are longer, and it's easy to make your own long shreds of cabbage by buying a head of cabbage and thinly cutting it with a sharp knife.

I was really pleased with this recipe and decided to call it a spring pasta because it's light, healthy and full of fresh herbs but it would be great any time of the year.

print

Spring Carrot Pasta with Herbs
Serves 4

Note: long shreds of carrot and cabbage work well here because they mimic the shape of the spaghetti and are easy to twirl with the pasta.  You can buy bags of long shreds of carrots at the store, and you can make your own long shreds of cabbage by thinly cutting a head of cabbage with a knife. 

1 lb spaghetti
3 tablespoons olive oil
6 slices prosciutto, chopped into ½” strips
¼ medium yellow onion, chopped
3 cups shredded carrots (preferably long shreds)
2 cups shredded green cabbage (preferably long shreds)
2 garlic cloves, minced
½ teaspoon caraway seeds
Salt and black pepper to taste
½ cup chopped fresh herbs such as basil, thyme, dill (or a mix) plus a few more for garnish
3 ounces soft goat cheese, crumbled


Bring a large pot of water to a boil and add a generous pinch of salt.  Cook the spaghetti according to package directions.  Drain, reserving about ½ cup of pasta water.

While pasta is cooking, heat oil in a large deep skillet or Dutch oven over medium heat.  Cook the prosciuttos until crispy, then remove with a slotted spoon to a paper towel lined plate to drain.  (Do not drain the olive oil from the skillet.)

In the same skillet, sauté the onion for about 2-3 minutes, stirring occasionally.  Add the cabbage and a pinch of salt and stir often until wilted, about 5 minutes.  Add the carrots and another pinch of salt and cook for an additional five minutes until tender but not mushy.  Stir in the caraway seeds and add salt and pepper to taste.

Add the pasta to the pot and toss well with tongs to combine, adding some of the reserved pasta water if it looks a little dry.  Add the herbs and toss again, then divide immediately between shallow bowls.  Top with the crispy prosciutto, goat cheese, and extra herbs for garnish.


Friday, April 27, 2018

Tuna, White Bean and Fennel Salad

Last Year's Post:  Curried Chicken Salad
Two Years Ago:    Chicken with Caramelized Onion and Cardamom Rice

Tuna and white beans are a time-honored Italian combination for a salad that usually also includes red onion and a lemony dressing.  I recently came across this recipe from the New York Times that includes the fresh flavor and crunch of fennel, which really appealed to me. I decided to adapt it by using canned tuna rather than fresh, and adding some kale to the fennel to make it even healthier.  You could certainly grill some fresh tuna in place of the canned tuna, but I love a good canned tuna salad on occasion and it makes things much simpler and faster.  My personal preference is a high-quality tuna canned in oil because I think tuna packed in water is bland.  I've also heard the tuna packed in pouches tastes fresh, but whichever way you go make sure it's the best tuna you can find.

The key to any great salad is to have a variety of flavors and textures.  This one has creamy beans, meaty tuna, crunchy fennel, tart red onion and bright lemon.  And it's extremely healthy as well, with high-quality protein from the tuna and beans, omega-3s, and all that dark green leafy goodness from the kale.  It's very easy to prepare - can you say no cooking?  (Perfect for a hot summer day...)  All you have to do is make the vinaigrette, chop a few things, and assemble. The recipe recommends serving the salad at room temperature, but the leftovers were just as good cold the next day and the salad keeps extremely well.  Leftovers would be great in a pita at work for lunch.

Have the salad for a light dinner on one of the first warm spring days with a glass of rose wine and imagine you're sitting on a terrace overlooking the Mediterranean.  Ahhhhhh


print
Tuna, White Bean and Fennel Salad
Serves 4

½ small red onion, diced
4 cups cooked cannellini or other white beans (or 2 cans of beans, rinsed and drained)
Salt and pepper
4 tablespoons fresh lemon juice, divided
4 tablespoons olive oil, divided
1 teaspoon lemon zest
2 garlic cloves, pressed or grated
1 large fennel bulb
3-4 large leaves of Tuscan kale, washed, stripped from the stems and thinly cut crosswise
1 (5-6 oz) can tuna (preferably packed in oil), drained and flaked into chunks
2 tablespoons chopped fresh Italian parsley
1 tablespoon chopped fennel fronds
1 lemon, quartered, for garnish

Soak the diced onion in ice water for 10 minutes (this will tame its bite), then drain.  Drain the beans and put in a bowl.  Add a generous sprinkling of salt, 2 tablespoons lemon juice and the onions and stir.  Add 1 tablespoon olive oil and toss to coat.  Set aside.

To make the dressing, in a small bowl whisk together 2 tablespoons lemon juice, the lemon zest, garlic, a pinch of salt, and 3 tablespoons olive oil.  Set aside.

Cut the fennel tops off and reserve some fronds for garnish.  Cut the bulb in half and cut out the core, then cut crosswise into thin slices.  Add the fennel slices and kale to a bowl, then lightly salt and toss with just enough dressing to barely coat.

To assemble the salad, divide the fennel/kale mixture among 4 plates.  Top with the bean mixture and tuna flakes.  Drizzle a small amount of dressing over each salad, then garnish with parsley, fennel fronds, and lemon quarters.  Serve at room temperature.

Friday, July 28, 2017

Grilled Shrimp Quesadillas


Last Year's Post: healthy white bean dip
Two Years Ago:  chicken quinoa salad with nectarine vinaigrette

Ahhh, summer.  Ideal summer foods are light, simple and tasty.  If they involve grilling, so much the better.  These shrimp quesadillas fit the bill in every way - they involve a grand total of five ingredients (not counting vegetable oil, which really shouldn't count) plus two brief grill visits to create something pretty special and very delicious.

You start by grilling some shrimp and red onion.  While they grill (a total of maybe 10 whole minutes) you could a) sip a glass of wine and enjoy the breeze or b) shred some cheese for the next step.  If you're really good you can do all three at the same time, but stay close to the grill - those shrimp go fast.


When the shrimp and onion are done, the onion is chopped and the shrimp sliced in half to form crescents.  Dump the cheese, onion and shrimp on flour tortillas and grill until pretty, folding partway through.  Serve with your favorite salsa or pico de gallo - just nothing too hot or bold that might overpower the shrimp.


A note about this recipe - it's from Rick Bayless, one of my favorite chefs.  He calls for a young Manchego cheese, which is Spanish.  He probably specifies young cheese because it gets stronger as it ages and again, he doesn't want to overpower the shrimp.  It was very good with Manchego but you could certainly substitute Monterey Jack if you felt like it.  You could also add lobster or crab in addition to the shrimp to make the quesadillas really special.

One quesadilla per person makes a light dinner with a side salad, or you could cut them into small pieces to use as an appetizer or part of a Mexican party table.

print recipe
Grilled Shrimp Quesadillas
Makes 6 quesadillas

½ medium red onion, cut into ½-inch rounds
12 ounces peeled and deveined shrimp
 ¼ cup vegetable oil, divided
3 cups (about 12 ounces) shredded young Manchego cheese
6 (8-10 inch) flour tortillas
Salsa, for serving

Heat a gas grill to medium-high on one side, medium on the other, or light a charcoal fire and let it burn until the charcoal is covered with white ash, then bank the coals to one side. Using an oil mister or pastry brush, oil each onion round on both sides and lay on the hottest side of the grill. Cook, flipping them half way through, until soft and grill-marked, 8 to 10 minutes. Let cool, then cut into ½-inch pieces.

Place shrimp on skewers for easy cooking.  Oil the shrimp on both sides and lay the hottest side of the grill. Cook, flipping halfway through, until just cooked through, about 5 minutes total. When the shrimp are cool enough to handle, cut them in half through the back making two crescents.

Lay the tortillas on the cooler side of the grill. Top each with about ½ cup of cheese and cook until the cheese starts to melt.  Divide the grilled onion and shrimp among the tortillas. When the cheese is about half melted, fold the tortillas in half, enclosing the filling. Cook the quesadillas until the tortillas are lightly grilled and the filling is warmed through, about 2 minutes per side. Serve with your favorite salsa.


Friday, June 30, 2017

Spaghetti with Lemon and Walnuts

Last Year's Post: Grilled Lobster Tails
Two Years Ago:   Southwest Grilled Shrimp Salad

If spaghetti with marinara and meatballs is classic winter comfort food, then this is its summer cousin - spaghetti with a light but very flavorful sauce of lemon, garlic, parsley and walnuts. It's definitely an unusual combination for spaghetti, don't you think?  You can serve it either warm or at room temperature, making it even more appealing for warm summer months.  And of course you could add some grilled chicken or shrimp if you really want, but I find it very satisfying as a vegetarian entree.

I think of this recipe as being minimalist in concept but definitely not in taste.  Just because it doesn't have a long list of ingredients, don't be fooled.  Each ingredient plays an important part for big impact: fruity olive oil, fragrant lemon zest and bright juice, mellow garlic slices, grassy parsley, crunchy toasted walnuts, grated Parmesan, and freshly ground black pepper.  Because there are so few ingredients, be sure to use the best you can find.

The original recipe called for adding the parmesan into the pasta while it's still in the pan, and stirring to make a "creamy sauce".  I found it made big gooey clumps of parsley and half-melted cheese instead, so I adapted the recipe to add the parmesan later.  Same tastes, happier result.


Spaghetti with Lemon and Walnuts
Serves 3-4

May be served warm or at room temperature.

8 ounces uncooked spaghetti
Salt and freshly ground black pepper
1 tablespoon olive oil plus more for drizzling
4 garlic cloves, thinly sliced
1 ½ cups chopped fresh flat-leaf parsley
Zest from ½ lemon
2 ½ ounces grated Parmesan cheese (about 2/3 cup)
1/3 cup toasted walnuts, coarsely chopped
1 lemon, cut into quarters, for garnish


Bring a large pot of water to a boil and add 1 teaspoon salt.  Add pasta and cook until al dente according to package directions.  Reserve 1 cup cooking liquid, then drain the pasta.

Heat 1 tablespoon olive oil in a skillet over medium heat.  Add garlic and cook 2 minutes until pale golden-brown.  Place the pasta in the skillet, tossing to coat.  Add the parsley and toss, adding some pasta water if the pasta looks dry.  Taste and adjust salt if needed; sprinkle with pepper. 

Divide among shallow bowls and garnish with lemon zest, parmesan and walnuts.  Drizzle lightly with olive oil and add lemon quarters on the side for squeezing.

Friday, May 19, 2017

Zucchini, Goat Cheese and Lemon Tart

Last Year's Post: Cold Pasta Salad with Smoked Salmon, Peas and Asparagus
Two Years Ago:   Melon Ribbon Bowls

This beautiful and delicious tart originated with Maria Sinskey of Sinskey Vineyards, home of Ina Garten's favorite rose wine.  Ina was so impressed she included it in her new book, "Cooking for Jeffrey".  It tastes as good as it looks - maybe even better, because the picture doesn't tell you about the lemon and goat cheese under all that zucchini.  It's a perfect light summer meal with a glass of cold, bone-dry rose and would be equally impressive on a buffet table cut into thin slices.  I fiddled with the recipe only a little bit by cutting out the salt in the goat cheese mixture since the zucchini already has plenty of salt, and by upping the amount of lemon because it really tastes fabulous.  Be sure your goat cheese is at room temperature before you start, otherwise it will be too stiff to spread.


The homemade pastry crust is easy to work with and very light and flaky, but you could easily substitute a premade pie crust if you want. A great tip I recently learned for making a nice round crust - roll the dough out slightly larger than you need, then fold it in fourths and trim around the outside edge to make it even.


 It's going to be difficult (and time-consuming not to mention frustrating) to cut the zucchini slices thin enough and uniform enough without a mandoline so if you don't have one already I would suggest you buy one before trying this recipe -they're not expensive.  It's very useful for slicing all kinds of foods to a uniform thickness - it's invaluable for au gratin potatoes, for example.  Some mandolines have their own stand, but it stores more compactly without one.  The important part is to make sure it comes with different types of blades and that the slicing thickness is adjustable.


The original recipe uses only zucchini, but I added in some summer squash for a little color variation just for fun. The dough needs to chill for 30 minutes and the zucchini slices drain for 30 minutes so it takes a while to assemble plus it bakes for 40 to 50 minutes.  The good news is that I assembled the tart and put it in the refrigerator for 45 minutes while I ran an errand before baking without anything bad happening, so I assume you could assemble the tart an hour or so in advance.  In addition, it's just as good warm or at room temperature so you could bake it a few hours in advance of serving.  The next day the leftovers were equally good cold and the tart crust was still crisp and flaky.


print
Zucchini, Goat Cheese and Lemon Tart
Makes 1 (11”) tart; 6 main dish servings or 12 buffet servings

1 ¼ cups all-purpose flour
Kosher salt and freshly ground black pepper
10 tablespoons cold unsalted butter, cut into ½” cubes
½ teaspoon white wine vinegar
5 tablespoons ice water
1 ½ pounds zucchini (can substitute some yellow summer squash)
2 tablespoons olive oil, divided
8 ounces plain creamy goat cheese, at room temperature
1 teaspoon minced fresh thyme leaves
Zest from one small lemon

Place the flour, ¾ teaspoon salt, and the butter in the bowl of a food processor and pulse 12 to 14 times, until the butter is the size of peas.  With the processor running, pour the vinegar and ice water through the feed tube and continue to process and pulse until the dough just comes together.  Dump out onto a floured board, form into a disk, wrap in plastic and refrigerate for 30 minutes.

Meanwhile, slice the zucchini (and summer squash, if using) to 1/8” thick on a mandoline.  Place the slices in a colander set over a plate and gently toss with 2 teaspoons of salt (the salt will draw out some of the moisture).  Set aside for 30 minutes to drain.  Spread the slices out on a clean dish towel, cover with a second clean towel and gently pat to remove some of the moisture.  Place the slices in a bowl and gently toss with 1 tablespoon of olive oil.

With a fork, mash together the goat cheese, thyme, lemon zest and ¼ teaspoon black pepper.  Set aside.

Preheat the oven to 400d.

Roll the dough out on a floured board to an 11” circle (tip:  roll the circle slightly larger, then fold the dough into quarters and trim the outside edge to make a smooth circle).  Place the dough on a sheet pan line with parchment.  Spread the goat cheese mixture evenly on the dough leaving a ½” boarder.  Lay the zucchini slices in tightly overlapping circles, starting at the very edge of the dough (the zucchini will shrink as it bakes).  Continue overlapping circles of zucchini until the whole tart is covered.  Drizzle with the remaining tablespoon of olive oil and sprinkle with black pepper.


Bake for 40 to 50 minutes until the dough is golden brown.  Serve hot, warm or at room temperature.

Friday, May 5, 2017

Spinach Puff Pastry Tarts

Last Year's Post: Persian Grilled Chicken with Saffron
Two Years Ago:   Toasted Couscous Salad

The filling for these tarts is very similar to Greek spanakopita, but puff pastry is substituted for phyllo dough which makes them much easier and faster to prepare.  You could cut them into small pieces for an appetizer, or serve them as a vegetarian entree with a tomato and cucumber salad on the side.  They're savory, crisp and light with the airy puff pastry and some crunch from the sesame seeds and pine nuts.

Valbreso sheep's milk feta from France is one of my recent discoveries.  I prefer it to normal chunk or crumbled feta that you find in the grocery store deli section, which I think is quite sharp and very salty.  The Valbreso feta is less salty and more creamy than other varieties, so it's worth looking for.  I've found it in upscale grocers, natural food stores and Costco (of course).

Puff pastry needs to thaw for about 40 minutes before unfolding, which gives you time to thaw the spinach and prepare the filling.  After rolling, cutting and assembling the tarts they bake for about 20 minutes, so start to finish the recipe takes a little over an hour.


print
Spinach Puff Pastry Tarts
Yields 2 - 6” square tarts

1 sheet of Puff Pastry (thawed according to instructions on the packet)
1¼ cups frozen spinach
¼ yellow onion, finely diced
1 clove of garlic, grated
1 tbsp olive oil
½ cup ricotta
½ cup feta, crumbled
¼ cup pine nuts, toasted (optional)
Salt and pepper, according to taste
1 egg + 1/2 tbsp water for egg wash
Sesame seeds for garnish


Preheat oven to 425d.  Line a baking sheet with parchment paper.

Thaw spinach in the microwave and drain well.  Place in a clean dishtowel and squeeze to remove as much liquid as possible.  Set aside.

Heat olive oil in a skillet on medium heat and sauté the onion until it turns soft and translucent. Add the garlic and sauté for 30 seconds, then add the spinach.  Stir to combine, then place the pan off the heat to cool.

 While the spinach mixture is cooling, season the ricotta cheese generously with salt and pepper in a large bowl.  Add the cooled spinach mixture to the ricotta and mix thoroughly with a fork. Add the feta and optional pine nuts and mix gently to combine.

Whisk the egg and water together in a small bowl and set aside.

When ready to assemble, unfold the puff pastry sheet on a lightly floured surface and roll to form a roughly 12”x12” square.  Cut in half horizontally and vertically to form four 6”x6” squares.  Divide the filling equally between two squares and spread evenly to within ½” of the edge on all sides.   Place another sheet on top of the spinach mixture and use your fingers to press down and seal the edges around the spinach, then use a fork to crimp the edges.  Brush the top of the pastry with egg wash and lightly sprinkle with sesame seeds. Make three small slits in the top of each tart with a sharp knife to allow steam to escape while baking.

Transfer the tarts to the prepared baking sheet and bake for 20-22 minutes until golden and puffed.  Cut in half to serve.


Friday, March 17, 2017

Teriyaki Citrus Chicken Salad

Last Year's Post: Cabbage and Spring Onion Tart
Two Years Ago:  Lemon Chicken Teriyaki Rice Bowl

Did you know that there's a citrus industry in Arizona?  Neither did I until I moved here.  Granted, it's not anywhere near as big as in Florida, but it's wonderful to enjoy fresh lemons, oranges, tangerines and grapefruit for several months each year.  I had the luxury of making this salad using fresh tangerines, but you can make it year-round using readily-available oranges from your local store.  You could probably even get by using fresh orange juice out of a carton, but if you go that route I might suggest starting with a little extra juice and concentrating it down to the same half cup to compensate for the lack of zest strips in the marinade.

Anyway, back to the beginning.  This is a slight twist on your normal teriyaki chicken because it includes citrus flavors in the marinade (orange or tangerine), the salad dressing (lemon), and the salad itself (mandarin oranges).  It's light, refreshing and healthy. Although the chicken needs to marinate for a few hours before cooking, that part can be done in advance or even the day or two before you plan to serve the salad.  You can also make the salad dressing in advance, so meal-time prep becomes a matter of slicing and assembly which makes for a quick weekday dinner.

The soy and honey in the marinade give the chicken a beautiful bronze color after it's cooked.


The sesame seeds and toasted almonds add crunch and the mandarin oranges add sweetness to the salad while a little leftover sauce brings a big pop of flavor.  I think fresh pineapple chunks and/or cucumber slices would also be good and might add them the next time around.  True confession:  I forgot to add the almonds to the salad before I took the picture up top.  The salad was good without them but they added extra crunch so try not to leave them out.

print
Teriyaki Citrus Chicken Salad
Serves 4

Note: the chicken can be marinated and grilled in advance, then refrigerated.  The salad dressing may also be made in advance, so it will take just a few minutes to slice the chicken and assemble the salads.

For the marinade:
1 cup fresh orange or tangerine juice
½ cup low-sodium soy sauce
1/3 cup honey
4 strips orange or tangerine zest (each about 1 ½ by ½ inch)
2 cloves garlic, peeled and gently crushed with the side of a knife
2 green onions, trimmed, white parts gently crushed
2 slices fresh ginger (each ¼ inch thick), peeled and gently crushed
1 cinnamon stick
1 tablespoon toasted sesame oil

For the salad dressing:
2 tablespoons fresh lemon juice
¼ cup extra-virgin olive oil
¼ teaspoon salt

For the salad:
2 boneless skinless chicken breasts
8-10 cups mixed baby lettuces, washed and dried
1 tablespoon toasted sesame seeds
1 (10.5 oz) can mandarin oranges in natural juice, drained
½ cup sliced almonds, toasted
2 green onions, trimmed and sliced

To make the marinade:  place the orange or tangerine juice in a nonreactive saucepan over high heat and bring to a boil.  Let boil until reduced by half.  Add the soy sauce, honey, zest strips, garlic, green onion whites, ginger, cinnamon stick and sesame oil.  Stir, then let boil until slightly thickened, about 6-8 minutes.  Remove the saucepan from the heat and let cool, then remove the solids from the pan using a slotted spoon. 

Remove any excess fat or sinews from the chicken breasts and discard.  Rinse and blot dry.  Gently pound the breasts between two pieces of plastic wrap until they’re an even thickness.  Place in a zip-top bag and pour half of the marinade into the bag, reserving the remaining marinade to use later.  Close the bag and massage the contents to evenly distribute the marinade, then place in the refrigerator for at least one hour and up to 4 hours, turning occasionally.

Meanwhile, make the salad dressing:  combine the lemon juice, olive oil and salt in a small screw-top jar and shake to combine.  Set aside.

To cook the chicken, preheat an outdoor grill or indoor grill pan to medium-high.  Remove the chicken from the bag and discard the marinade.  Arrange the chicken pieces at an angle on the grill grates and cook for 4 minutes.  The outside of the chicken should turn a deep brown in spots from the caramelizing of the sugars in the marinade but shouldn’t burn.  Flip the chicken and cook until the internal temperature reaches 165d, basting each side with some of the marinade (that was reserved earlier) during the last few minutes.  Total cooking time should be roughly 10 minutes depending on the thickness of the chicken.  Remove the chicken and let come to room temperature, then thinly slice at an angle.

To assemble the salads, toss the lettuces lightly with enough salad dressing to just barely coat.  Divide among four plates.  Sprinkle with the sliced green onions, mandarin oranges, and toasted almonds.  Divide the chicken slices between the salads, arranging decoratively on top of the greens.  Spoon some of the leftover marinade on top of the chicken, sprinkle with sesame seeds and serve. 


Friday, August 5, 2016

Savory Kale and Corn Galette

Last Year's Post:  Spanish Shrimp
Two Years Ago:   Goat Cheese and Chorizo Rolls

A galette is just a fancy term for a free-form (or rustic) tart that's easier to make and prettier than a pie.  The most common type is a sweet galette (think plums, apples, etc.) for dessert but I'm not all that big on sweets (gasp) so my thoughts tend to go in the savory direction for a light vegetarian entree, especially this time of the year with all that beautiful produce in the markets.


In its savory version, a galette is lighter than a quiche because it doesn't contain the milk-and-egg custard; its all about the veggies.  It makes an elegant and impressive vegetarian dinner served with a big crisp green salad and a nice bottle of wine.  I made all manner of changes to the original recipe, which is one of the advantages of a galette - use what you have on hand or is fresh at the market.  I found beautiful kale, thyme and corn at the market, plus I had sun-dried tomatoes and Manchego cheese on hand, so that's what I used.

You could also use zucchini or other vegetables, other fresh herbs, and other cheeses equally well.  The one substitution I wouldn't recommend is fresh tomatoes, especially beefsteak tomatoes, because they're watery and can easily make your galette soggy.  If you really want to use fresh tomatoes, either slice and salt them for 30 minutes or so to draw out some moisture, or roast them which gets rid of most of the moisture and also intensifies the flavor.  Or if you really want that fresh tomato flavor, think about putting them in your side salad instead.


The result was amazingly delicious - the sweet corn and sun-dried tomatoes contrasted beautifully with the earthy kale, and the Manchego cheese added richness.  But the star of the show was the crust.  Normally, you want a pie crust to be tender and flaky for sweet foods, but this particular crust is light and crisp - almost a cross between a pie crust and a cracker.  It's because there's less butter (fat) than in a normal pie crust, which is another bonus.  It was very easy to work with and the whole project was fun, although you should know it took about 2 hours for prep work, cooking the filling, chilling the dough, rolling the dough, assembling the galette and baking it - maybe not a work-night project unless you do some of the prep in advance.  You can make the galette a few hours in advance if you're having company because it's equally good warm or at room temperature, but I wouldn't make it the day before - the crust loses some crispness over time.  I added some sesame seeds to the edge of the crust for a little extra texture and taste, but you could also use coarse black pepper, or sea salt, or a mix of seeds equally well.

I can't emphasize enough how good this was, and I really hope you'll try it.


print recipe
Savory Kale and Corn Galette
Serves 4; to serve more, double the recipe and make two galettes

For the dough:
1 cup all-purpose flour
¼ cup (1/2 stick) cold unsalted butter, cut into ½” pieces
½ teaspoon salt
1 egg
1/8 cup cold water

For the filling:
1 tablespoon olive oil
¼ medium onion, chopped
1 large clove garlic, minced or grated
1 bunch Tuscan kale, de-stemmed and chopped
1 ear of corn, shucked (or 1 ½ cups frozen corn)
1 teaspoon minced fresh thyme
3 oil-packed sun-dried tomatoes, drained and finely chopped
3 oz crumbled feta or goat cheese, or 3 oz small cubes of any firm white cheese such as Monterey Jack
¼ teaspoon salt
Freshly ground black pepper, to taste
Sesame seeds, for garnish (optional)

In a food processor, pulse the flour, butter and salt a few times until crumbly.  In a small bowl, whisk the egg with a fork.  Put half the egg in a slightly larger bowl (reserving the remainder for brushing) and add the ice water.  Whisk again to combine.

Add the egg and water to the food processor and pulse until the dough comes together more or less.  Turn out on a floured surface and bring together with your hands to form a ball.  Flatten into a disk and wrap in plastic wrap.  Refrigerate for 30-45 minutes.

While the dough chills, make the filling.  Heat a large skillet over medium heat.   Add oil and onions and cook for 2 minutes, stirring.  Add garlic and cook 1 additional minute until fragrant.  Add kale and corn and cook until the kale is softened and wilted, 3-4 minutes.  Season with salt and pepper and set aside to cool for 20 minutes or so.  When cool, stir in the thyme, sun-dried tomatoes and cheese.

Line a baking pan with parchment paper and preheat the oven to 375d. 

On a floured surface, roll the dough to a circle approximately 11” in diameter.  Gently fold into quarters and place on the parchment paper, then unfold.  Place the filling mixture in the center of the dough, then spread evenly leaving  1 ½ “ of dough uncovered around the outer edge.  Fold the edges over the filling and brush the edges with the remaining beaten egg.  Sprinkle with sesame seeds, optional.

Bake for about 35 minutes until the crust is golden.  Serve warm or at room temperature.

Friday, May 20, 2016

Cold Pasta Salad with Smoked Salmon, Peas and Asparagus

Last Year's Post:  Melon ribbon Bowls
Two Years Ago:   Edamame Spread

Cold pasta salads are ideal warm weather food because you can do the cooking in the morning (or night before) so you don't have to heat up the kitchen that evening.  This one is light (sour cream, no mayo) and healthy with the salmon and veggies, and herbs and lemon rind add bright notes to the overall flavor profile.  One pot does the work of cooking asparagus, peas and pasta so clean-up is fast.

Look for relatively slender fresh asparagus in the market for the best flavor and texture, and make sure you don't overcook it - it should be crisp-tender, not soft.  Taste a piece shortly before you think it should be done to make sure.

The key to this salad is the quality of the veggies and salmon - buy the best and freshest that you can find and it will be excellent.


print recipe
Cold Pasta Salad with Smoked Salmon, Peas and Asparagus
Serves 4

½ bunch slender asparagus, trimmed
½ cup frozen peas
1/2 shallot, minced
1 cup sour cream
2 tablespoons milk
1 tablespoon Champagne vinegar or white wine vinegar
1 tablespoon finely grated lemon zest
1 tablespoon chopped fresh dill leaves
1/4 teaspoon salt
1/4 teaspoon freshly ground black pepper
6 ounces orchiette or bowtie pasta
6 ounces chopped or flaked smoked salmon
1/4 cup chopped chives
Dill sprigs, garnish
Cucumber slices and lemon wedges, optional garnishes

Bring a large pot of water to a boil.

Cut the tips off the asparagus stems, and then cut the stems into 1” pieces.  Drop the asparagus stems and the peas in the boiling water for 3 minutes, then add the asparagus tips and boil for an additional 30 seconds.  Remove the vegetables from the water using a spider (strainer) and immediately drop in a bowl of ice water to stop the cooking process.  (Do not discard the boiling water.) Drain the vegetables, pat dry, and set aside.

In a medium bowl, whisk together the sour cream, milk, vinegar, lemon zest, dill, salt, and pepper. Add the shallots and whisk to combine.

In the same pot of boiling water, cook the pasta until al dente (add some salt to the water if desired). Drain and rinse with cold running water. Drain again well. Toss with the sauce, peas, asparagus and salmon. Adjust the seasoning to taste. Cover with plastic wrap and refrigerate until chilled, about 2 hours.


Before serving, toss with the chives. Garnish with dill sprigs and optional cucumber slices and lemon wedges and serve.


Friday, May 13, 2016

Spring Vegetable Ramen

Last Year's Post:  Chicken with Shallots
Two Years Ago:   Pan-Seared Tuna with Capers and Red Wine Sauce

If you're looking for a light, healthy entree to counter-balance a heavy food episode or just want to cut down a little, give this recipe a try.  The broth is warming and fragrant with garlic, ginger and sesame, and the miso adds a deep umami flavor.  (You can usually find white miso - the mildest variety, near tofu at well-stocked supermarkets.  If you can't find it, the broth will be good anyway.)  The vegetables add nutrition and crunch,and the egg is great protein.  You could always add or substitute some shredded chicken for the egg if you want a more substantial meal.

I love the black sesame seeds for drama, but toasted white sesame seeds would work just as well.  And I couldn't resist adding the watermelon radish simply because I found one at the grocery store.  They're not all that easy to find but very pretty.  Funny story:  I thought the radish would stump the cashier for sure, but she just kept right on going and never missed a beat.  When I told her I thought it was going to stump her, she said "I've been a cashier for 25 years so I don't get stumped easily".  The woman in back of me said she'd never heard of a watermelon radish and the cashier told her it was also known as a shallot.  Not quite!  Shallots are mild onions, watermelon radishes are radishes.  Oh
well.


I've been reading a fair amount about how to hard-boil eggs lately because I've had trouble with the shells sticking and ripping up the whites.  Turns out the best tip is to boil the water first, then gently lower in the eggs.  Cook 6 minutes for soft-boiled (runny yolk) or 8 minutes for hard-boiled (hard yolk), then immediately place in an ice bath to stop the cooking process.  Works really well - the shells don't stick at all.

Spring Vegetable Ramen
Serves 4

4 eggs
1 bunch slender asparagus, trimmed
6 ounces sugar snap peas, trimmed
2 tablespoons toasted sesame oil, divided
1 bunch green onions, sliced, white and green parts separated
4 cloves garlic, minced
1 tablespoon grated fresh ginger
2 cups water
2 cups chicken broth
3 tablespoons white miso
1 ½ tablespoons reduced-sodium soy sauce
4 ounces fresh shiitake mushrooms, stemmed and sliced
2 (3 ounce) packages ramen noodle soup, seasoning packets discarded
Black or white sesame seeds, for garnish (optional)
Sliced watermelon radish, for garnish (optional)

Hard-cook the eggs:  fill a saucepan with enough water to cover the eggs and bring to a boil, then gently lower the eggs into the water.  Reduce heat, cover, and let simmer for 8 minutes.  Remove the eggs and immediately place in a bowl filled with ice water to stop the cooking process.  When completely cool, remove and pat dry.  Shell the eggs and cut in half.

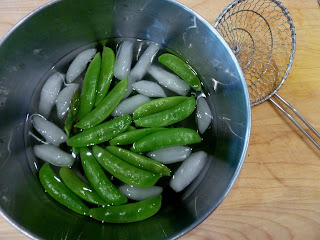
Cut the tips off the asparagus, then cut the spears into 1” lengths.  Bring a large pot of water to a boil and add the asparagus spears.  Let boil for 1 minute, then add the asparagus tips and the sugar snap peas.  Boil an additional 30 seconds, then remove all with a slotted spoon and place in an ice water bath (save the water and keep it hot).  When cool, remove the vegetables from the water and pat dry.  Slice the sugar snap peas diagonally into 3-4 pieces each.  Set aside.

In a large saucepan, heat 1 tablespoon oil over medium heat.  Add green onion whites, garlic and ginger and cook, stirring, until fragrant, about 1 minute.  Add water, chicken broth, miso, soy sauce and the remaining 1 tablespoon oil, bring to a rolling simmer.  Add the mushrooms and simmer for 3 to 5 minutes.

Meanwhile, place the ramen noodles in the boiling water left from cooking the vegetables.  Cook, stirring occasionally, for 3 minutes until soft.  Drain.

To serve, divide the ramen noodles between wide shallow bowls.  Ladle in the broth mixture and mushrooms, then top with asparagus and sugar snap peas.  Garnish each bowl with 2 eggs halves, sesame seeds and watermelon radish slices.  Top with green onion tops and serve.


Friday, March 25, 2016

Spring Green Pasta

Last Year's Post: Citizen Public House Chopped Salad
Two Years Ago:   Lentil Salad with Bacon and Walnuts

Pasta Primavera is a great classic spring dish filled with bright vegetables.  The standard version often has a cream-based sauce which seems counter to the light, fresh feeling of the dish - a fragrant basil pesto seems better suited to the spring spirit.  I decided not to call this Pesto Pasta Primavera, however, because that level of alliteration seemed pretty annoying.

The good news is that you can make this dish before spring vegetables are actually available locally, using fresh produce from the store.  Then you can make it again using produce from the local farmer's market in a month or two.  I like the fact that it's vegetarian, but you could certainly add some cooked chicken or turkey if you want.  It's a fast, easy and healthy dish to get you in the mood for spring - you just do a fast vegetable saute while the pasta is cooking.


About the pesto: feel free to make your favorite recipe or buy some at the store.  A friend of mine introduced me to Costco's pesto sauce, which is excellent but like everything else at Costco comes in a large jar.  I divided it up between smaller containers and froze most of it - pesto keeps very well as long as it's thawed in the refrigerator and not the microwave.  Be sure to go light on the pesto at first while you toss everything together because you want it to be a fairly light coating on the pasta.  You can always add more if you want.

print recipe
Spring Green Pasta
Serves 4

8 ounces sugar snap peas
2 tablespoons olive oil
1 leek, white and light green parts only, chopped
1 small zucchini, diced
½ cup frozen peas
1 bunch thin asparagus spears, stalks diced, tips left whole
1 pound linguini pasta
½ cup prepared pesto
½ cup grated Parmesan cheese
Freshly ground black pepper


Fill a large pot with water and bring to a boil.  Drop the sugar snap peas in the water for 15 seconds, then remove with a mesh strainer and immediately place in a bowl of ice water.  (Do not discard the boiling water.)  When the sugar snaps are completely cool, drain and pat dry, then cut into thin pieces on the diagonal.

Cook the pasta in the boiling water according to package directions, then drain.

While the pasta cooks, add the olive oil to a large skillet over medium heat.  Add the leek and sauté for a minute or two, then add the zucchini, peas, and diced asparagus stalks.  Sauté for 2-3 more minutes, stirring frequently, until the vegetables are crisp-tender.  Add the asparagus tips and sauté for one more minute. Remove the skillet from the heat.  Add the drained pasta, sugar snaps, and sautéed vegetables back to the pasta pot and toss, adding some of the pesto at a time, until the pasta is coated to your liking (it should be lightly coated).

Serve in shallow bowls topped with Parmesan and coarse black pepper.


Friday, February 12, 2016

Pasta Arrabiata

Last Year's Post: Coconut-Marinated Pork Tenderloin with Pineapple Rice
Two Years Ago:  Sesame Seed Chicken Salad

Arrabbiata is a spicy sauce for pasta made from garlic, tomatoes, and red chili peppers cooked in olive oil.   The word "arrabbiata" literally means angry in Italian, which supposedly is a reference to the spiciness of the sauce.  If that's true, this recipe is more grumpy than angry - it's mildly to moderately spicy depending on how much crushed red pepper you add.  Additional depth of flavor comes from the paprika and optional pepperoncini without adding a lot of heat.  I just happened to have a jar of pepperoncini in my refrigerator (no idea why) so I added some, but didn't notice it in the finished dish so I listed it as optional.  I don't think it's worth buying an entire jar just for this recipe.

In addition to being spicy, Arrabbiata recipes often include black olives and capers to give it additional flavor and texture.  I particularly like the salty pop of the capers.


Because the sauce is relatively light, it's important to throw the cooked pasta into the pan with the sauce and toss it around for a couple of minutes.  This allows the sauce to evenly coat all of the pasta and infuse it with flavor.  I've heard Lidia Bastianich, one of the foremost Italian cooks in America, state that this step is so important that she wouldn't finish pasta any other way. I've discovered there's only one caution to this approach - add the cooked pasta to the sauce gradually unless you're very sure of your pasta-to-sauce ratio.  If you dump it all in at once and decide it was too much pasta for the amount of sauce, you're up the proverbial creek without a paddle.


This is a simple, fast healthy and light pasta dish that won't weigh you down but is perfect comfort food on a cold night.  And, it even qualifies for meatless Mondays.

print
Pasta Arrabbiata
Serves 4

3 tablespoons extra-virgin olive oil
1 small onion, minced
2 garlic cloves, minced
1/2 cup pitted black olives, coarsely chopped
2 tablespoons drained capers, rinsed
1/2 teaspoon sea salt, plus more to taste
¼ - ½ teaspoon dried crushed red pepper flakes, depending on your preference
½ teaspoon paprika
2 teaspoons anchovy paste
2 tablespoons stemmed, seeded and minced pepperoncini (optional)
1 28-ounce can crushed Italian tomatoes
1 pound hot cooked pasta
Grated Parmesan Reggiano


In a large skillet over medium heat, heat the oil.  Add the onion and garlic and sauté for 3 minutes. Reduce the heat to medium and add the olives, capers, 1/2 teaspoon of salt, red pepper flakes, paprika, anchovy paste and pepperoncini and sauté for 1 minute. Add the tomatoes and simmer until reduced slightly, about 20 minutes. Add 1-2 tablespoons of grated Parmesan to the sauce and stir to combine. Taste and adjust seasonings.