Friday, September 30, 2016

Parmesan Chicken Bake (No Mayo)

Last Year's Post:Sausage, Kale and Potato Soup (Copycat Olive Garden Zuppa Toscana)
Two Years Ago:  Perfect Apple Crisp

I've seen a recipe for "melt in your mouth chicken" floating around the internet for a number of years, and people absolutely rave about it.  The chicken is coated in a mayonnaise and parmesan mixture prior to baking which keeps the chicken very moist and adds great flavor but it's not exactly the most healthy recipe on the planet. I mean, mayo.  I never tried it for that reason until I stumbled across a version that suggested substituting plain Greek yogurt for the mayonnaise.  Yes!  I was somewhat skeptical that it could possibly taste as good as mayo, but hope is eternal.  And besides, I'd never tasted the mayo version so how would I even know?

I must say I was very impressed with the heavenly smell as it baked, and then with the taste.  It's absolutely delicious, moist and very flavorful with hints of garlic, parmesan and just a touch of warmth from the red pepper flakes. I added some toasted almonds on top for crunch and some parsley for color and then served it over spaghetti.  Pair it with a crisp green salad for a complete meal.

Some versions of the recipe call for leaving the chicken breast whole; this one calls for cubing the chicken prior to baking.  I like that for two reasons:  it bakes faster, and you can serve less than one entire chicken breast per serving.  Since chicken breasts have gotten huge lately, that helps with portion control.

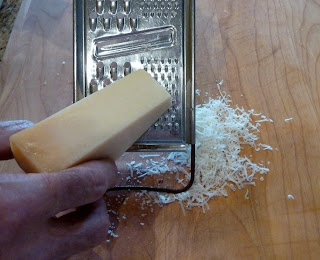
Note that there will probably be some clear juices in the bottom of your baking dish when it comes out of the oven, which is why the recipe calls for using a slotted spoon to remove the chicken. The creamy topping stays on the chicken pieces, though, which is where all the flavor comes from.  Another note is that the recipe specifically calls for freshly grated Parmesan, which is what I did - I don't know if pre-shredded or grated Parmesan would work equally well.  One last thought is this isn't the prettiest dish I've ever made, so part of the reason for the almonds and parsley is to give some color and contrast.  But boy, does it ever taste good!  And it's really easy and fast.  Next time I might add some asparagus or other green vegetable to the pasta as well.


print recipe
Parmesan Chicken Bake
Serves 4

1 lb boneless skinless chicken breasts
¾ cup plain Greek yogurt
1 cup freshly shredded Parmesan cheese
½ teaspoon seasoned salt
½ teaspoon black pepper
3 garlic cloves, minced
½ teaspoon red pepper flakes
¼ cup Italian bread crumbs or Panko crumbs
¼ cup sliced toasted almonds, for garnish (optional)
Chopped parsley, for garnish (optional)
Hot cooked pasta or rice, for serving


Preheat oven to 375d.

Cut the chicken into 1” cubes.  Coat a 9x13 baking dish with cooking spray and spread the chicken evenly on the bottom.

In a small bowl, combine the remaining ingredients except bread crumbs (yogurt through red pepper flakes) and mix well.  Evenly spread the mixture on top of chicken, coating completely.  Sprinkle the bread crumbs on top.

Place the pan in the oven, uncovered, for 30-35 minutes.  If desired, you can turn the broiler on for the last minute or so to brown the top.


Remove the pan from the oven and use a slotted spoon or spatula to remove the chicken and place on the pasta or rice.  Top with almonds and parsley and serve.

Saturday, September 24, 2016

Korean Rice Bowls

Last Year's Post:  Healthy Baked Apples
Two Years Ago:   Squash Ravioli with Sage Brown Butter Sauce

Korean rice bowls with mixed vegetables are also called Bibimbap, which is fun to say  (BEE-beem-bop) but I figured most people wouldn't know what it meant, plus this recipe isn't completely authentic Bibimbap because I substituted hard-cooked eggs for the runny-egg-thing that manages to find its way onto everything these days.  If you like runny eggs, go for it.  (Some Bibimbap recipes actually use raw eggs that are mixed with the rest of the ingredients, ugh.)

The only unusual ingredient in the recipe is Gochujang hot pepper paste, which is a staple in Korean cooking.  You'll find it at your local Asian market.  It's pretty spicy so you only use a small amount, but it adds wonderful flavor and a little heat to the roasted squash.  If you can't find it or don't want to buy it just for this recipe, don't worry - just substitute harissa or sambal olelek or another hot sauce instead.  After all, it's just one component in the sauce for the squash, which in turn is just one part of the rice bowl.


The squash roasts along side the shiitake mushrooms for depth of flavor, then everything gets assembled on top of the rice.  Lime juice, soy sauce and more hot sauce are added at everyone's discretion so your own bowl can be as mild or hot as you like.  And very healthy!


print
Korean Rice Bowls
Serves 4

1 teaspoon Gochujang (Korean hot pepper paste) or sambal oelek, plus more for the table
2 teaspoons soy sauce
2 tablespoons vegetable oil, divided
2 teaspoons sesame seeds
2 cups peeled butternut squash, cut into bite-sized pieces
Sea salt
7 ounces shiitake mushrooms, stemmed, caps cut in half if large
2 tablespoons soy sauce plus more for the table
2 cups frozen edamame, cooked according to package directions
5 cups hot cooked white or brown rice
4 radishes, trimmed and sliced
2 cups Napa cabbage, thinly sliced
4 hard-boiled eggs, peeled and sliced
Black or white sesame seeds, for garnish
Lime wedges, for garnish
Thinly sliced green onions, for garnish


Preheat oven to 425 degrees.  Whisk Gochujang, 2 teaspoons soy sauce, 1 tablespoon vegetable oil, and sesame seeds in a medium bowl.  Add squash and toss to coat.  Spread in a single layer on one half of a large rimmed baking sheet.  In a second bowl, mix the shiitake mushrooms, remaining 1 tablespoon vegetable oil, and 2 tablespoons soy sauce.  Spread in a single layer on the other half of the baking sheet.  Roast for 15 minutes until the mushrooms are juicy and slightly shrunken, then remove them from the baking sheet and place it back in the oven until the squash is tender and browned on the edges, about 5 more minutes.  Sprinkle both with salt.

To serve, divide the rice between 4 bowls.  Top with squash, mushrooms, edamame, radishes, cabbage, and sliced egg.  Garnish with sesame seeds, lime wedges and green onions.  Serve, passing soy sauce and Gochujang (or sambal oelek) at the table.


Friday, September 16, 2016

Lemon Chicken Orzo Soup

Last Year's Post: Mexican Baked Egg Casserole
Two Years Ago:  Roast Pork, Fennel and Green Bean Salad

This is a relatively light soup, making it perfect for the transition to fall.  What makes it unique is the bright pop of lemon.  Panera has a very similar version in their soup rotation so I guess this qualifies as a Panera copycat even though I found the recipe elsewhere.

The soup is simple to make, but I have two suggestions.  The first is to do all your prep in advance so you're not frantically trying to chop something while something else is boiling over on the stove.  That way you can just stand and admire how beautiful your soup is as you casually add ingredients at exactly the right time while sipping an adult beverage.


The second is to use really good quality chicken stock.  I've tested several brands over the years and recommend Kitchen Basics (no paid endorsement!) because it's darker and richer than many other brands.  Even the regular version has less sodium than some other varieties but I always buy the low sodium version so I can control the salt.  Prepared soups that you buy in the store or in a restaurant are notoriously high in sodium (Panera's Lemon Chicken Orzo Soup has over 1,00mg of sodium per serving) so using a low-sodium stock allows you to start low and add more salt gradually.  Better yet, leave the sodium level low and put the salt on the table.  People never add as much salt after the fact.


The reason why the recipe calls for pre-cooked chicken (I used rotisserie chicken from the deli) rather than cooking the chicken in the soup is because I've found that cooking it in boiling or simmering liquid can cause the chicken to become chewy and fairly flavorless if it's overcooked. (Case in point - Ina Garten's recipe for homemade chicken stock tells you to throw away the cooked chickens after making the stock.)  Adding cooked shredded chicken at the last minute is an easy way to ensure the chicken is stays tender.

Last point:  you'll notice the recipe calls for stemming the baby spinach.  You can skip this step if you want but spinach stems are one of my (many) pet peeves, whether in soups or salads.  They're hard to eat, unappetizing in salads, and stringy in soups.  Most restaurants (and people, for that matter) don't take the time to stem them, but call me obsessive.

print recipe
Lemon Chicken Orzo Soup
Serves 4

1 tablespoon olive oil
1 large stalk or celery, diced
1 carrot, peeled and diced
1 clove garlic, minced
1 shallot, diced
1/8 cup dry sherry
2 quarts good quality low-sodium chicken stock
2 sprigs fresh thyme
1 bay leaf
Salt and pepper
½ cup uncooked orzo
1 cooked boneless skinless chicken breast, shredded
Zest of 1 lemon
½ cup fresh lemon juice
3 ounces baby spinach, stemmed and coarsely chopped


In a large soup pot, heat the oil over medium heat.  Add the celery, carrots, garlic and shallots and sauté until just tender, 5-8 minutes.  Deglaze with the sherry, then add the stock, bay leaf and thyme.  Bring to a gentle simmer and cook for 15 minutes.    Taste and adjust seasonings with salt and pepper.

Remove the thyme and bay leaves, then add the orzo and simmer for an additional 8 minutes. Add the shredded chicken, lemon zest and juice, and spinach and cook, stirring, for 2-3 more minutes to wilt the spinach and make sure everything is hot.  Taste and adjust seasonings again if needed.  Serve hot.


Friday, September 9, 2016

Italian Tuna

Last Year's Post:  Grilled Hawaiian Filipino Pork
Two Years Ago:   Pesto for the Freezer

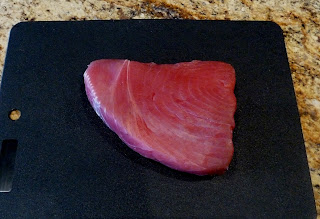
Long ago and far away one of my first experiences with fresh tuna was at a business conference in Florida.  I've always liked canned tuna so I figured I'd give the fresh version it a try when I saw it on the menu.  When the server asked me how I wanted it cooked, the guy across the table (who happened to be an avid sport fisherman from Maine) said "Please don't order it well done, or even medium well."  I'm sure I looked surprised so he explained that tuna dries out quickly and becomes chewy when overcooked so you should always order it medium rare at most.  Great advice!  I've ordered it medium-rare ever since and haven't been disappointed.  If you find extremely high quality tuna you can even sear both edges and leave the interior basically raw.  Sliced and served with an soy dipping sauce, it's delicious and tastes just like a dish I've ordered at Ruth Chris' Steakhouse in the past.

The key to cooking tuna correctly is a really hot grill, a thick cut of tuna, and close attention to timing.  Do not wander off.


Make the Italian pepper sauce before you start grilling so the tuna doesn't sit too long and either get cold or overcooked (from carry-over cooking) before you're ready to eat.  You can cook the pasta in advance also - just toss it with a little olive oil so it doesn't stick together in a ball.


Did you know that tuna is an excellent source of nutrients and Omega-3's as well as a high-quality protein?  Add that to the health benefits of olive oil and a Mediterranean diet in general and you have a pretty darn healthy meal.

P.S.  If you have any leftovers, cut the tuna into bite-sized pieces and combine with the pasta and remaining sauce.  Cover and refrigerate, then add a little shredded parmesan on top the following day for an excellent cold lunch salad.

print recipe
Italian Tuna
Serves 4

24 ounces tuna steaks, approximately 1” thick
1 cup olive oil plus additional for brushing
½ cup minced parsley
½ cup marinated roasted red peppers, chopped
½ cup thinly sliced green onions
2 tablespoons lemon juice
2 tablespoons capers, drained and rinsed
½ teaspoon dried oregano
Freshly ground black pepper
Cooked pasta or polenta

In a small saucepan, combine 1 cup olive oil with parsley, red peppers, green onions, lemon juice, capers, oregano and pepper to taste.  Simmer over low heat, stirring occasionally, to combine flavors.  Keep warm.

Preheat the grill to high.  Brush tuna steaks with olive oil and season with pepper.  Grill the tuna for approximately 5 minutes per side until well grill-marked but still very pink in the center.  Let rest for a minute or two.


Slice the tuna and serve over pasta or polenta with the sauce spooned on top. 

Friday, September 2, 2016

Mayan Quinoa Salad

Last Year's Post:  Wine Bar (or Brewery) Platters
Two Years Ago:   Baked Italian Sandwiches

This salad is a great example of clean eating that won't make you feel deprived even though it's vegetarian.  The secret is the variety of tastes and textures:  juicy tomatoes, creamy avocado and beans, toasty quinoa, and crunchy corn and pepitas.  There's so much going on that you'll never miss the meat, I promise.  The crunch factor is key, and the surprise ingredient is freeze-dried corn which is my newly discovered favorite.   The corn is dried with no additives or other ingredients, and it's naturally gluten, dairy, wheat and nut free.  It's very light and crunchy with a naturally sweet corn taste and is very low in fat and calories.  It makes a great snack but I particularly like it on salads because of its color, flavor and crunch.  You can find it in bags (or possibly a plastic container) in the produce aisle of your upscale grocer or natural foods store.


Note that the quinoa needs to be cooked and cooled for this salad, so you might want to start with that or cook it in advance. After that, you just shake up the vinaigrette, chop a few things, and assemble.  Fast, easy, delicious, and healthy!

print
Mayan Quinoa Salad
Serves 4

For the sherry vinaigrette:
1 medium shallot, minced
2 tablespoons sherry vinegar
1 tablespoon fresh lemon juice
1 teaspoon Dijon mustard
4 tablespoons extra-virgin olive oil
Salt and freshly ground black pepper

For the salad:
½ cup uncooked red or white quinoa
1 avocado
1 tablespoon lemon or lime juice
2 cups baby spinach, chopped
½ cup freeze-dried corn*
1 (15 oz) can black beans, rinsed and drained
½ cup pepitas (roasted salted pumpkin seeds)
2 cups slivered cherry tomatoes
Cilantro leaves, for garnish

For the vinaigrette:  stir shallot, vinegar, lemon juice and mustard in a small bowl and let stand for at least 15 minutes to blend.  Gradually whisk in oil (or shake in a jar to combine).  Season to taste with salt and pepper.

Prepare the quinoa according to package directions and let cool. 

Cut the avocado in half and remove the pit, then score the flesh in a crosshatch pattern with the tip of a knife.  Using a large spoon, scoop the chunks into a small bowl and toss with the lemon or lime juice to prevent browning.

To assemble the salads, place each ingredient decoratively in strips on the plates with complementary colors next to each other:  avocado, tomatoes, quinoa, spinach, beans, corn, and pepitas.  Garnish with cilantro leaves and drizzle with vinaigrette, passing extra vinaigrette at the table.


*Note:  you will find freeze-dried corn in a bag or package in the produce aisle with other dried vegetables.

Friday, August 26, 2016

Coconut Curry Rice

Last Year's Post:  Summer Harvest Quiche
Two Years Ago:   Balsamic Chicken Watermelon Salad

I don't remember where I found this recipe, but I was on a coconut jag at the time and had vague visions of Chinese fried rice with shredded coconut in it, mostly because the name was "coconut fried rice".  Maybe that doesn't sound all that great to you but not to worry, I was totally off base anyway.  Sometimes being wrong turns out to be a good thing.

The coconut in this case comes in the form of coconut milk used to cook the brown rice, which imparts a hint of coconut to the finished dish.  Combined with mild curry powder, the overall flavor profile is much more Malaysian or Indian than Chinese.  The flavors are complex yet delicate.  (I thought about adding some spiciness to the dish but finally decided against it because I was afraid it would overpower the coconut or curry.)  You could make the flavors more bold by adding more coconut milk or curry powder, and you could certainly serve hot sauce on the side, but we very much liked it as is.  (The Lawyer:  "Have we had this before?  This is really good!")

You can go vegetarian by using tofu, or add thinly sliced chicken or pork for meat people - directions are included for both. I used some thin-sliced pork chops I found on sale at the store.  Compared to the original recipe, I cut down slightly on the amount of rice and meat and amped up the veggies which I do with pretty much any recipe.


Note that the recipe calls for making the rice in advance and chilling it, which helps the rice to brown in the pan.  If you don't have the time, skip the chilling step and just go straight from cooking the rice to cooking everything else.  It will still turn out fine.

print recipe
Coconut Curry Rice
Serves 4-6

Note:  If you are using chicken or pork instead of tofu, skip the tofu instructions and vice versa.


1 block extra-firm tofu plus 2 tablespoons soy sauce
-or-
6-8 ounces raw chicken or pork cut into thin bite-sized slices

1 ¼ cups uncooked brown rice
1 can regular coconut milk
1 tablespoon coconut oil or canola oil
1 medium onion, chopped
1 medium red pepper, chopped
10-12 sugar snap peas, trimmed and sliced diagonally into ½” pieces
 3 cloves garlic, minced
2 teaspoons grated ginger
2 teaspoons curry powder
½ cup frozen peas
2 teaspoons soy sauce
1 cup roasted cashews


Rinse the rice and drain.  Combine 1¼ cups coconut milk with 1¼ cups water to make 2½ cups total liquid.  Place the rice in a medium saucepan with the liquids and bring to a boil over high heat.  Reduce heat to low, cover and simmer for 30-35 minutes until the liquid is absorbed.  Cool and place in the refrigerator for several hours.

(For the tofu:  Preheat oven to 325d.  Drain and press the tofu.  Chop into cubes and toss in a bowl with the soy sauce.  Let marinate for 10 minutes until the soy sauce is absorbed.  Spread the cubes on a lightly greased baking sheet and baked for 45 minutes, flipping midway.  Remove and set aside.)

Heat a large non-stick pan over medium heat and add the oil.  (For the chicken or pork:  add the meat to the pan and sauté for 3-4 minutes, stirring occasionally, until cooked through.  Remove and set aside.)
Add the onions to the pan and sauté for 2-3 minutes, then add the red pepper and sugar snaps and continue to sauté for 2 minutes more.  Add the garlic, ginger, and curry powder and sauté for 30-60 seconds until fragrant.  Add the rice and peas and mix to combine, then let cook undisturbed for 1-2 minutes to develop a crispy crust on the bottom.  Add the soy sauce and tofu, chicken or pork and stir again, scraping the bottom, then continue to cook for a minute or two until thoroughly heated through.

Serve hot topped with roasted cashews.


Friday, August 19, 2016

Mexican Chicken Pasta

Last Year's Post:  Roasted Tomato Californian
Two Years Ago:   Chicken Gyros

I had some rotisserie chicken left over recently and was craving comfort food, so I decided to make a Mexican pasta mash-up.  As written, it's very kid-friendly assuming you use a mild salsa but you could easily make it spicier by using a hotter salsa or adding jalapenos.  Next time I'll try using cooked Mexican chorizo in place of the rotisserie chicken because I love spicy chorizo.  The chili powder gives it flavor without heat, but you could also substitute a spicier Mexican seasoning blend of your choice.


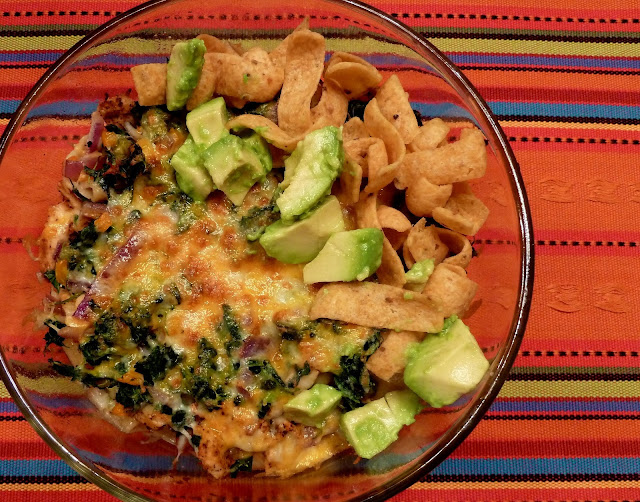
The spinach adds great nutrition that kids probably won't even notice.  Oddly, my favorite part was the corn chip garnish - the crunch and salt were great complements to the soft pasta and creamy cheese.  Of course, chips are my all-time favorite food so that might have something to do with it.

Depending on how many people you're feeding, this is a great recipe to divide between two baking dishes and freeze one for later.  It's perfect comfort food while being a little different than your typical Italian baked pasta dish.

print recipe
Mexican Chicken Pasta
Serves 6

Note: this recipe can be made more or less spicy based on the type of salsa used.  Adding jalapenos or substituting Mexican chorizo for chicken would also make it spicier. 

10-12 ounces rotisserie chicken, shredded
1 teaspoon garlic powder
1 teaspoon chili powder
2 teaspoons canola oil
½ onion, chopped
½ cup red or green bell pepper, chopped
3 ounce can mild chopped chiles, drained
1 (10 ounce) package frozen chopped spinach, thawed and squeezed dry
Non-stick cooking spray
2 cups salsa
16 ounces rigatoni or ziti pasta, cooked to al dente according to package directions
6 ounces shredded Mexican cheese blend
½ cup cherry tomatoes, quartered (optional)
1 avocado, peeled and chopped, tossed with a little lemon juice (optional)
Corn chips or baked tortilla chips (optional, but the crunch factor is very good)


Preheat oven to 350d.

In a medium bowl, combine the chicken, garlic powder and chili powder until the spices are evenly distributed.  Set aside.

In a medium skillet, heat the oil over medium heat.  Add the onion and bell pepper and cook for 4-5 minutes until tender, stirring occasionally.  Stir in the spinach and chopped chiles.

Coat two (2-quart) or one (4-quart) baking dishes with cooking spray.  Spread half of the salsa on the bottom, then top with half the pasta, half the chicken, and half of the vegetable mixture.  Pour half of the remaining salsa over the vegetables and top with half of the cheese.  Repeat layering with the remaining pasta, chicken, vegetables and salsa (not cheese).

Bake, covered, for 30 to 35 minutes until heated through.  Uncover and sprinkle with the remaining cheese and place under the broiler for a few minutes to melt and brown the cheese, watching closely.  Let stand for five minutes before serving.  If desired, garnish with cherry tomatoes, avocado, and/or corn chips.


 If you used two baking dishes, the second dish may be covered and frozen.  Thaw overnight and continue with baking directions.